How to Draw a Strong Arm
Learn how to draw a strong arm with this step-by-step guide. Improve your drawing skills and create realistic and impressive artwork with these instructions.
Materials You'll Need
- Pencil
- Paper
- Eraser
The human arm is a remarkable showcase of strength, versatility, and anatomical complexity. Learning how to draw a strong arm can be both a rewarding and essential skill for any artist, as arms often serve as focal points in figure drawing, character design, and action scenes. Understanding the muscles, proportions, and subtle curves that define a powerful arm helps you bring a sense of realism and dynamism to your artwork. Drawing strong arms is especially useful if you're interested in illustrating superheroes, athletes, or any characters who exude power and confidence.
Many artists are drawn to the challenge of capturing musculature and movement, and mastering how to draw a strong arm is a great way to improve your anatomical skills. Whether you're a beginner aiming to get the basics right or a more experienced artist looking to refine your shading and detail work, this tutorial will break down the process into manageable steps. You'll learn how to map out basic shapes, build up the muscles, and add definition to make your drawing truly stand out. Techniques such as gesture drawing, contouring, and layering shadows will be covered, so you can confidently render arms that look both lifelike and expressive.
Don't worry if you feel intimidated at first—drawing strong arms is a skill that improves with practice and patience. As you work through the steps in this guide, remember that each line you draw brings you closer to mastering this important aspect of figure drawing. So grab your favorite drawing tools, embrace the learning process, and enjoy discovering just how much you can achieve. Let's dive in and explore how to draw a strong arm together!
Materials Needed
Before we begin, gather the following materials:
- Drawing paper: Use a high-quality paper suitable for sketching and drawing.
- Pencils: Have a variety of pencils with different hardness levels, ranging from 2B (soft) to 6B (hard).
- Eraser: A kneaded eraser works best, as it allows for easy shaping and erasing.
- Sharpener: Keep your pencils sharp for precise lines and details.
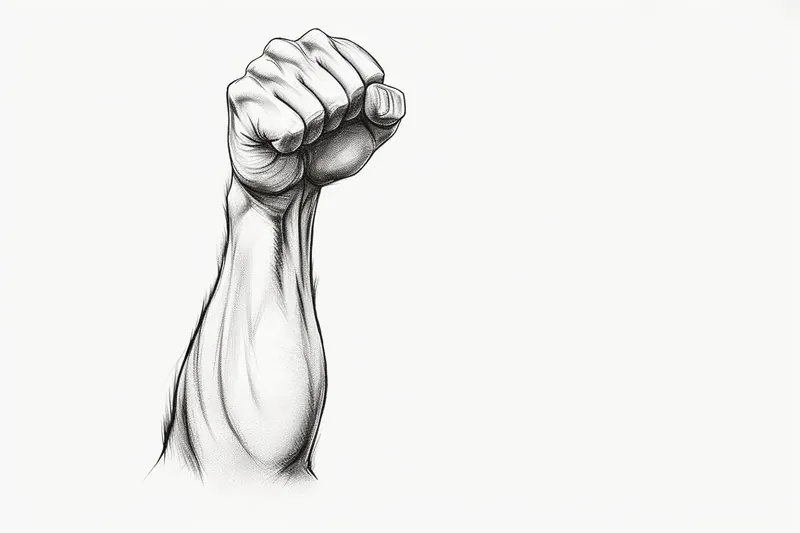
- **Reference Image:**Find a clear and detailed image of a strong arm to use as a reference. It's important to study and understand the anatomy and structure of a real arm.
Now that you have all the necessary materials, let's dive into the step-by-step process of drawing a strong arm.
Step 1: Basic Shapes and Proportions
Start by lightly sketching the basic shapes and proportions of the arm. Use simple geometric shapes like ovals and boxes to represent different parts of the arm, such as the upper arm, forearm, and hand. Focus on getting the overall proportions and angles correct at this stage.
Step 2: Adding Muscles and Definition
Next, begin adding the muscles and definition to the arm. Study your reference image and identify the major muscle groups, such as the biceps, triceps, and forearm muscles. Use curved and flowing lines to outline and define these muscles. Pay attention to their placement and how they interact with each other.
Step 3: Refining the Details
Now, it's time to refine the details of the arm. Start by adding smaller muscles and tendons, paying close attention to their shapes and placement. Use lighter lines to indicate the tendons and darker lines for the muscles. Remember to refer to your reference image frequently to ensure accuracy.
Step 4: Shading and Highlights
To create a sense of depth and realism, add shading and highlights to your drawing. Study how light falls on the arm and identify areas of shadow and light. Use a range of pencil grades to achieve different tones and values. Gradually build up the shading by layering and blending the strokes until you achieve the desired effect. Use an eraser to create highlights on areas where light hits the arm.
Step 5: Texturing and Final Touches
To add texture to the arm, carefully observe and replicate the skin's natural patterns and wrinkles. Use small, controlled strokes to create these textures. Add any additional details and refine any areas that need improvement. Take your time with this step, as it can make a significant difference in the overall appearance of your drawing.
Tip: When drawing a strong arm, start with the basic shapes to establish the overall structure; use cylinders for the upper arm and forearm, and ovals for the shoulder and elbow joints. Pay close attention to proportions—generally, the upper arm should be about 1.5 times the length of the forearm. Once your shapes are in place, lightly sketch the major muscle groups like the biceps and triceps, focusing on their bulges and how they taper towards the elbow. Use a reference photo of a muscular arm to understand the subtle variations in shading and highlights; this will help you define the contours and create a sense of volume. Lastly, don't hesitate to use blending tools, like a stump or your fingers, to smooth out shadows and give the arm a more realistic, sculpted appearance. Remember, practice makes progress, so keep experimenting with different poses and angles!
Conclusion
Drawing a strong arm requires careful observation and attention to detail. By following the step-by-step instructions outlined in this guide, along with using the right materials, you can create a realistic and powerful representation of an arm in your artwork. Remember to practice regularly and be patient with yourself as you improve your drawing skills. With dedication and practice, you'll be able to draw strong arms and other intricate subjects confidently.
So grab your pencils and start sketching! Before you know it, you'll be creating impressive drawings of strong arms that will captivate and inspire others.
Fun Facts About Strong Arm
- The human arm contains over 20 muscles, with the biceps brachii being one of the most prominent for strength and flexion.
- The triceps muscle, located at the back of the upper arm, is responsible for about 70% of the arm's muscle mass and is crucial for pushing movements.
- Arm strength is not just about muscle size; functional strength involves coordination, endurance, and flexibility.
- Professional arm wrestlers can generate forces exceeding hundreds of pounds with their strong arms during competition.
- The forearm contains muscles that control both wrist and finger movement, enabling powerful grips and fine motor skills.
- Strong arms are essential for many sports, including weightlifting, gymnastics, and swimming, where upper body power is key to performance.
- Resistance training, such as lifting weights, is proven to increase arm strength and muscle definition.
- Some people are born with a rare extra muscle in the arm called the palmaris longus, which can enhance grip strength.
- Artists often study anatomy to accurately depict strong arms in figure drawing and character design.
- Strong arms help prevent injuries by supporting the body during physical activity.
Suggestions for Scenes and Settings for Strong Arm Drawings
- A superhero mid-punch, with the strong arm extended and muscles flexed in dramatic action.
- An athlete lifting a heavy barbell, focusing on the tension and definition in the biceps and forearm.
- A rock climber gripping onto a cliff edge, highlighting the strain and veins in the arm.
- An arm-wrestling match, capturing the dynamic push and pull between two powerful arms.
- A medieval knight holding a sword or shield, emphasizing both the strength and armor details.
- A swimmer emerging from the water, with droplets accentuating the muscular definition of the arm.
- A construction worker lifting a heavy beam or hammer, showing the everyday strength in action.
- An archer drawing a bow, focusing on the taut forearm and flexed hand.
- A medical anatomy study pose, with the arm flexed to reveal clear muscle groups for educational practice.
- A basketball player going for a slam dunk, the arm fully extended and muscles engaged.