Are you fascinated by the epic tales of ancient Greece? Do you admire the strength and courage of the legendary Spartan warriors? If so, why not try your hand at drawing a Spartan? In this step-by-step tutorial, I will guide you through the process of how to draw a Spartan in a stunning and attention-grabbing way. So grab your pencils, and let’s get started!
Materials Required
Before we begin, let’s ensure you have all the necessary materials to create your Spartan drawing. Here’s a list of what you’ll need:
- Drawing paper or sketchbook
- Pencils (preferably a set of graphite pencils ranging from 2H to 6B)
- Eraser
- Pencil sharpener
- Ruler
- Reference image of a Spartan warrior (optional, but helpful)
Now that you have everything you need, let’s dive into the step-by-step process of drawing a Spartan.
Step 1: Sketch the Basic Proportions
Start by lightly sketching the basic proportions of your Spartan figure. Begin with a simple oval shape for the head, and then draw a vertical line down the center of the oval. This line will serve as the spine of your figure. Next, sketch a horizontal line across the center to mark the location of the eyes. Use your ruler to make these lines straight and accurate.
Step 2: Define the Body Shape
Extend the spine line downwards to create the body of your Spartan. Draw two curved lines on either side of the spine to form the chest and abdomen. From the bottom of the torso, sketch two more lines to create the legs. Remember, these lines are just a rough guide, so keep them light and flexible for now.
Step 3: Add the Limbs
Using the rough guidelines you drew in the previous step, start defining the limbs of your Spartan. Draw two slightly curved lines from the shoulder area to create the upper arms. Then, sketch the lower arms by drawing two more curved lines extending from the upper arms. Repeat this process for the legs, creating the upper and lower leg shapes.
Step 4: Refine the Body Shape
Now that you have the basic body shape and limbs in place, it’s time to refine the details. Begin by adding more definition to the chest and abdomen. Draw subtle curves to indicate muscle definition. Pay attention to the proportions and anatomy of the Spartan warrior as you refine the body shape.
Step 5: Define the Face and Helmet
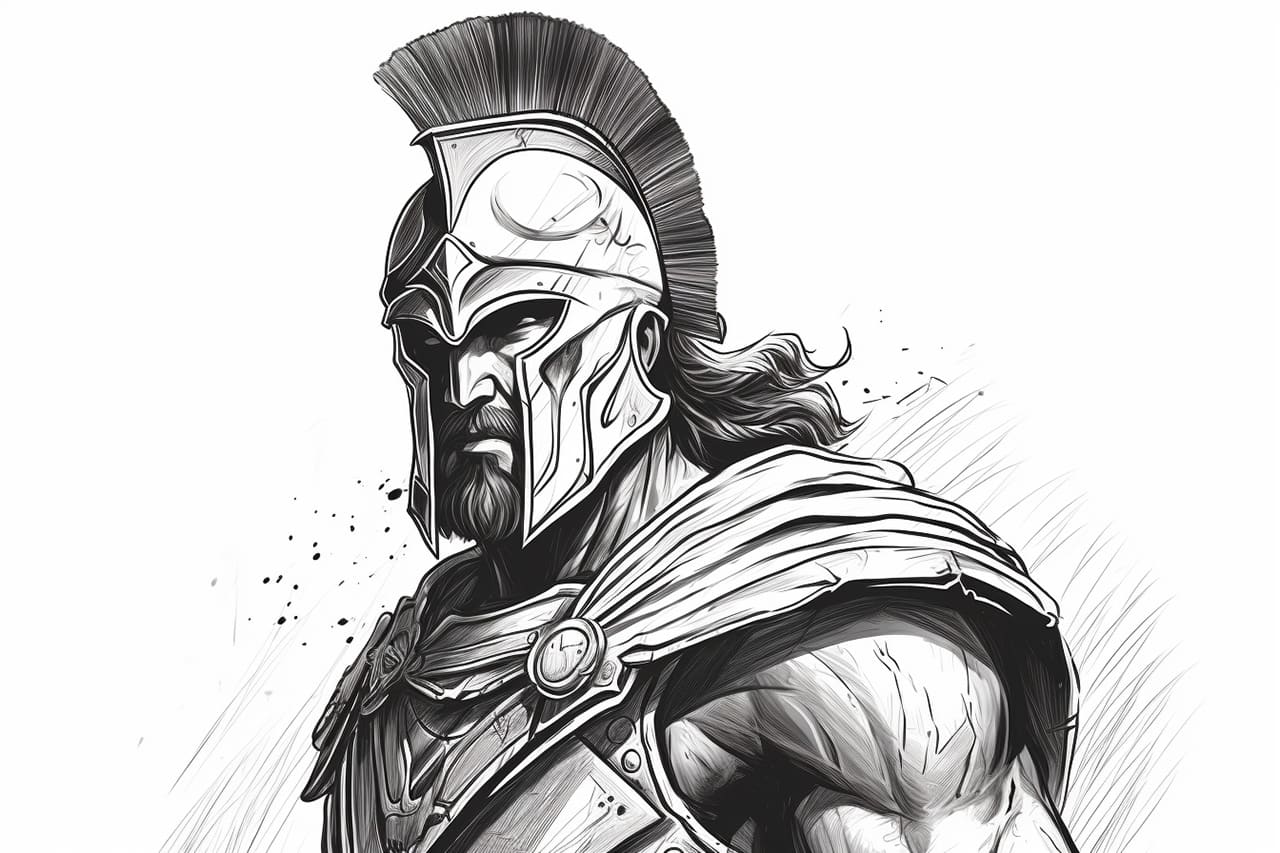
Moving on to the head, start by adding facial features to your Spartan warrior. Sketch two almond-shaped eyes along the horizontal line you drew earlier. Below the eyes, draw a straight line for the nose and a slightly curved line for the mouth. Next, add the iconic Spartan helmet by drawing a curved line above the eyes, connecting to the sides of the head. Use reference images to help you capture the unique details of the helmet.
Step 6: Add the Spear and Shield
No Spartan warrior is complete without their signature weapons – the spear and shield. Extend one arm of your Spartan and sketch the outline of the spear, keeping it parallel to the body. Then, draw a straight line extending from the hand to represent the shaft of the spear. For the shield, draw a circular shape overlapping with the arm and body of the Spartan.
Step 7: Refine the Details
Now that you have the basic elements of your Spartan drawing, it’s time to refine the details. Start by adding more definition to the facial features, adding eyebrows, and refining the shape of the eyes, nose, and mouth. Then, add intricate details to the helmet, such as the crest and any decorative elements it may have. Don’t forget to add muscle definition and refine the shape of the body, paying close attention to the proportions and anatomy.
Step 8: Shade and Add Depth
To bring your Spartan drawing to life, it’s time to add shading and depth. Start by determining the light source in your drawing. This will help you determine where the shadows will fall. Use your set of graphite pencils to create graduated shading, ranging from lighter tones to darker tones. Pay attention to the contours of the body and the folds of the clothing. By adding shading and highlights, you can create the illusion of depth and form.
Step 9: Final Touches
Take a step back and evaluate your drawing. Are there any areas that need some extra attention or refinement? Make any necessary adjustments or additions to ensure your Spartan drawing is the best it can be. Use your eraser to clean up any stray marks or smudges.
Conclusion
Congratulations! You have successfully drawn a Spartan warrior from ancient Greece. By following these step-by-step instructions, you were able to create a stunning drawing that captures the strength and valor of the legendary Spartans. Remember, practice makes perfect, so keep honing your drawing skills and exploring new subjects. Happy drawing!