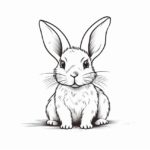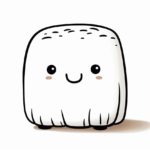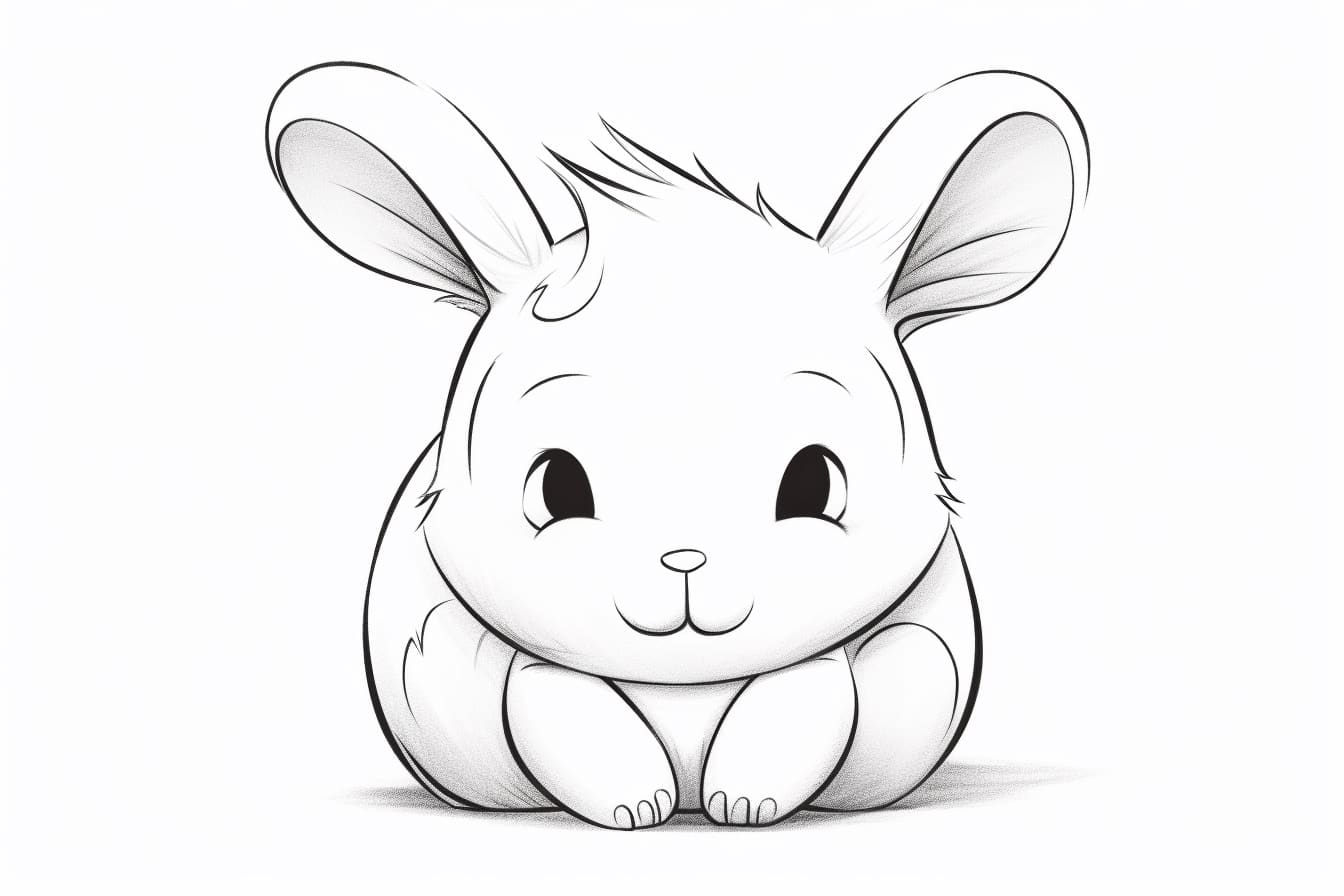
Welcome to this step-by-step drawing tutorial on how to draw a Squishmallow bunny. Squishmallows have taken the toy world by storm with their irresistibly soft and squishy bodies. Now, you can create your very own Squishmallow bunny masterpiece!
Drawing is a great way to express your creativity and improve your artistic skills. Whether you’re a beginner or an experienced artist, this tutorial will walk you through the process of drawing a cute and cuddly Squishmallow bunny. So grab your pencils and let’s get started!
Materials Required:
- Drawing paper
- Pencil
- Eraser
- Colored pencils or markers (optional)
Step 1: Sketch the Basic Shapes
Start by sketching the basic shapes that make up the Squishmallow bunny. Draw a large oval shape for the body and a smaller oval shape for the head. Connect the head and body using a curved line. These shapes will serve as the foundation for your drawing.
Step 2: Add the Facial Features
Next, let’s add some adorable facial features to our Squishmallow bunny. Draw two large circles for the eyes and add a smaller circle inside each eye to represent the pupils. Above the eyes, draw a slightly curved line for the eyebrows. Below the eyes, draw a small triangle for the nose. Finally, draw a curved line for the mouth and add a smile.
Step 3: Sketch the Ears
Now it’s time to add the bunny ears. Draw two long and curved bunny ears on top of the head. Make sure the ears are symmetrical and taper at the tips. You can add some fluffy texture to the inside of the ears by drawing small curves.
Step 4: Refine the Body
In this step, we’ll refine the body of our Squishmallow bunny. Add some curves on the sides of the body to make it look round and squishy. Draw two short lines on each side of the body to represent the arms. For the feet, draw two small ovals at the bottom of the body.
Step 5: Add Details
To add some extra cuteness to our Squishmallow bunny, let’s add some details. Draw two small circles inside the eyes to highlight the pupils. Add two small ovals on the face for the cheeks. You can also draw some lines on the body to represent the bunny’s fur.
Step 6: Finalize the Outline
Now that we have all the basic elements in place, it’s time to finalize the outline of our Squishmallow bunny. Go over your sketch with a darker pencil or pen, emphasizing the main lines and erasing any unnecessary guidelines. This will make your drawing look more polished and defined.
Step 7: Color Your Squishmallow Bunny
In this step, you can have some fun and add color to your drawing. Squishmallows come in a variety of colors, so feel free to get creative with your color choices. Use colored pencils or markers to bring your Squishmallow bunny to life. You can add some shading and highlights to make your drawing look more three-dimensional.
Step 8: Add Final Touches
To add the finishing touches to your Squishmallow bunny, take a step back and evaluate your drawing. Are there any areas that need more detail or refinement? Make any necessary adjustments to make your drawing look the way you want it to. Don’t be afraid to experiment and make it your own!
Conclusion
Congratulations, you have successfully learned how to draw a Squishmallow bunny! By following these step-by-step instructions, you were able to create your very own adorable and squishy bunny drawing. Drawing is a wonderful skill to develop, and with practice, you will continue to improve and create even more impressive artworks.
Remember to have fun and enjoy the process of drawing. Don’t worry if your drawing doesn’t turn out exactly as planned – every artist has their own unique style. Keep practicing and exploring different techniques, and soon you’ll be able to draw Squishmallows with ease.
So grab your pencils and start drawing your own Squishmallow bunny today. Happy drawing!