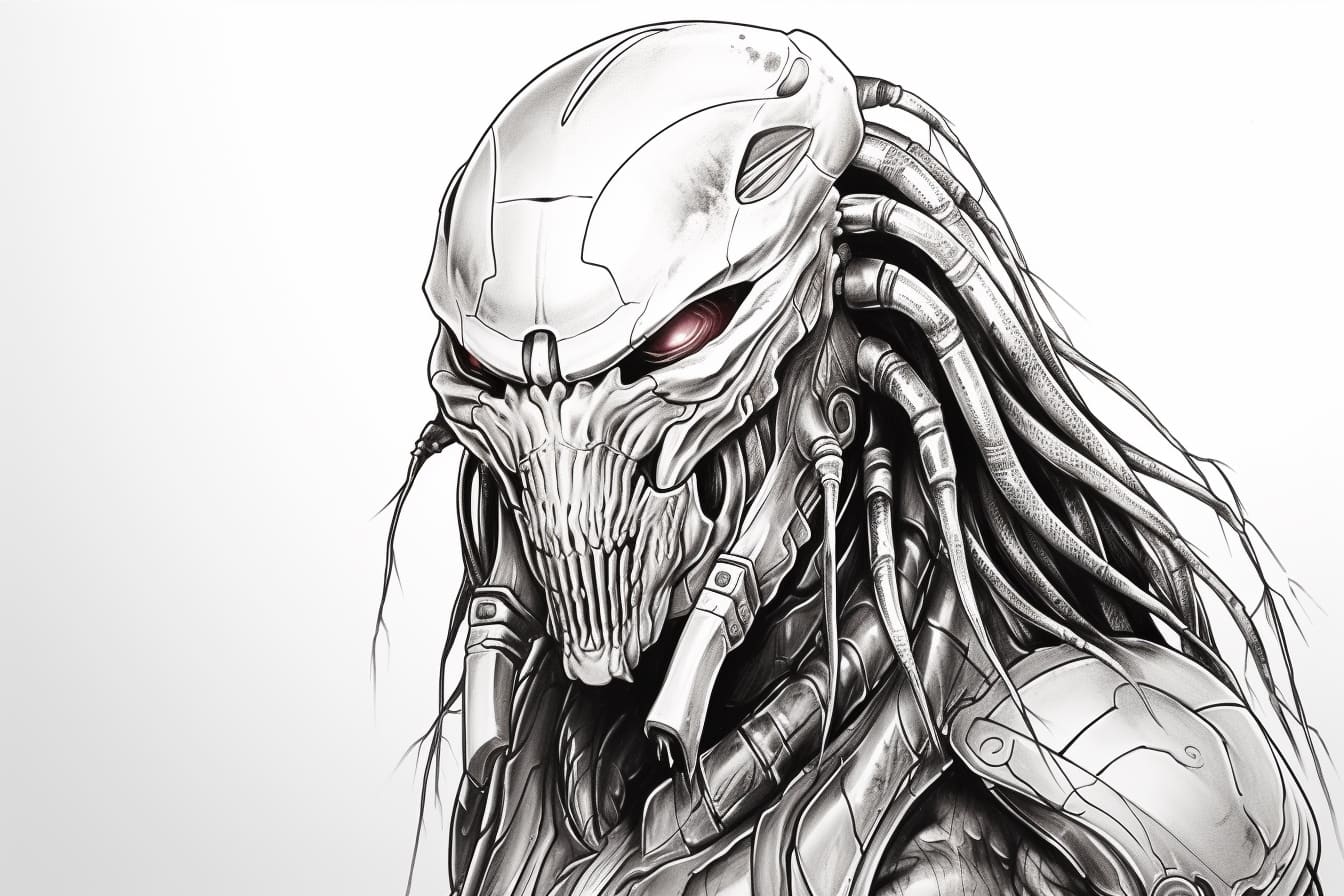
Welcome to this step-by-step guide on how to draw a predator. In this tutorial, we will explore the process of creating a realistic and dynamic predator drawing. Whether you are an aspiring artist or simply looking to enhance your drawing skills, this guide will provide you with the techniques and tips needed to bring your predator to life on paper. So, grab your materials and let’s get started!
Materials Required
Before diving into the drawing process, it is important to gather the necessary materials. Here is a list of what you will need:
- Drawing paper or sketchbook
- Pencils of varying hardness (H, HB, and B)
- Eraser
- Fine-tip black marker or pen
- Blending tools (such as blending stumps or cotton swabs)
- Reference image of a predator (can be a photograph or a printout)
Make sure you have all your materials ready before starting the drawing process. This will help ensure a smooth and uninterrupted workflow.
Step 1: Study Your Reference Image
Begin by carefully studying your reference image. Observe the various features, proportions, and details of the predator you are going to draw. Pay close attention to the shape of the head, the placement and size of the eyes, the position of the ears, and any unique characteristics that define the predator’s appearance. Familiarizing yourself with the subject matter will make the drawing process much easier.
Step 2: Start with Basic Shapes
Using a light pencil, start sketching the basic shapes that form the foundation of your predator drawing. Begin with a rough outline of the head, focusing on capturing its overall shape and proportions. You can use simple geometrical shapes like circles and ovals to help guide your initial sketch.
Step 3: Add Facial Features
Once you are satisfied with the basic head shape, start adding the facial features of the predator. Pay careful attention to the placement of the eyes, the shape of the nose, and the position and size of the mouth. Take your time to ensure that these features are accurate and in proportion to the rest of the head.
Step 4: Refine the Outline
With the basic structure and facial features in place, it’s time to refine the outline of your predator drawing. Use a darker pencil or a fine-tip black marker to trace over the most prominent lines of your sketch. This will help give your drawing a more defined and polished appearance.
Step 5: Add Details and Textures
Now that you have a solid foundation, it’s time to add the details and textures that will bring your predator to life. Observe your reference image closely and carefully replicate the intricate details such as the fur, scales, or feathers. Utilize different pencil pressures and shading techniques to create depth and realism.
Step 6: Work on the Eyes and Facial Expressions
The eyes of your predator drawing are crucial in capturing its character and personality. Spend some time refining the eyes, adding depth and expression. Experiment with the shape and shading to achieve the desired effect. Remember to always refer back to your reference image to ensure accuracy.
Step 7: Shade and Add Depth
To give your predator drawing a three-dimensional appearance, focus on shading and adding depth. Use your pencils of varying hardness to create different tonal values. Pay attention to the direction of light in your reference image and use it as a guide for shading. Build up layers of shading gradually, working from light to dark.
Step 8: Finalize the Drawing
Once you are satisfied with the overall appearance of your predator drawing, take a step back and evaluate it as a whole. Make any necessary adjustments or additions to enhance its visual impact. Erase any stray lines or smudges, and clean up the drawing to ensure a polished and professional finish.
Conclusion
Congratulations! You have successfully completed your predator drawing. By following these step-by-step instructions and using your reference image as a guide, you have created a realistic and dynamic predator on paper. Remember, practice makes perfect, so don’t hesitate to continue exploring and refining your drawing skills. Keep experimenting with different materials and techniques to further develop your artistic style. Happy drawing!