Welcome to this step-by-step guide on how to draw a calla lily. Whether you are a beginner or a seasoned artist, this tutorial will provide clear instructions and helpful tips to help you create a beautiful and realistic representation of this elegant flower. So, let’s grab our materials and get started!
Materials:
- Drawing paper
- Pencil (HB or 2B)
- Eraser
- Fine-tip black pen or waterproof fine-tip marker
- Colored pencils or markers (optional)
Step 1: Sketch the Basic Shape
Start by lightly sketching an elongated oval shape for the main body of the calla lily. This shape will serve as a guideline for the flower’s overall form.
Step 2: Draw the Flower’s Petals
Add a long, curved line extending from the top-left side of the oval to create the first petal. Repeat this step on the right side of the oval to create the second petal. These petals should have a slight curve and taper towards the bottom.
Step 3: Add Detail to the Petals
To give the petals a more realistic appearance, add some gentle curves and folds to their surfaces. You can achieve this by sketching soft lines along the length of each petal.
Step 4: Draw the Spadix
Inside the oval shape, draw a long, curved line right down the center. This line represents the spadix, which is the tall, central part of the calla lily.
Step 5: Add the Pointed Tip to the Spadix
At the top of the spadix, draw a small, pointed shape to indicate the tip of the flower.
Step 6: Sketch the Stem
Extend a vertical line downwards from the bottom of the oval shape to create the stem of the calla lily. Add some gentle curves to make it look more natural.
Step 7: Detail the Stem
To add more depth to the stem, draw a series of vertical lines along its length. These lines will represent the texture and ridges of the stem.
Step 8: Refine and Darken Your Sketch
Take a moment to refine your initial sketch, erasing any unnecessary lines and darkening the final outlines of your calla lily. This will help define the flower’s shape and make it stand out more.
Step 9: Apply Ink to Your Drawing
Using a fine-tip black pen or a waterproof fine-tip marker, carefully trace over your pencil lines. Be confident and deliberate with your strokes, aiming for smooth and consistent lines throughout the drawing.
Step 10: Erase any Remaining Pencil Marks
Once the ink has dried, gently erase any remaining pencil marks on your drawing. Take care not to smudge the ink while doing so.
Step 11: Add Shadows and Highlights
To create a sense of depth and dimension, add shadows and highlights to your calla lily drawing. Identify the main light source and imagine where the shadows would naturally fall on the flower. Use your pencil or colored pencils/markers to shade in those areas accordingly.
Step 12: Color Your Drawing (Optional)
If you’d like to add color to your calla lily drawing, use colored pencils or markers to carefully apply hues that resemble the flower’s natural coloration. Shades of white, cream, yellow, and green are commonly seen in calla lilies, but feel free to experiment with different color combinations.
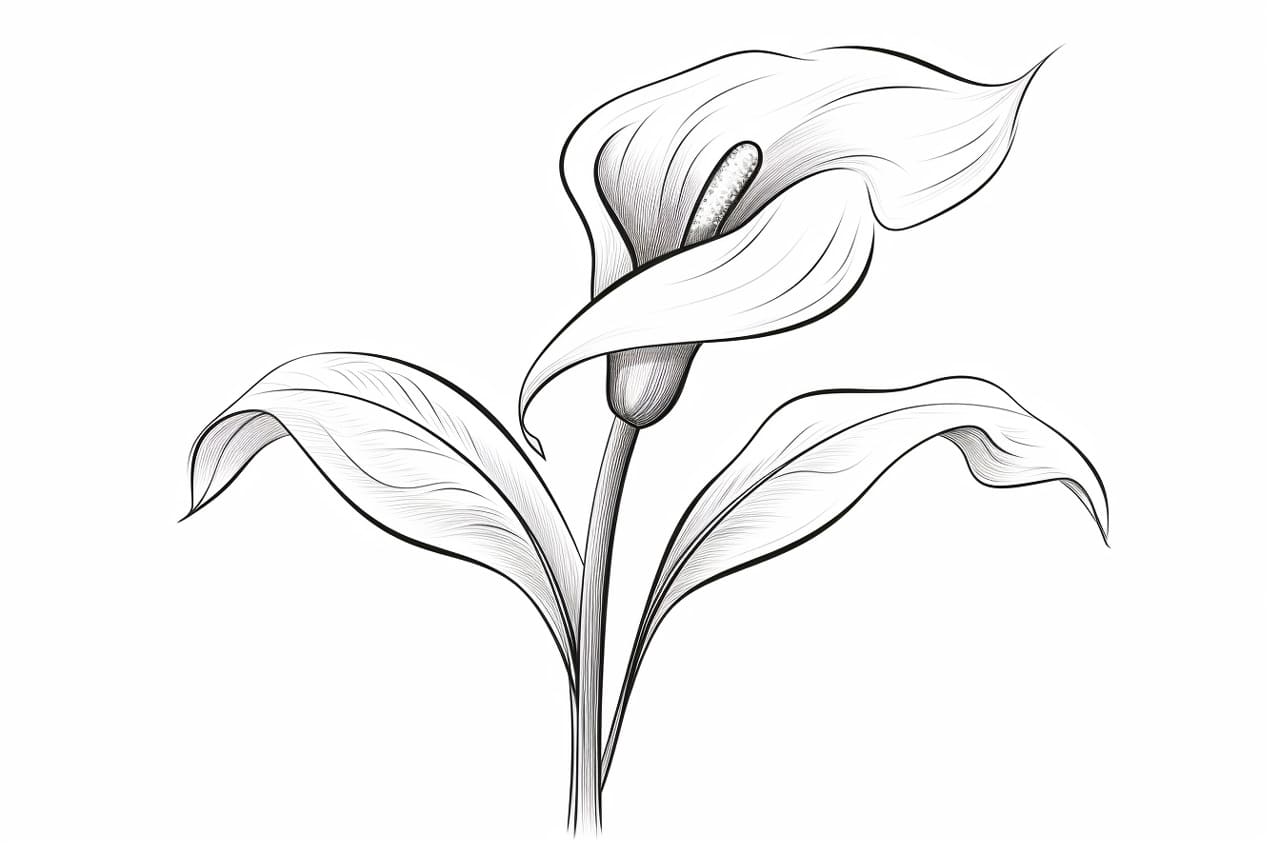
Conclusion
Congratulations! You have successfully learned how to draw a beautiful calla lily. By following these step-by-step instructions, you now have the skills to create your own stunning floral artwork. Remember to practice regularly, experiment with different techniques, and most importantly, enjoy the process of creating art. Happy drawing!