How to Draw a Seed
Learn how to draw a seed in this step-by-step tutorial. Follow these clear and concise instructions to create a realistic and detailed illustration of a seed.
Materials You'll Need
- Pencil
- Paper
- Eraser
Seeds are one of nature's most fascinating creations—small yet powerful, they contain the beginnings of life and the promise of new growth. From the smooth, shiny surface of a sunflower seed to the textured shell of an acorn, seeds come in an incredible variety of shapes and sizes. Learning how to draw a seed allows you to explore the subtle details that make each type unique, while also giving you insight into the natural world. This subject is perfect for artists interested in botanical illustration, students working on science projects, or anyone who enjoys capturing the beauty of everyday objects.
Understanding how to draw a seed can be both a fun and rewarding challenge, no matter your skill level. This tutorial is designed to guide you step by step, from sketching the basic outline to adding shading and texture for a realistic effect. Drawing seeds is a great way to practice observation skills, attention to detail, and basic techniques like contour drawing, hatching, and blending. Whether you're just starting with pencil and paper or looking to experiment with color and mixed media, you'll find that drawing a seed is an accessible project that can help build your artistic confidence.
So, gather your favorite art supplies and get ready to create your own botanical masterpiece! Remember, every artist develops their own style, so don't be afraid to experiment and have fun as you learn. With patience and practice, you'll be amazed at how something as simple as a seed can become a stunning work of art. Let's begin this creative journey together!
Materials Required
Before we dive into the drawing process, let's gather the materials you'll need:
- Pencil
- Eraser
- Drawing paper
- Fine-tipped pens or markers (optional)
- Colored pencils or paints (optional)
Now that you have your materials ready, let's begin the artistic journey of drawing a seed!
Step 1: Outline the Shape
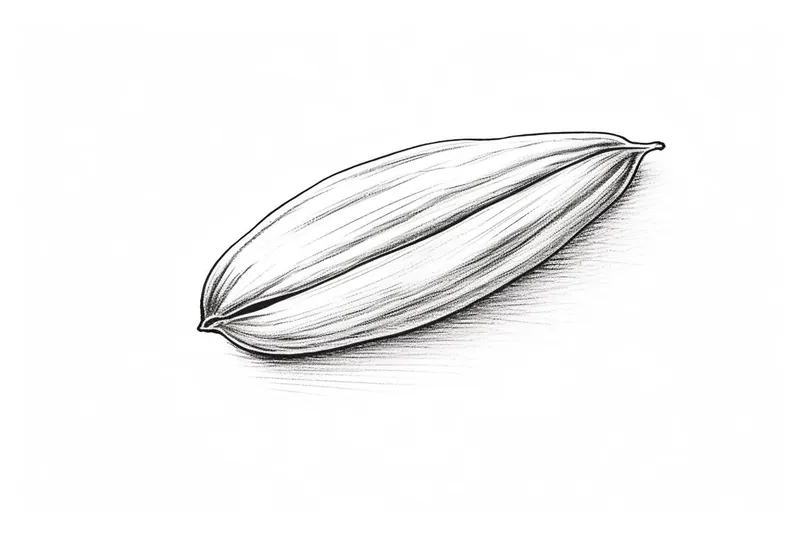
Start by lightly sketching a small oval shape in the center of your drawing paper. This oval will serve as the basic outline of the seed. Keep the lines faint and loose for now, as we will refine the shape later on.
Step 2: Add Details
Next, observe the seed you wish to draw and add any details that stand out. Some seeds have ridges, grooves, or unique patterns. Use your pencil to lightly sketch these elements onto the seed's outline. Remember to keep your lines light and loose throughout this process, as we will refine them later.
Step 3: Refine the Shape
Now that you have sketched the basic outline and added some details, it's time to refine the shape of the seed. Carefully go over your initial sketch, adjusting any proportions or curves as necessary. Gradually darken the lines to make them more defined. Pay attention to the overall shape and ensure that it accurately represents the seed you are drawing.
Step 4: Shade the Seed
To give your drawing a three-dimensional appearance, it's important to add shading. Observe the lighting conditions and imagine where the light is coming from. Begin by shading one side of the seed, using your pencil to create smooth and gradual transitions from light to dark. Remember to keep your strokes in the direction of the seed's form. This shading technique will help create a sense of depth in your drawing.
Step 5: Add Texture
Seeds often have textured surfaces, which add interest and realism to your drawing. Study the seed you are drawing and observe its texture. Use your pencil to lightly sketch these textures onto your seed, paying attention to the direction and placement of the lines. It's best to start with lighter lines and gradually build up the intensity as needed.
Step 6: Refine the Details
With the basic shape, shading, and texture in place, it's time to refine the details of your seed drawing. Take a closer look at the seed and add any additional lines or marks that bring out its unique characteristics. These details can include tiny imperfections or irregularities found on the surface of the seed. Be patient and take your time during this step, as it will greatly contribute to the realism of your drawing.
Tip: As you embark on your seed drawing journey, consider taking reference photos of the seeds from multiple angles; this will enhance your understanding of their shapes and textures, allowing for more accurate details in your artwork. Observing how light interacts with the seed can also help you better execute shading, creating a more lifelike representation.
Step 7: Ink the Lines (Optional)
If you want to give your seed drawing a more polished and finished look, you can use fine-tipped pens or markers to ink over the pencil lines. This will create bold and defined lines that stand out. Start by outlining the seed's shape, and then gradually work your way through the details. Once the ink is dry, erase any remaining pencil lines to reveal a clean and professional-looking drawing.
Step 8: Add Color (Optional)
To bring your seed drawing to life, you can add color using colored pencils or paints. Study the colors of the seed you are drawing, and try to replicate them as accurately as possible. Use light and subtle layers of color, gradually building up the intensity until you achieve the desired effect. Remember to blend the colors smoothly for a realistic appearance.
Conclusion
Congratulations on completing your seed drawing! By following these step-by-step instructions, you have learned how to create a detailed and realistic representation of a seed. Whether you choose to keep it as a black and white illustration or add color, your drawing reflects your artistic skills and attention to detail. Keep practicing and exploring new subjects, and you'll continue to improve your drawing abilities. Happy sketching!
Fun Facts About Seeds
- Seeds can remain dormant for hundreds or even thousands of years before germinating, as seen with a 2,000-year-old date palm seed that sprouted in Israel.
- The smallest seeds in the world belong to certain orchids, with each seed weighing less than a millionth of a gram.
- Some seeds, like those of the coconut, can float across oceans and still germinate when they reach land.
- Seeds are a major food source for humans, including grains like wheat, rice, and corn, which make up a large portion of the global diet.
- Some plants, such as fire poppies, require exposure to fire or intense heat for their seeds to germinate.
- The largest seed in the world is the coco de mer, which can weigh up to 18 kilograms (about 40 pounds).
- Many seeds have evolved hooks, barbs, or sticky coatings to hitch rides on animals for dispersal.
Suggestions for Scenes and Settings for Seed Drawings
- A close-up of a sprouting seed breaking through the soil, with roots and the first tiny shoot visible.
- [A collection of various seeds (sunflower, acorn](https://yonderoo.com/how-to-draw-an-acorn/), maple, bean, etc.) arranged on a textured wooden table as a botanical study.
- An imaginative cross-section showing the inside of a seed, revealing the embryo and stored nutrients.
- A whimsical scene of a seed floating on water, inspired by how some seeds travel great distances to find new homes.
- A seed nestled among fallen autumn leaves, highlighting the contrast in textures and colors.
- [An animal's perspective: a squirrel or bird](https://yonderoo.com/how-to-draw-a-bird/) examining or carrying a seed in its natural habitat.
- A time-lapse sequence: several sketches showing the same seed evolving from dormant to sprouting stages.
- A fantastical interpretation where seeds are depicted as tiny treasure chests or magical objects.
- A macro view focusing on the intricate patterns, ridges, or hairs covering the surface of a specific seed variety.
- A seed pod bursting open, releasing multiple seeds into the air or onto the ground below.