Welcome to this step-by-step guide on how to draw a railroad! Whether you’re an experienced artist or just starting out, this tutorial will help you create a captivating and detailed drawing of a railroad. By following these instructions, you’ll be able to capture the essence of a railroad and bring it to life on paper. So let’s get started!
Materials Required
Before we begin, let’s gather the materials you’ll need for this drawing:
- Pencil: Choose a graphite pencil with a medium hardness (HB or 2B) for sketching and shading.
- Eraser: Have a good quality eraser handy to correct mistakes and tidy up your drawing.
- Paper: Select a smooth and heavyweight paper that can handle pencil work without smudging or tearing.
- Ruler: A straight edge ruler or a T-square will help you draw straight lines for the tracks and other elements.
- Reference Image: Find a clear and detailed reference image of a railroad to guide your drawing. You can search for one online or use a photograph you have taken.
Now that you have all the necessary materials, let’s dive into the steps for drawing a railroad!
Step 1: Plan Your Composition
Begin by studying your reference image and planning the composition of your drawing. Consider the perspective, focal points, and any additional elements you’d like to include, such as a train or landscape features. Sketch a rough outline of these elements lightly with your pencil, ensuring that the proportions and placement are accurate.
Step 2: Draw the Horizon Line
Next, draw a straight horizontal line across your paper to represent the horizon. This line will act as a reference point for the perspective of the railroad. Use your ruler or T-square to ensure the line is straight and level.
Step 3: Sketch the Tracks
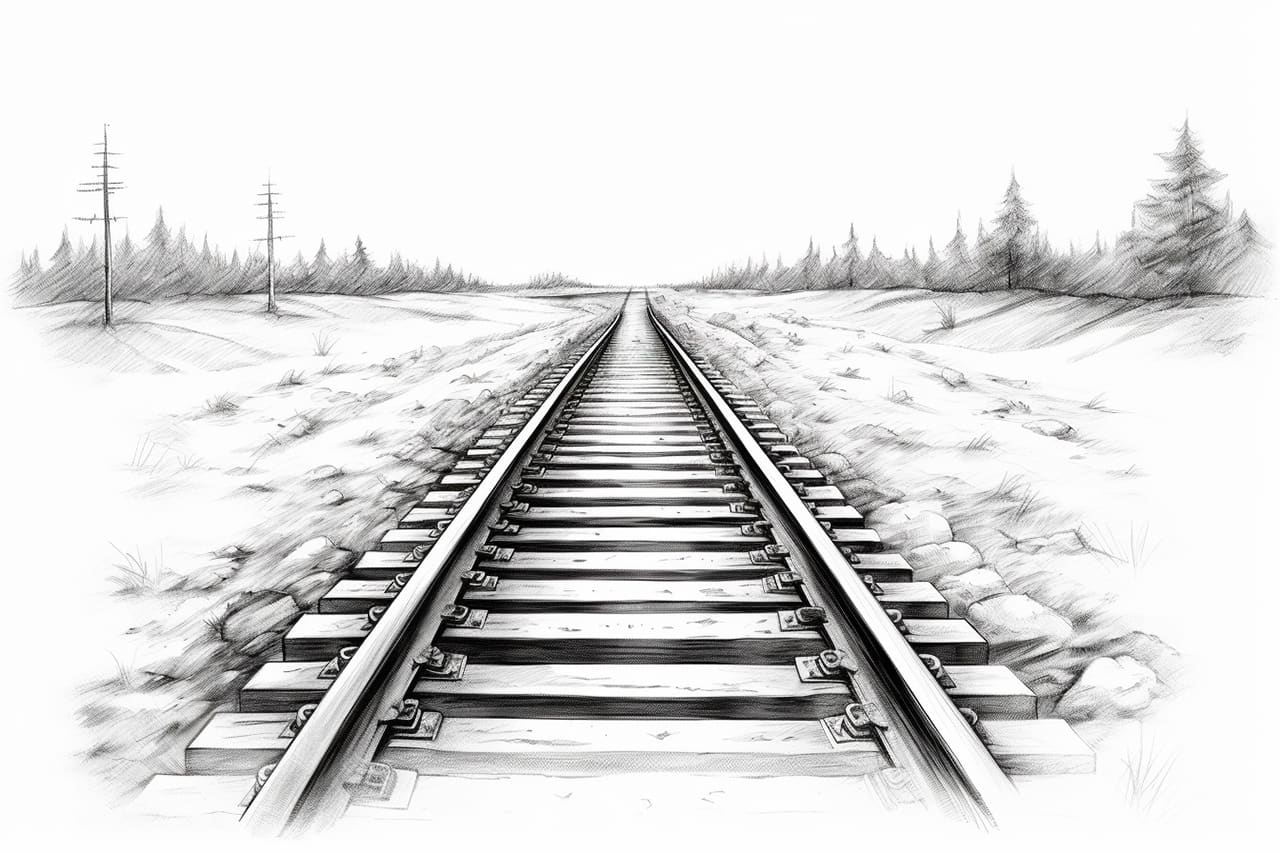
Using your reference image as a guide, lightly sketch the railroad tracks. Start by drawing two parallel lines that taper into the distance, disappearing into a vanishing point on the horizon. Use your ruler to keep the lines straight and evenly spaced. Remember that the lines should appear closer together as they recede into the distance.
Step 4: Add Cross Ties and Rail Connectors
Draw small rectangles perpendicular to the tracks to represent the cross ties. These ties support the rails and help maintain their stability. Add details such as rail connectors at regular intervals along the tracks. These connectors join the sections of rail together.
Step 5: Develop the Surroundings
To create a realistic railroad, it’s essential to add the surroundings. Begin by sketching the landscape or environment around the tracks. This could include fields, trees, buildings, or other structures. Pay attention to the perspective and scale to ensure a convincing composition.
Step 6: Shade the Tracks and Cross Ties
Now that the basic structure of the railroad is in place, it’s time to add depth and dimension through shading. Use your pencil to gently shade the tracks and cross ties, starting with light strokes and gradually building up the darkness. Pay attention to the direction of light in your reference image and create subtle variations in shading to create a realistic effect.
Step 7: Add Details to the Railroad
To make your railroad drawing more intricate and authentic, focus on adding details. Sketch additional elements such as railroad switches, signals, and electrical poles. These details will enhance the overall realism and interest of your drawing.
Step 8: Refine the Surroundings
Spend some time refining and adding details to the surrounding landscape. Use various shading techniques to create texture and depth in trees, grass, or other elements. Pay attention to light and shadow to make your drawing more lifelike.
Step 9: Finalize the Drawing
Take a step back and evaluate your drawing as a whole. Make any necessary adjustments or corrections to ensure a balanced and visually appealing result. Once you’re satisfied with your work, carefully erase any remaining pencil lines or smudges.
Conclusion
Congratulations! You’ve completed your drawing of a railroad following these step-by-step instructions. By paying attention to perspective, shading, and detail, you’ve successfully captured the essence of a railroad on paper. Remember, practice is key to improving your artistic skills, so keep exploring and experimenting with different subjects. Now, go grab your drawing supplies and embark on your next artistic adventure!