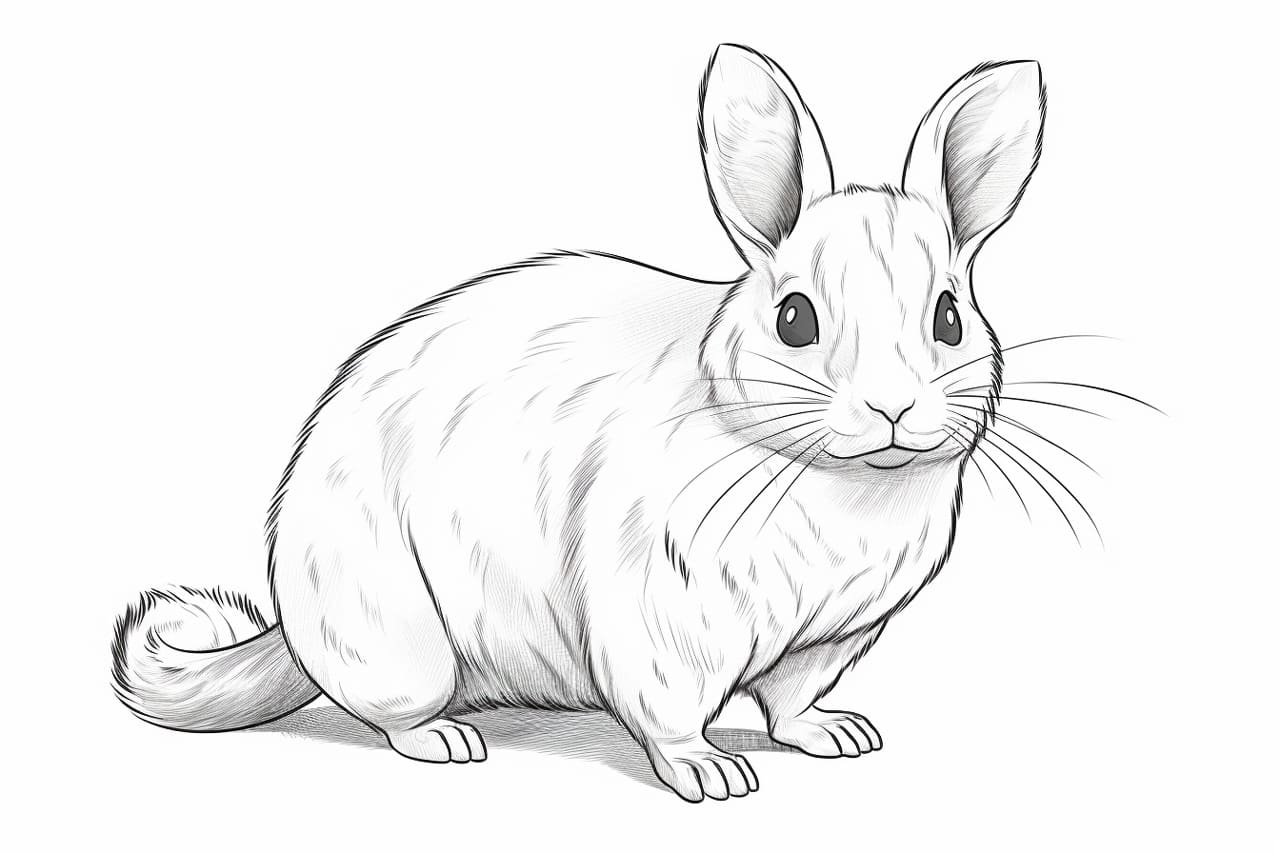
Welcome to this step-by-step drawing tutorial on how to draw a chinchilla! Whether you’re a beginner or an experienced artist, this guide will help you create a realistic and adorable depiction of this charming creature. So grab your drawing materials and let’s get started!
Materials Required:
Here are the materials you will need to draw a chinchilla:
- Pencil: Start with a light pencil for sketching and initial outlines, such as an HB or 2B.
- Eraser: Have a good quality eraser handy to remove any mistakes or unwanted lines.
- Paper: Use a clean sheet of drawing paper, preferably smooth and of medium thickness.
- Colored Pencils or Markers (optional): If you want to add color to your chinchilla drawing, have some colored pencils or markers ready.
Now that you have your materials ready, let’s begin!
Step 1: Outline the Basic Shape
Start by lightly sketching a circle near the center of your paper. This will be the chinchilla’s head. Then draw a slightly elongated oval shape beneath the circle for the body. Connect the head and body with a curved line to create the neck. Remember to keep these initial lines light, as they will be erased later.
Step 2: Add Facial Features and Ears
Within the circle you drew in the previous step, sketch two large oval shapes for the chinchilla’s eyes. Leave some space between the eyes for the nose. Just below the eyes, draw a small triangular shape for the nose. Add a curved line for the mouth, slightly below the nose. On either side of the head, draw two small, rounded triangles for the ears. Make sure the ears are slightly angled backward.
Step 3: Refine the Face and Add Details
Using the initial guidelines, refine the shape of the chinchilla’s head and face. Smooth out any rough lines and add more definition to the ears. Add a small curved line within each ear to represent the inner ear detail. Then, darken the eyes, leaving a small white highlight to bring them to life. Add a tiny dot within each eye for the pupils, ensuring they are slightly off-center. Add a few short lines above the nose for the whiskers.
Step 4: Sketch the Body and Tail
Refine the body shape by adding more curves and contours to create a fuller appearance. Chinchillas have a plump body, so make sure to indicate this in your drawing. Next, draw the tail extending out from the body, using curved lines. Chinchilla tails are bushy and fluffy, so give it a slightly tapered and rounded shape.
Step 5: Outline the Legs and Feet
Draw four small rectangular shapes for the legs, two on each side of the body. Chinchillas have short and chunky legs, so ensure that the rectangles are wider than they are tall. Attach small ovals or circles to the bottom of each rectangle to represent the feet. Add a curved line to divide each foot into two toes.
Step 6: Add Fur Texture and Details
Now it’s time to add the fluffy texture to your chinchilla drawing. Start by drawing small, curved strokes radiating out from the focal points, such as the head, ears, and body. These short lines will create the appearance of soft fur. Continue adding texture to the entire body, tail, and the backside of the ears. Make sure to vary the direction and length of the strokes to make the fur look more realistic.
Step 7: Erase Guidelines and Refine Your Drawing
Carefully erase the initial guidelines and any unwanted lines from your drawing. Use a kneaded eraser or a precision eraser to remove any stray marks or mistakes. Take your time during this step to ensure that your chinchilla drawing looks clean and polished.
Step 8: Add Color (optional)
If you wish to add color to your chinchilla drawing, now is the time to do so! Chinchillas have soft gray fur, so use various shades of gray for the body, head, and tail. You can also add a touch of white to create highlights and depth. Experiment with different colored pencils or markers to achieve the desired effect. Don’t forget to add a bit of pink for the nose and inner ears!
Conclusion
Congratulations on completing your chinchilla drawing! By following this step-by-step guide, you have learned how to draw a realistic chinchilla with all its adorable features and fluffy fur. Remember to practice regularly to refine your drawing skills further. So pick up your pencil, let your creativity flow, and enjoy the process of bringing chinchillas to life on paper!