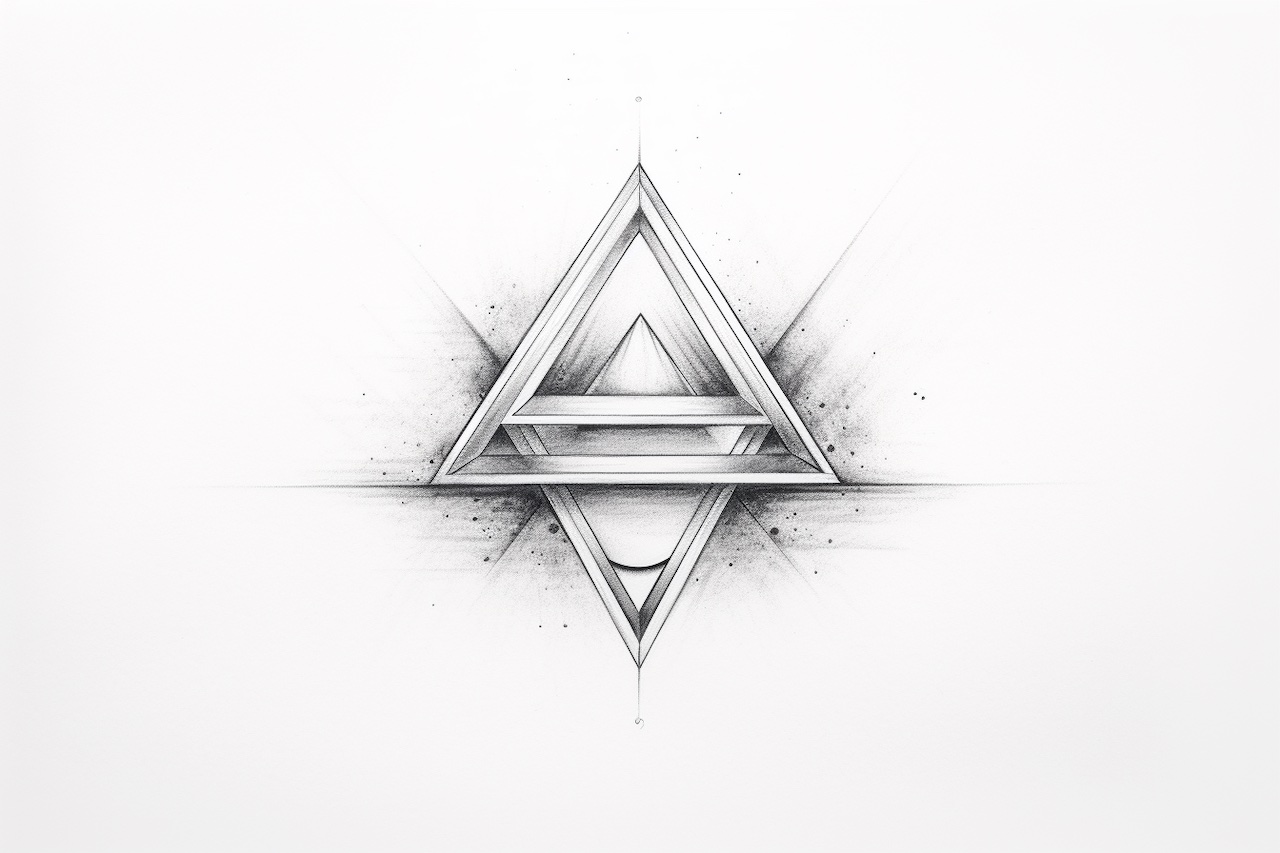
Welcome to this step-by-step guide on how to draw a prism. Whether you’re an aspiring artist or simply looking to improve your drawing skills, drawing a prism is a great exercise to challenge yourself and explore geometric forms. Prisms are three-dimensional shapes with two parallel and congruent polygonal bases connected by rectangular faces. They can come in various forms, such as rectangular, triangular, or hexagonal. In this tutorial, we will focus on drawing a rectangular prism, which is a commonly found shape.
Materials Required
Before we begin, gather the following materials:
- Paper: Choose a smooth and sturdy drawing paper that is suitable for sketching and shading.
- Pencil: Opt for a medium-soft graphite pencil (HB or 2B) that allows you to create both light and dark lines.
- Eraser: Have a kneaded eraser or a soft vinyl eraser handy to remove any unwanted lines or mistakes.
- Ruler: Use a straight ruler to draw straight lines and create accurate measurements.
- Optional: Colored pencils or markers if you wish to add color to your drawing.
Now that you have your materials ready, let’s dive into our step-by-step guide on drawing a prism.
Step 1: Sketch the Base
To start, draw a rectangle on your paper using a light pencil stroke. This rectangle will represent the base of your prism. Use a ruler to ensure the lines are straight and the corners are right angles. Remember, a prism’s base can be any polygon, but for this tutorial, we will focus on a rectangular prism. The size and proportions of your base will determine the overall size of your prism.
Step 2: Determine the Prism’s Height
Decide on the height of your prism and mark it above one of the long sides of the base. Keep in mind that the height should be perpendicular to the base and equal on both sides. Use your ruler to draw a vertical line from the marked point upwards, ensuring it is parallel to the opposite side of the base.
Step 3: Connect the Points
Now, connect the corresponding points on the base and the top of your vertical line to form the sides of the prism. These lines should be parallel to the base and of equal length. Use your ruler to maintain precision and ensure the lines are straight. The sides of the prism should be perpendicular to both the base and the height.
Step 4: Add the Second Base
Draw a rectangle parallel to the base, connecting the ends of the lines you just drew. This rectangle represents the second base of your prism. Ensure that it has the same proportions and is congruent to the original base. The two bases should lie in parallel planes.
Step 5: Complete the Faces
To finish drawing the prism, connect the corresponding corners of the second base with the top points of the sides you drew in Step 3. These lines will complete the rectangular faces of the prism. Make sure they are straight and parallel to the corresponding sides below.
Step 6: Refine and Erase
Now that you have your basic prism shape, take a moment to refine your drawing. Use your ruler to straighten any wobbly lines and adjust any proportions that may seem off. Pay attention to the angles and make sure they form right angles where necessary. Once you are satisfied, gently erase any construction lines and unnecessary marks using your eraser.
Step 7: Shade and Add Details (Optional)
If you wish to add depth and dimension to your drawing, you can proceed to shade the prism. Observe the direction of the light source and darken the areas where the light is blocked, creating shadows. Use hatching or cross-hatching techniques with your pencil to add texture and create a realistic appearance.
Feel free to experiment and customize your prism drawing. You can use colored pencils or markers to add color to your artwork or explore different prism shapes by varying the number of sides on the base. With practice, you will become more comfortable with drawing prisms and other geometric forms.
Conclusion
Drawing a prism is an enjoyable way to enhance your artistic skills and explore geometric shapes. By following these step-by-step instructions, you can create a realistic representation of a rectangular prism. Remember to use a ruler for precision, pay attention to proportions and angles, and refine your drawing before adding details. With practice, you will not only improve your drawing abilities but also develop an eye for spatial relationships and three-dimensional objects.
So, grab your paper, pencil, and ruler, and let’s begin creating prisms! Happy drawing!