Welcome to this step-by-step tutorial on how to draw a poison dart frog! In this guide, I will walk you through the process of creating a realistic and vibrant representation of this fascinating creature. So grab your art supplies and let’s get started!
Materials Required
Before we begin, make sure you have the following materials:
- Drawing paper
- Pencil
- Eraser
- Fine-tipped markers or colored pencils
- Reference photo of a poison dart frog (optional but recommended)
Having these materials handy will ensure that you have everything you need to create a beautiful drawing of a poison dart frog. Now, let’s dive into the steps!
Step 1: Basic Shapes
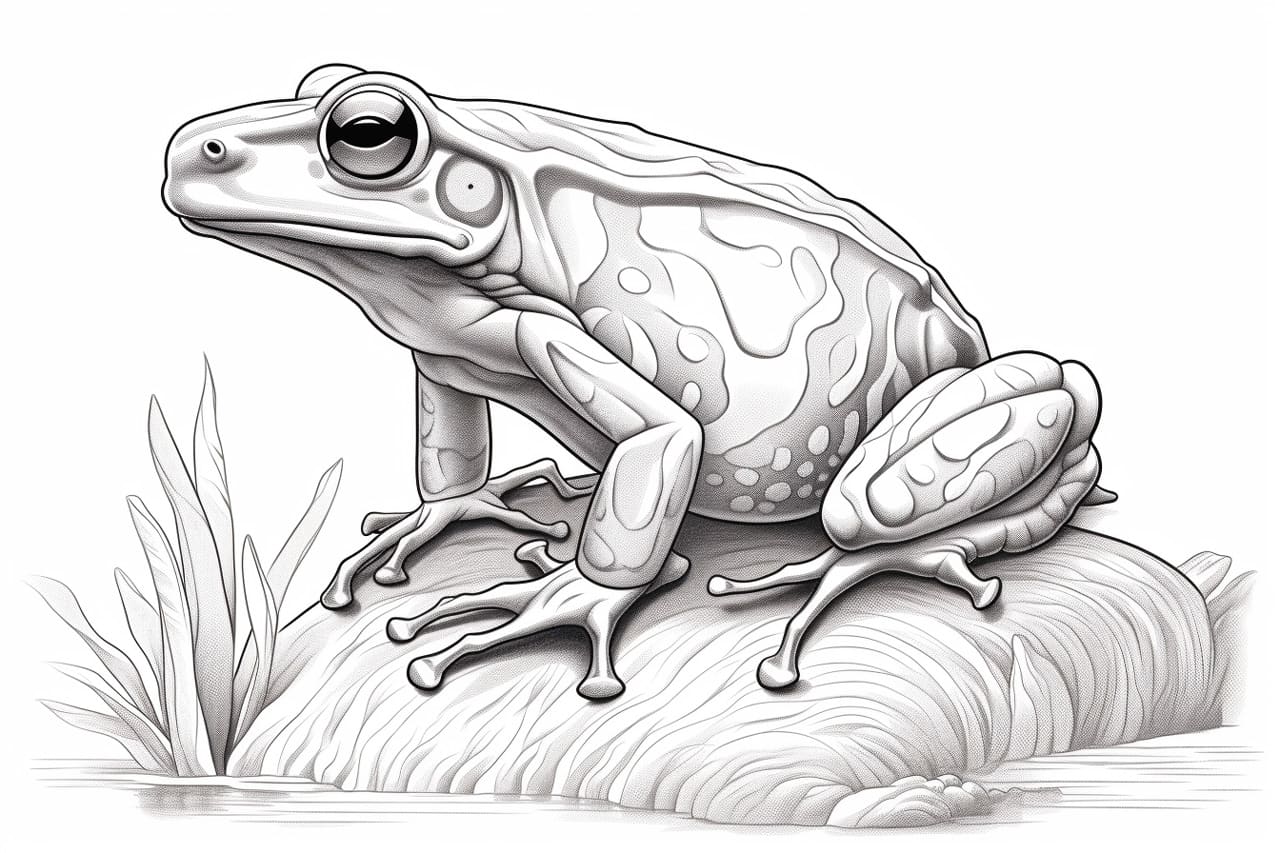
Start by lightly sketching the basic shapes that will form the body of the frog. Begin with an oval shape for the body and add a smaller oval for the head. Place them close together but not touching. Next, draw a slightly curved line extending from the head for the back of the frog.
Step 2: Legs and Feet
Now it’s time to add some legs to our poison dart frog. Draw two long, curved lines on either side of the body, starting from the bottom of the body and extending outward. These will be the back legs. Repeat the process for the front legs, but make them slightly shorter and thinner. After that, add small ovals at the end of each leg to represent the frog’s feet.
Step 3: Eyes and Mouth
Focus on the frog’s face now. Sketch two large circles for the eyes, making sure they are evenly spaced on the head. Inside each eye, draw a smaller circle for the iris. Leave a small white space in each eye to create a highlight. Next, draw a small curved line below the eyes to depict the frog’s mouth.
Step 4: Details of the Face
Let’s add some details to the face to make our frog look more realistic. Draw a curved line above each eye to indicate the eyebrow ridge. Then, add a small curve below the mouth to represent the frog’s chin. Don’t forget to add a few tiny dots on the chin to suggest texture.
Step 5: Patterns and Textures
Now comes the fun part! Poison dart frogs have unique and vibrant patterns on their bodies, so let’s recreate them. Use your reference photo to guide you in drawing the distinct patterns and textures. Start by lightly sketching the shapes and lines of the patterns, and then gradually darken them to make them more prominent.
Step 6: Shading and Depth
To add depth and dimension to your drawing, it’s important to incorporate shading. Observe your reference photo and identify areas where shadows fall. Use your pencil or markers to lightly shade those areas, gradually building up the darkness. Pay attention to the frog’s body contours and the direction of the light source to make your shading more realistic.
Step 7: Color the Frog
At this stage, you can start adding color to your poison dart frog. Use fine-tipped markers or colored pencils to carefully fill in the patterns with the appropriate colors. Poison dart frogs come in various colors, so be creative and experiment with different shades to bring your artwork to life.
Step 8: Final Touches
Take a moment to review your drawing and make any necessary adjustments. Erase any unwanted pencil lines and refine the details as needed. If desired, you can add a background or additional elements to enhance the overall composition of your artwork.
Conclusion
Congratulations, you have successfully learned how to draw a poison dart frog! By following these step-by-step instructions and using your creativity, you have created a stunning representation of this fascinating creature. Don’t forget to practice and experiment with different techniques to further enhance your drawing skills. Enjoy the process and continue exploring the world of art!

