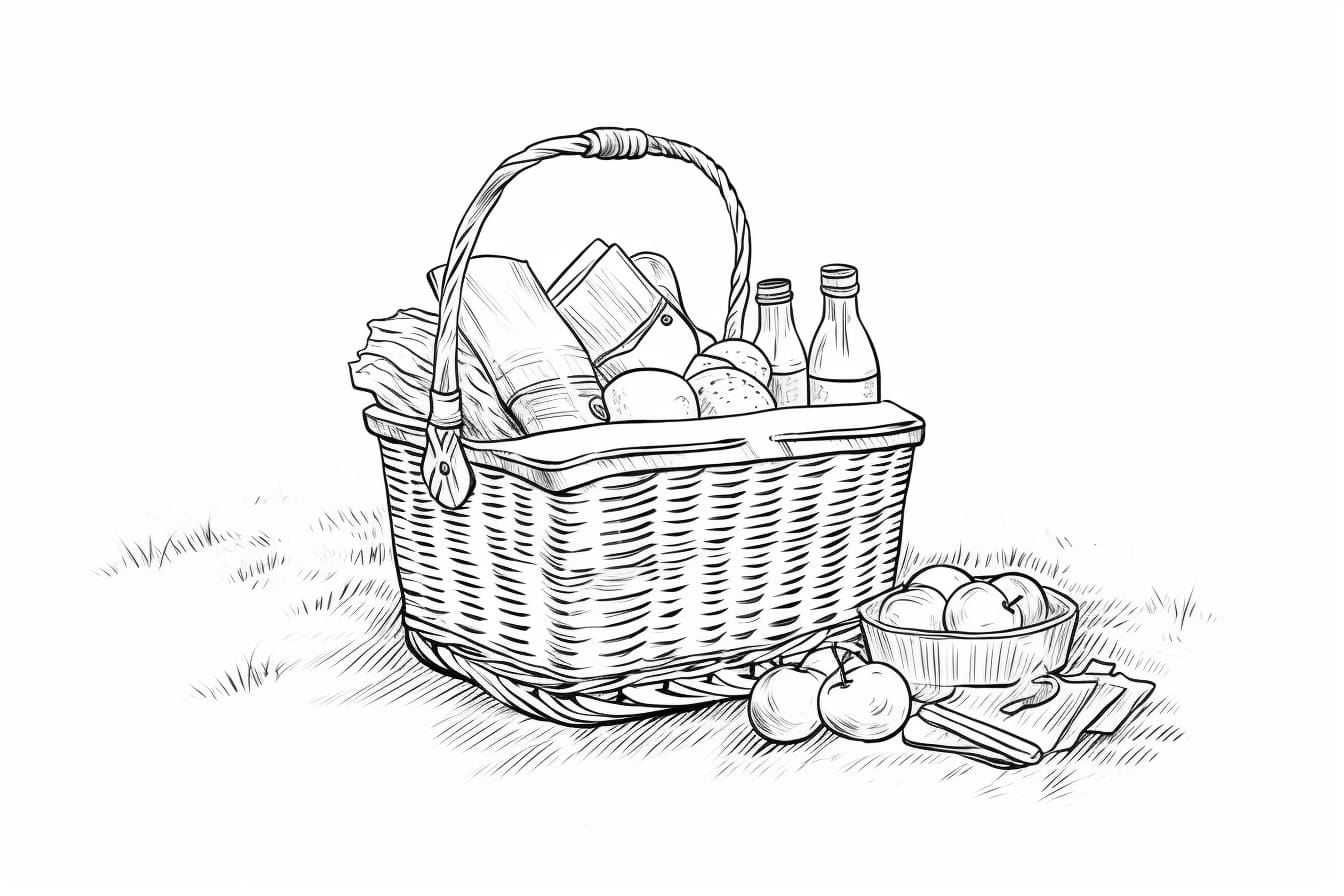
Welcome to this step-by-step guide on how to draw a picnic basket! Whether you are an experienced artist or just starting out, this tutorial will help you create a beautiful illustration of a classic picnic basket. So, grab your drawing materials and let’s get started!
Materials Required
To draw a picnic basket, you will need the following materials:
- Paper: It’s best to use a medium-weight drawing paper, which can withstand the pressure of your drawing tools.
- Pencil: A graphite pencil with a medium range of hardness (HB or 2B) is ideal for this drawing.
- Eraser: A kneaded eraser is recommended for easy clean-up and adjustments as you draw.
- Ruler: A ruler will help you create straight and precise lines.
- Colored pencils or markers (optional): If you want to add color to your drawing, have some colored pencils or markers on hand.
Now that you have gathered your materials, let’s dive into the step-by-step process of drawing a picnic basket.
Step 1: Draw the Outline
Start by lightly sketching the outline of the picnic basket. Begin with a rectangle lying horizontally on your paper. This will be the base of the basket. Next, draw the sides of the basket by connecting the corners of the rectangle with slightly curved lines. Make sure to leave an opening at the top for the handle.
Step 2: Add the Weave Pattern
Using curved lines, create a weaving pattern on the sides of the basket. Imagine the lines as a series of interconnected “U” shapes, spaced evenly apart. Add some lines vertically as well, crossing over the horizontal ones to complete the woven look.
Step 3: Draw the Handle
To draw the handle, start by lightly sketching two curved lines that connect the top corners of the basket. Then, create a curved shape for the handle, slightly arched above the basket. Make sure the handle is thick enough to appear sturdy.
Step 4: Add the Lid
Draw a slightly curved line at the top of the basket to indicate the lid. You can make it as wide or narrow as you like, depending on how open or closed you want the basket to be. To give it a woven texture, add some diagonal lines across the lid.
Step 5: Enhance the Basket
In this step, we will add some details to make the basket look more realistic. Draw some short lines along the top edges of the basket to represent the individual strands of the weave.
Next, add a decorative ribbon or bow on the front of the basket. This can be a simple curved shape with two tails hanging down.
Step 6: Shade and Add Depth
Now it’s time to add shading to your picnic basket drawing. Decide on the direction of your light source, and lightly shade the areas that would be in shadow. This will help give the basket a three-dimensional look. You can use hatching or cross-hatching techniques with your pencil to achieve this.
Step 7: Color the Basket (Optional)
If you wish to add color to your drawing, now is the time to do so. Use colored pencils or markers to carefully color in the basket and any other elements you want to emphasize. You can choose natural colors like browns and tans for the basket, and add pops of color for the bow or decorative elements.
Conclusion
Congratulations on completing your drawing of a picnic basket! With these step-by-step instructions, you have learned how to create a beautiful and realistic illustration. Remember to practice regularly, as it is through practice that your drawing skills will improve.
So, grab your drawing materials and start creating your own picnic basket masterpiece today. Happy drawing!