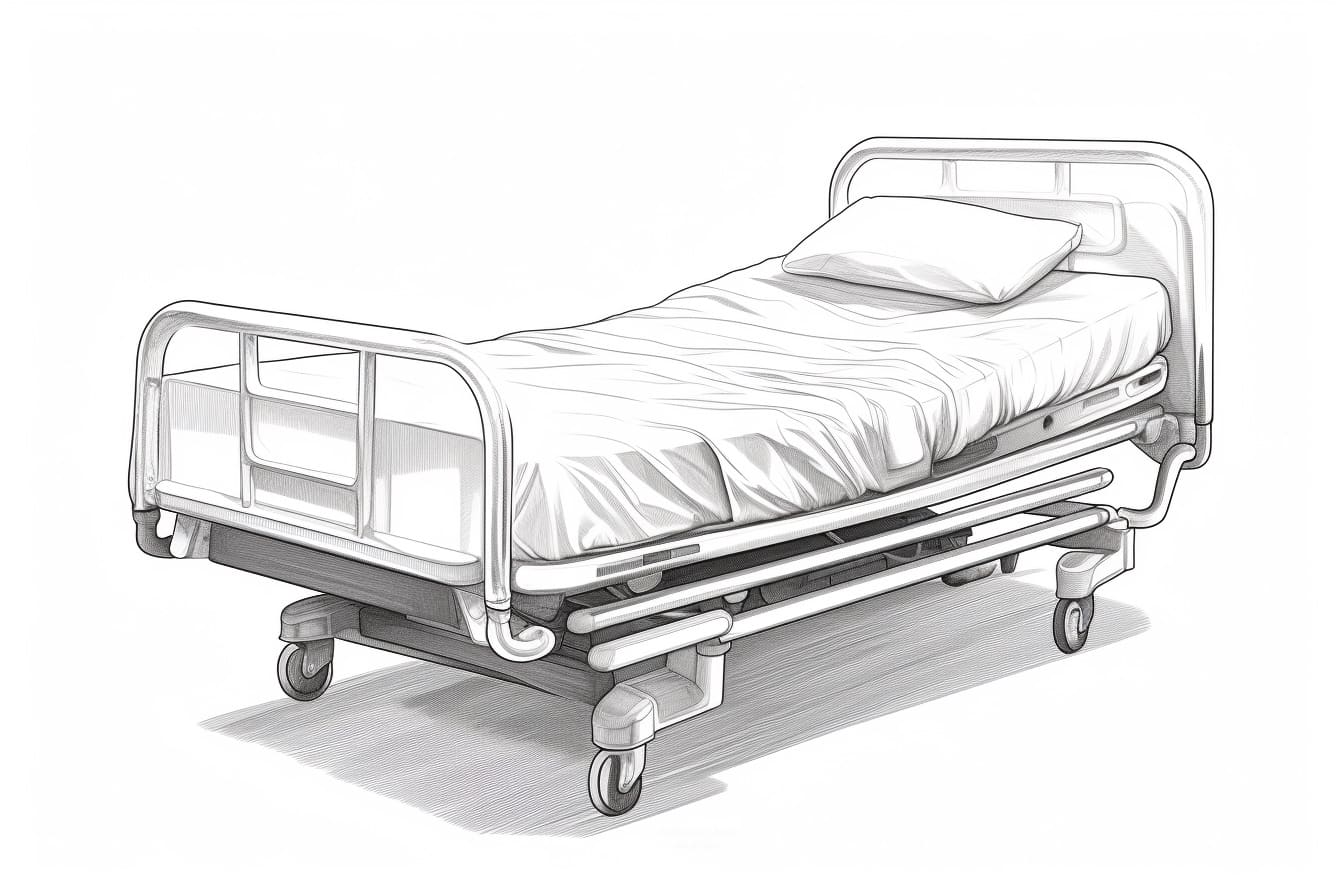
As an artist, capturing the details of various objects is an essential skill. Drawing a hospital bed may seem like a complex task, but with the right approach, anyone can create a realistic and accurate representation. In this article, we will guide you through the step-by-step process of how to draw a hospital bed, providing clear instructions and tips along the way.
Materials Required
Before we delve into the drawing process, let’s gather the necessary materials:
- Paper: Choose a suitable paper size, preferably larger to accommodate all the details.
- Pencil: A set of drawing pencils ranging from H to B will give you various levels of shading.
- Eraser: A good quality eraser will help you correct any mistakes.
- Ruler: A straight edge ruler will assist you in drawing clean and precise lines.
- Reference Image: Find a clear image of a hospital bed to use as a visual reference.
Now that we have everything we need, let’s get started!
Step 1: Sketch the Basic Shape
Begin by lightly sketching the basic shape of the hospital bed. Use a light pencil, such as an H-grade, to ensure easy erasing when necessary. Start with a rectangular shape for the main body of the bed. Then, add two straight lines on each side to represent the bed’s railing.
Step 2: Add Details to the Railing
Now, let’s focus on the bed’s railing. Using a darker pencil, such as a 2B, carefully draw the details of the railing. Pay attention to the curves and angles, ensuring they match your reference image. Remember to keep your lines light and loose during this stage.
Step 3: Outline the Head and Footboards
Move on to outlining the head and footboards of the hospital bed. These are typically rectangular in shape, but the design may vary. Use your reference image to accurately depict their form. Begin with light, loose lines, and gradually refine them to achieve a more precise outline.
Step 4: Draw the Mattress and Bed Sheets
Next, draw the mattress and bed sheets. Start by sketching the shape of the mattress on the bed. Depict any visible patterns or textures using basic shading techniques. For the bed sheets, follow the contours of the mattress and add folds to create depth and realism.
Step 5: Add the Pillows
A hospital bed is incomplete without pillows. Draw the pillows by outlining their basic shapes and placing them at the head of the bed. Remember to consider perspective and the way they would appear from a top-down view. Add shading to give the pillows volume and form.
Step 6: Refine the Details
Now that the main elements of the hospital bed are in place, it’s time to refine the details. Use a sharper pencil, like a 4B or 6B, to create more defined lines and shadows. Pay attention to smaller features, such as buttons or knobs on the bed, and add them with precision.
Step 7: Shade and Add Texture
To make your hospital bed drawing more realistic, add shading and texture. Identify the areas of light and shadow by observing your reference image and recreate them on your drawing. Use various strokes, like cross-hatching or stippling, to achieve the desired texture for different parts of the bed.
Step 8: Erase and Clean Up
Once you are satisfied with the overall look of your drawing, it’s time to erase any unnecessary guidelines or mistakes. Use a kneaded eraser to remove pencil marks without damaging the paper. Pay close attention to details and ensure clean, crisp lines throughout your drawing.
Step 9: Finalize the Drawing
Review your hospital bed drawing and make any final adjustments or touch-ups. Step back and assess the overall composition, checking for symmetry and accuracy. Add any additional details or shading as needed to enhance the realism of your artwork.
Congratulations! You have successfully drawn a hospital bed. With practice, you will continue to improve your skills and capture the essence of various objects and scenes.
Conclusion
Drawing a hospital bed requires careful observation and attention to detail. By following the step-by-step instructions outlined in this article, you now have the skills to create a realistic and accurate representation. Remember to start with a basic sketch, gradually add details and shading, and refine your drawing until you are satisfied with the result.
So gather your materials, find a reference image, and let your creativity flow as you embark on this drawing journey. Happy sketching!