Celtic knots are intricate and beautiful designs that have been admired for centuries. Originating from the Celtic culture, these knots are known for their endless loops and intersecting patterns. If you’ve ever wanted to learn how to draw a Celtic knot, you’ve come to the right place. In this article, we will guide you through the step-by-step process of how to draw a Celtic knot. So grab your drawing tools and let’s get started!
Materials Required
Before we begin, make sure you have the following materials:
Now that you have gathered your materials, let’s dive into the steps of drawing a Celtic knot.
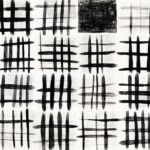
Step 1: Start with a Grid
To create a Celtic knot, it’s helpful to start with a grid. This grid will serve as a guide for the placement of your lines and intersections. Begin by drawing a square on your paper.
Step 2: Divide the Square
Next, divide the square into smaller squares by drawing horizontal and vertical lines through the center of the square. This will create a grid of equal-sized squares within the larger square.
Step 3: Add Diagonal Lines
Now, draw diagonal lines from the corners of each square towards the center. These diagonal lines will intersect with the previously drawn horizontal and vertical lines, creating a woven pattern.
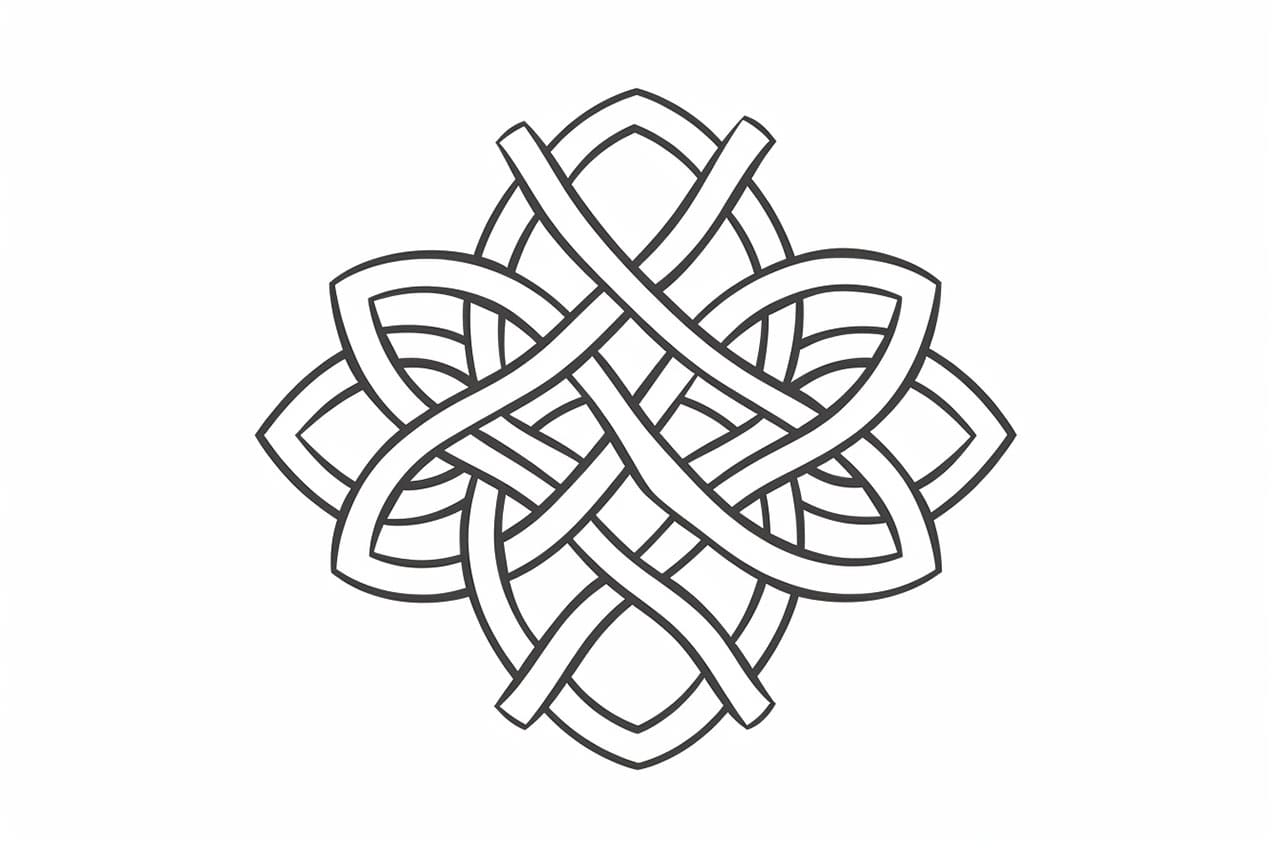
Step 4: Create Overlapping Loops
To create the overlapping loops that are characteristic of Celtic knots, start by drawing a curved line from one corner of a square to the opposite corner, passing over the intersecting lines. Then, draw another curved line from the adjacent corner, passing under the intersecting lines. Repeat this process for each square in the grid, ensuring that the loops intersect and overlap in a consistent manner.
Step 5: Refine the Design
Once you have completed the basic structure of your Celtic knot, take a moment to review your design and make any necessary adjustments. You may choose to refine the curves, straighten lines, or add additional details to enhance the overall appearance of the knot.
Step 6: Ink Your Drawing
Once you are satisfied with the pencil sketch of your Celtic knot, it’s time to ink your drawing. Use a fine-tip marker or pen to carefully trace over the lines of your design, making them more prominent. You can also erase any remaining pencil marks at this stage.
Step 7: Shade or Color (Optional)
If desired, you can now add shading or color to your Celtic knot. This step is optional but can bring your design to life. Use colored pencils, markers, or any other medium of your choice to add depth and vibrancy to your drawing.
Conclusion
Drawing a Celtic knot may seem challenging at first, but with practice and patience, you can create stunning designs. By following the step-by-step instructions provided in this article, you have learned the process of drawing a Celtic knot. Remember to start with a grid, create overlapping loops, and refine your design before inking and adding color. With time, you will become more comfortable and skilled in creating these intricate patterns. So, grab your materials and let your creativity flow as you embark on the journey of drawing beautiful Celtic knots!