Learn the art of drawing a braid with this comprehensive step-by-step guide from a professional artist and drawing instructor.
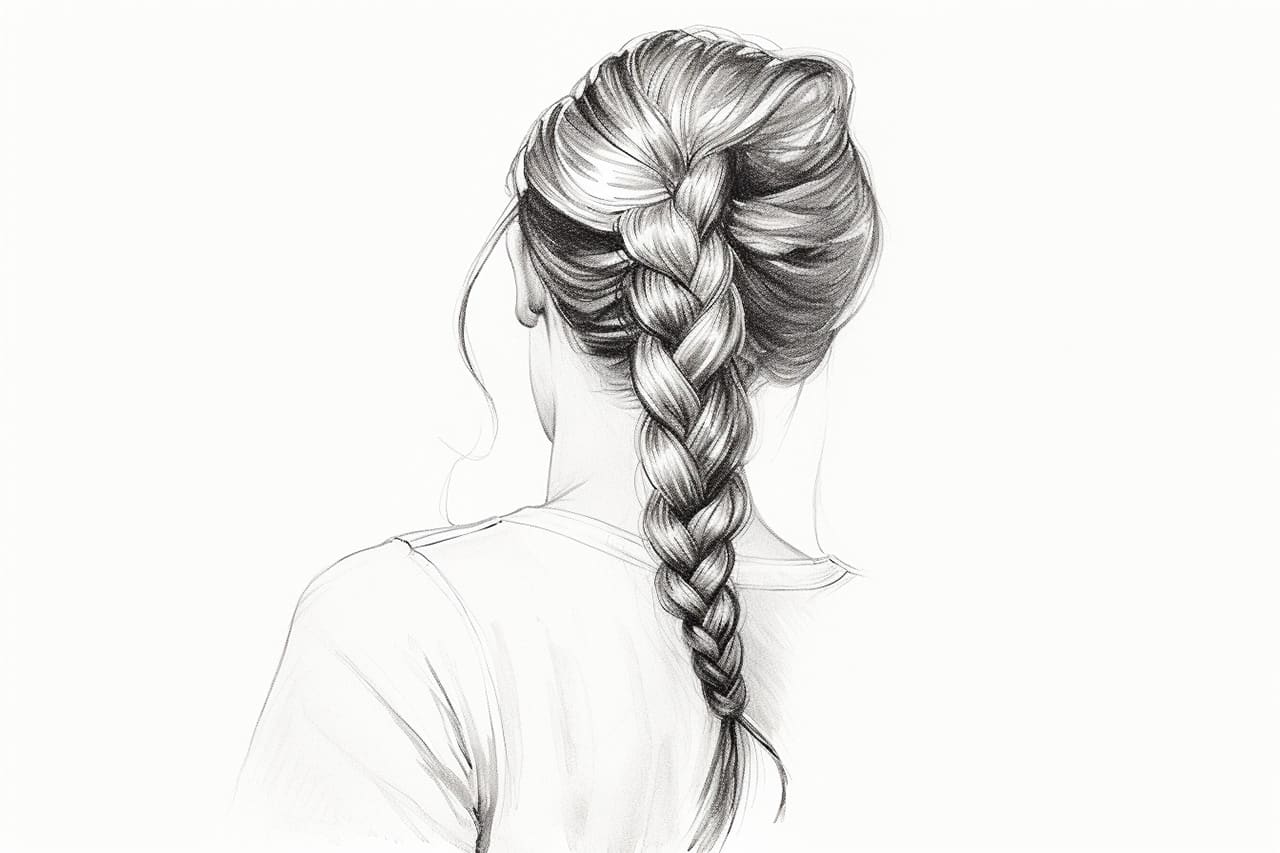
Drawing hair can be a challenging task, especially when it comes to intricate styles like braids. However, with practice and a solid understanding of the basic techniques, you can master the art of drawing a braid. In this guide, I will provide you with step-by-step instructions to create a realistic and beautifully textured braid drawing.
Materials Required
Before we begin, make sure you have the following materials ready:
- Pencil (HB or any preferred grade)
- Eraser
- Drawing paper or sketchbook
- Fine-tip black pen or marker (optional for outlining)
- Colored pencils or markers (optional for coloring)
Now that you have gathered your materials, let’s dive into the process of drawing a braid.
Step 1: Starting with the Basic Outline
Begin by lightly sketching an arc or a curve to represent the general shape of the braid. This will serve as a guide for the overall flow and direction. Remember, don’t press too hard with your pencil at this stage, as you may need to make adjustments later on.
Step 2: Dividing the Hair into Sections
Divide the arc or curve into three equal sections, just like how a braid consists of three strands. These sections will help you maintain the proportion and structure of the braid throughout the drawing process.
Step 3: Adding Volume and Detail
Starting at the top of the braid, draw a curved line to define the width of each strand. Make sure to maintain consistency in the width of the strands as you move along the braid. This will give your drawing a three-dimensional appearance, adding depth and volume.
Step 4: Creating Texture
To make the braid look realistic, it’s crucial to add texture. Begin by drawing small, curved lines along each strand, following the direction of the hair. These lines represent the individual strands that create the braid. Be mindful of the spacing between the lines, as they should be closer together towards the top of the braid and gradually widen as you move towards the bottom.
Step 5: Weaving the Strands
Now, it’s time to create the weaving effect that makes a braid unique. Starting at the top of the braid, draw a small curve that connects the outer edge of the first strand to the inner edge of the second strand. Repeat this step, connecting the second strand to the third and the third to the first. Remember to maintain the width and shape of each strand as you go along.
Step 6: Adding Detail to the Weaving
To enhance the weaving effect, draw small curved lines along the connections you made in the previous step. These lines represent the overlapping strands of hair in a braid. Pay attention to the direction and position of these lines to ensure a realistic appearance.
Step 7: Shading and Highlights
To provide depth and dimension to your braid drawing, add shading. Identify the light source in your drawing and imagine where the shadows would fall. Darken the areas where the strands overlap or where shadows would naturally occur, such as underneath the braid or in between the strands. Additionally, add highlights to the top parts of the braid to make it appear shiny and more realistic.
Step 8: Outlining (Optional)
If you prefer a more defined look, you can outline your braid drawing using a fine-tip black pen or marker. This step is entirely optional and depends on your personal style and preferences, as well as the desired outcome of your drawing.
Step 9: Coloring (Optional)
Once you have completed the drawing, you can add color to your braid using colored pencils or markers. Consider the hair color and choose shades accordingly. Blend the colors softly, mimicking the natural highlights and variations in the hair. This step is also optional, but adding color can bring your braid drawing to life.
Conclusion
Congratulations! You have successfully learned how to draw a braid. By following the step-by-step instructions and practicing regularly, you can refine your technique and create even more intricate and detailed braid drawings. Remember to be patient with yourself and enjoy the process of creating art.
Discover the beauty and intricacy of drawing a braid with this comprehensive guide. From the basic outline to the detailed weaving, bring your artwork to life with realistic textures and shading. Whether you’re a beginner or an experienced artist, this step-by-step tutorial will guide you towards creating stunning braid drawings.
Fun Facts About Braids
- Braids have been worn by various cultures around the world for thousands of years, with evidence of braided hairstyles dating back to ancient civilizations such as Egypt, Greece, and China.
- The art of braiding has been traditionally passed down from generation to generation, often symbolizing cultural identity, social status, and even marital status in different societies.
- There are many different types of braids, including three-strand braids (simple braid), French braids, Dutch braids, fishtail braids, rope braids, waterfall braids, and many more, each with its own unique technique and aesthetic appeal.
- Braids are not only a popular hairstyle choice but also serve practical purposes such as keeping hair neat and organized, protecting hair from damage, and even serving as a way to communicate messages or signify membership in a group.
- In some African cultures, intricate braided hairstyles are a form of art and can convey messages about a person’s age, social status, tribe, or even marital status.
- Braiding can be a therapeutic and relaxing activity, with many people finding the repetitive motion of braiding to be calming and meditative.
- Braids can be adorned with beads, ribbons, flowers, and other accessories to add flair and personal style to the hairstyle.
- Braids have made a resurgence in popular culture in recent years, with celebrities and influencers often showcasing intricate and creative braided hairstyles on red carpets and social media.
- Braiding is not limited to just hair – it can also be seen in various forms of art, such as basket weaving, rope-making, and even in certain types of knitting and crochet techniques.

