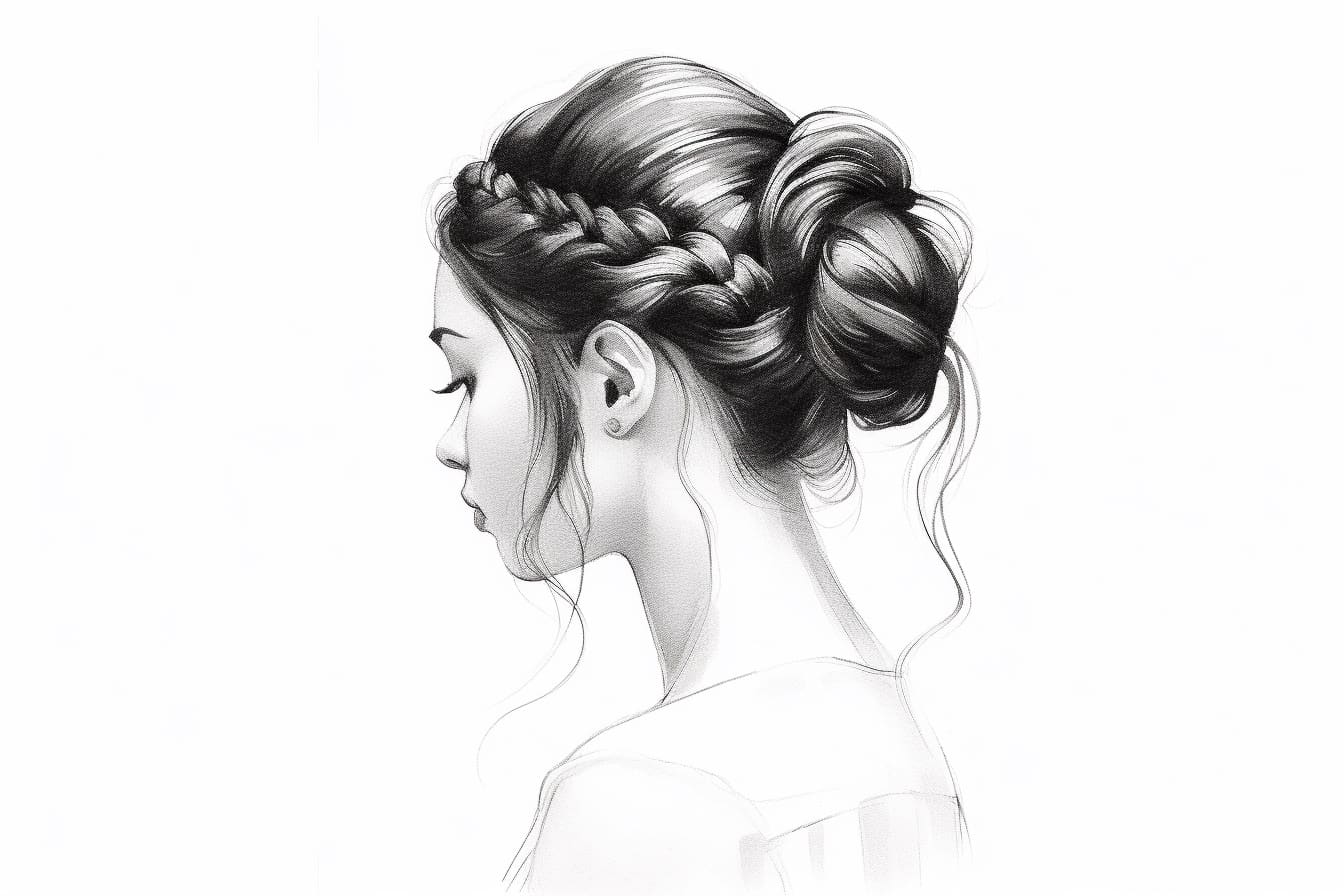
Are you a fan of intricate hairstyles and looking to add some flair to your drawings? A side braid can be a beautiful addition to any character or portrait. In this step-by-step tutorial, I’ll guide you through the process of drawing a side braid in a simple and easy-to-follow manner. Whether you’re a beginner or an experienced artist, you’ll be able to master this hairstyle with ease. So grab your drawing materials and let’s get started!
Materials Required:
- Pencil
- Eraser
- Paper
Step 1: Draw the Outline
To begin, lightly sketch the outline of the head where you want the side braid to be. Remember to keep your lines simple and loose, as this is just a guide for the overall placement of the braid.
Step 2: Divide the Hair
Next, draw a curved line from the top of the head to the desired side where the braid will begin. This line will serve as the starting point for our braid. From there, divide the remaining hair into three equal sections using two additional curved lines. This will give us the foundation for the braid.
Step 3: Start Braiding
Start by drawing the first section of the braid. Take the leftmost section and divide it into three smaller sections. Begin weaving the hair by crossing the outer left section over the middle section. Then, cross the outer right section over the middle section. Repeat this pattern, alternately crossing the sections over the middle, until you reach the end of the hair.
Step 4: Add Volume
To create a more realistic and voluminous braid, add some thickness to each section. Imagine the strands of hair as cylindrical shapes. Gradually thicken each strand as you move down the braid, creating a tapered effect. This will give it a more 3D appearance.
Step 5: Continue Braiding
Once you’ve completed the first section of the braid, it’s time to move on to the next section. Take the middle section of hair and divide it into three smaller sections, just like before. Repeat the braiding technique from Step 3 for this section.
Step 6: Incorporate Hair Strands
To enhance the realism of the braid, add some loose strands of hair on the sides. Draw a few thin strands hanging down from different points along the braid. These loose strands will make the braid look more natural and relaxed.
Step 7: Complete the Braid
Continue the braiding process by taking the remaining section of hair and dividing it into three smaller sections. Follow the same braiding technique from Step 3 to complete the braid. Pay attention to the direction and positioning of the strands to maintain a consistent look.
Step 8: Refine and Adjust
Take a moment to evaluate your drawing and make any necessary adjustments. Erase any unwanted lines or stray marks, and refine the shape of the braid. You can also add more volume and texture to the hair by lightly shading certain areas with your pencil.
Step 9: Final Touches
To add the finishing touches, emphasize the texture of the braid by adding small details and highlights. Use your pencil to create subtle lines and shadows along the individual strands of hair. This will give the braid depth and make it appear more realistic.
Conclusion
Congratulations! You’ve successfully learned how to draw a side braid. With a few simple steps and some practice, you can easily incorporate this hairstyle into your drawings. Remember to start with a basic outline, divide the hair into sections, and follow a consistent braiding technique. By adding volume, loose strands, and final touches, you can bring your side braid to life. Enjoy experimenting with this versatile hairstyle and incorporating it into your future artworks!