Welcome to this step-by-step guide on how to draw a carrot! Whether you’re an experienced artist looking to enhance your skills or a beginner with a passion for drawing, this tutorial will provide you with clear and concise instructions to create a realistic and appealing carrot illustration. So grab your drawing materials, let’s get started!
Materials Required
Before we begin, make sure you have the following materials ready:
- Paper: Use a smooth-surfaced paper that is suitable for drawing and can handle various drawing mediums.
- Pencil: Choose a pencil with a medium hardness (HB or 2B) for sketching.
- Eraser: Have a quality eraser to easily correct any mistakes and clean up your drawing.
- Colored pencils or Markers (optional): If you want to add color to your carrot, gather some colored pencils or markers to bring your drawing to life.
- Reference picture of a carrot.
Now that you have all the necessary materials, let’s move on to the step-by-step process of drawing a carrot!
Step 1: Basic Outline
Start by drawing a slightly curved vertical line in the center of your paper. This line will serve as the main structure of the carrot. Make sure the line is light and easily erasable, as we will be refining our drawing as we progress.
Step 2: Top and Bottom Shape
At the top of the central line, draw a small loop shape, resembling the leafy top of a carrot. Keep the curves of this shape organic and irregular, as real carrot tops are not perfectly symmetrical.
Now, at the lower end of the central line, draw a round shape. This will be the wider bottom part of the carrot. Ensure that the bottom shape is wider than the top.
Step 3: Refine the Outline
Refine the outline of your carrot by adding more curves and details. Make the top part of the carrot slightly narrower and taper it towards the tip. Add irregular lines to suggest the texture of the leafy top. For the bottom part, draw a slightly curved line to connect the round shape with the central line.
Step 4: Carrot Texture
To give your carrot a realistic texture, add small diagonal lines across the entire surface. These lines will mimic the texture and lines found on the skin of real carrots. Make the lines shorter and closer together towards the bottom, gradually becoming longer and more spaced out towards the top.
Step 5: Detailing the Carrot Top
Focus on the carrot top and add more details. Draw several curved lines extending from the center of the top shape outward, mimicking leaf veins. Make these lines irregular and slightly curved. Add a few smaller, jagged lines on the edges of the leaves to suggest a more organic and natural appearance.
Step 6: Darken the Outline
Once you are satisfied with your carrot’s overall shape and texture, darken the outline. Use a darker pencil or apply more pressure to create a clear distinction between the carrot and the background. Be careful not to press too hard and create unwanted smudges.
Step 7: Shading and Highlights
To give your carrot depth and dimension, add shading and highlights. Identify the light source in your drawing and imagine where the light would hit the carrot. Shade the opposite side of the carrot with light, diagonal pencil strokes. Gradually darken the shading as you move towards the bottom.
Next, add highlights by using an eraser. Lift off small sections of graphite from the areas that would catch the light, such as the top and sides of the carrot. This will create a more three-dimensional effect.
Step 8: Optional Coloring
If you wish to add color to your carrot, use colored pencils or markers to carefully layer and blend colors. Start with a light orange color as the base, and gradually add darker shades to create depth. Pay attention to the shading and highlights you previously created with graphite, and try to replicate those using colored pencils or markers.
Conclusion
Congratulations! You have successfully learned how to draw a carrot. By following these step-by-step instructions, you can create a realistic and appealing carrot drawing with ease. Remember to practice regularly and experiment with different techniques to further enhance your drawing skills. Happy drawing!
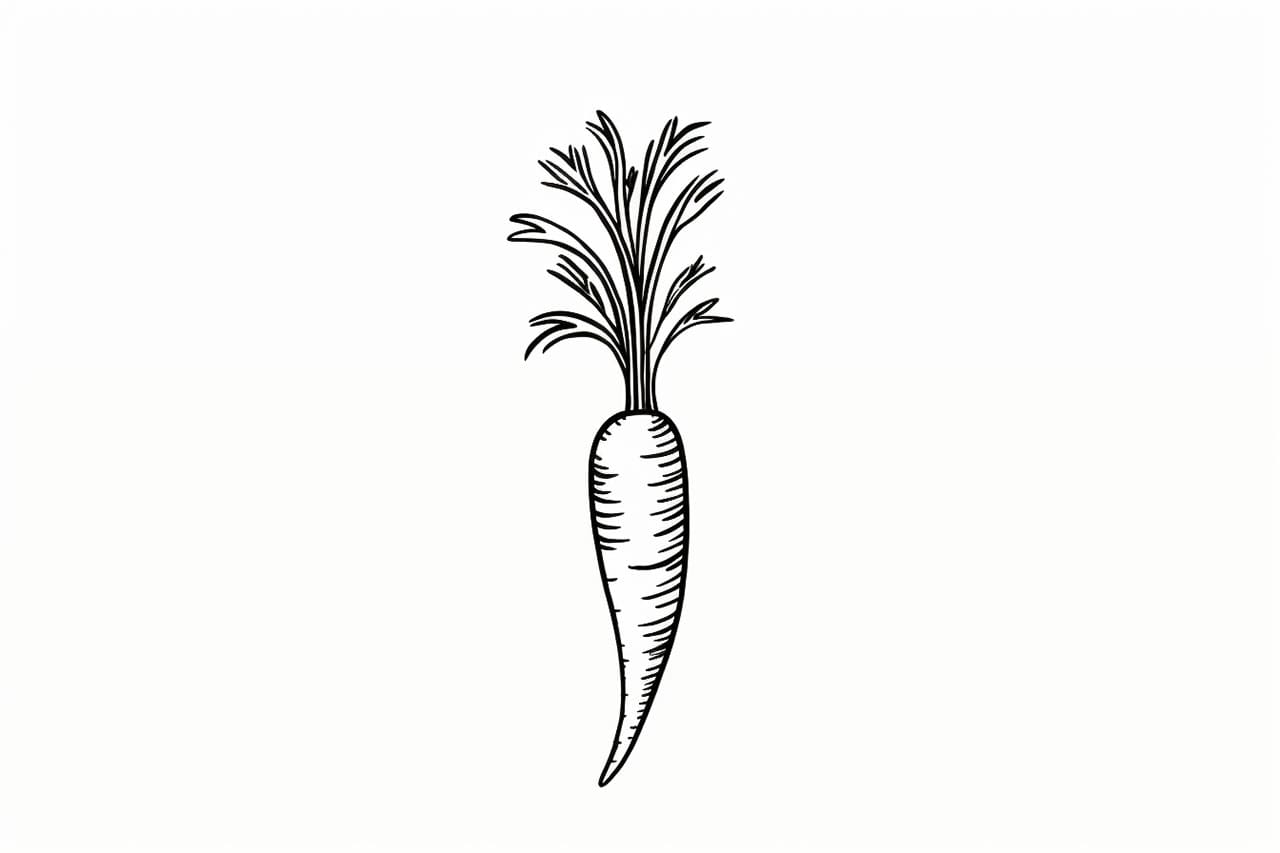
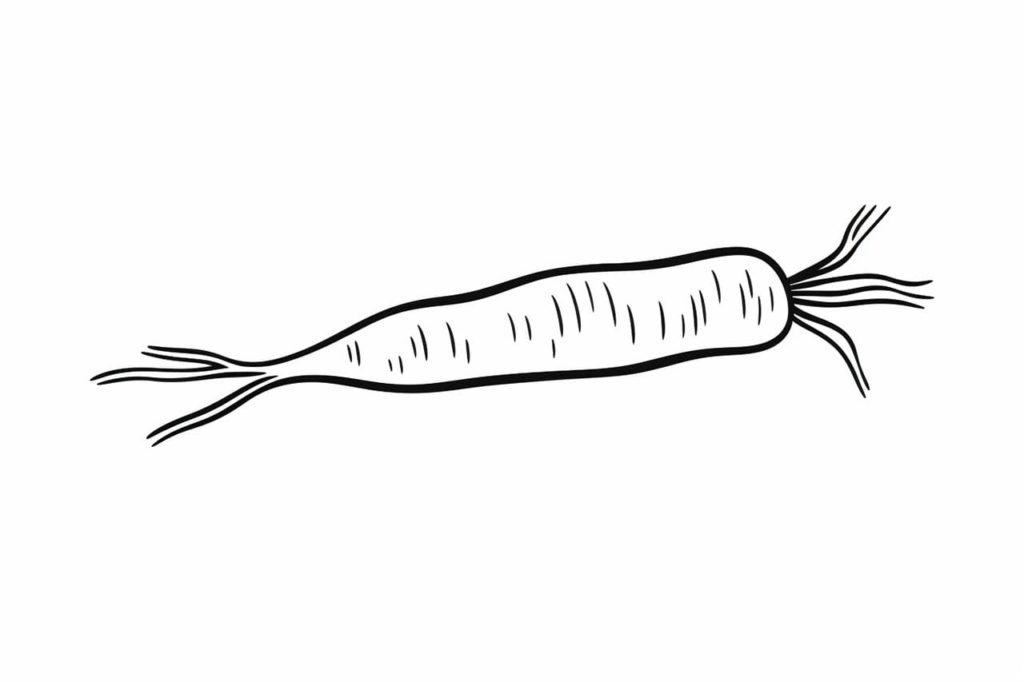
Gallery of Carrot Drawings

Fun Facts About Carrots
- Carrots are root vegetables, most commonly orange, but they also come in purple, red, yellow, and white varieties.
- They were originally cultivated for their leaves and seeds—not their roots!
- Carrots get their bright orange color from beta-carotene, which the body converts into vitamin A—a nutrient great for eyesight.
- Wild carrots were first grown in Persia around the 10th century and looked quite different from the ones we eat today.
- Carrots are 88% water, making them surprisingly hydrating and crunchy!
- The longest carrot ever recorded measured over 20 feet (6 meters) long—though it was definitely not snack-sized.
- Carrot leaves (also called tops or greens) are edible and can be used in pestos, soups, and salads.
- In medieval times, carrots were sometimes used as medicine for various ailments, including digestive issues.
- Some rabbits do enjoy carrots—but they should be an occasional treat, not the main part of their diet!
- In space, astronauts have included carrots in dehydrated form on missions as part of their nutritious meal options.
Suggestions for Scenes and Settings for Carrot Drawings
- Carrot Garden Bed: Draw a bunch of carrots growing underground, with leafy tops waving above the soil and tiny bugs crawling nearby.
- Harvest Time: Illustrate a sunny scene of someone pulling a freshly grown carrot from the earth, dirt flying and roots dangling.
- Bunny Picnic: Create a cheerful meadow setting with a group of rabbits gathered around a pile of giant carrots, maybe wearing tiny hats.
- Carrot Castle: Imagine a whimsical carrot-shaped castle in a veggie kingdom, with vines as drawbridges and onion guards at the gate.
- Carrot Space Rocket: Design a rocket shaped like a carrot blasting off from a farm launchpad into the stars, trailing compost clouds.
- Carrot in Disguise: Draw a carrot in a trench coat and sunglasses, trying to blend in among a pile of parsnips at the farmer’s market.
- Kitchen Counter Drama: Show a group of animated veggies (including carrots) reacting in horror as a chef approaches with a peeler!
- Carrot Underwater Scene: Picture a magical sea where coral reefs are made of colorful carrots and seahorses nibble on the tips.
- Frozen Veggie World: Depict carrots in a snowy landscape with icicles hanging from their tops and frosty breath puffing from cartoon carrot mouths.
- Carrot Time Traveler: Invent a scene where a carrot with goggles and a pocket watch travels through eras—prehistoric dino snack, medieval feast, space ration.