How to Draw Planets
Learn how to draw planets with this step-by-step drawing tutorial. Create stunning planetary illustrations and explore your artistic abilities.
Materials You'll Need
- Pencil
- Paper
- Eraser
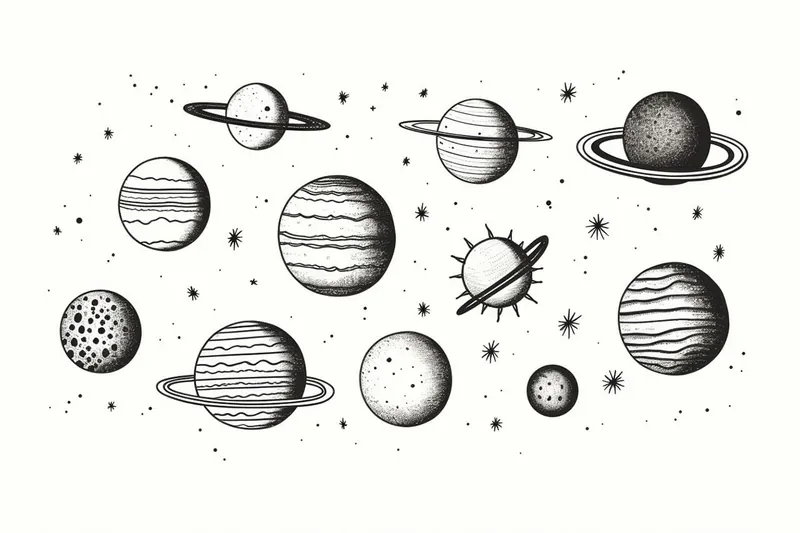
Planets have long captivated the imagination of artists, scientists, and dreamers alike. Each one is a unique world, with its own colors, textures, and atmospheric patterns—making them a truly inspiring subject to capture on paper. Whether you're fascinated by the swirling clouds of Jupiter, the mysterious rings of Saturn, or the vibrant reds and oranges of Mars, learning how to draw planets opens up a universe of creative possibilities. Drawing planets allows you to explore not only their scientific features but also your own artistic interpretations, blending realism with imagination as you depict distant worlds.
People choose to draw planets for many reasons: to enhance their space-themed artworks, to decorate notebooks and journals, or simply to express their love for astronomy and the cosmos. This tutorial on how to draw planets is perfect for beginners and intermediate artists alike. You'll practice essential skills such as drawing smooth circles, shading to create dimensionality, and using colors to represent planetary surfaces and atmospheres. Techniques like layering, blending, and highlighting will help bring your drawings to life, whether you want to create realistic planets or whimsical, fantasy-inspired worlds.
Don't worry if you're new to drawing—this guide breaks down the process into easy-to-follow steps, with tips and tricks along the way to boost your confidence. By the end, you'll have the knowledge and inspiration to fill your sketchbook with planets of all shapes and sizes. So grab your pencils and let your creativity soar as we journey through the galaxy together!
Materials Required
Before we begin, let's gather the materials you'll need to draw planets:
- [Drawing paper or sketchbook](https://yonderoo.com/best-sketchbooks-for-artists/)
- Pencil
- Eraser
- Colored pencils or markers
- Compass or circular object (such as a jar lid) for tracing circles
- Reference images of planets (optional, but helpful for accuracy)
Now that you have your materials ready, let's dive into the step-by-step process of drawing planets.
Step 1: Sketch the Basic Outline
Start by lightly sketching a circle on your drawing paper using a pencil and a compass. This circle will serve as the outline of your planet. If you don't have a compass, you can use a circular object like a jar lid as a template for tracing. Adjust the size of your circle based on the desired size of your planet.
Step 2: Add Texture to the Planet
To make your planet look more realistic, add texture by lightly sketching some lines and shapes across its surface. Planets often have interesting patterns, such as swirls or spots. Use reference images or let your imagination guide you in creating unique textures for your planet.
Step 3: Shade the Planet
Now, it's time to add depth and dimension to your planet by shading. Determine the light source in your drawing, and use your pencil to darken one side of the planet where the light doesn't reach as much. Gradually lighten the shading as you move towards the other side, where the light hits more prominently. This shading technique will create a three-dimensional effect.
Step 4: Add Details
To make your planet visually appealing, add some details. You can draw craters, mountains, or even rings if you're drawing a gas giant like Saturn. Again, reference images will be helpful here to accurately capture the features of each planet. Take your time and pay attention to small details—they can make a big difference in the overall appearance.
Step 5: Color Your Planet
This is where your colored pencils or markers come into play. Choose the appropriate colors for your planet based on its real-life appearance or let your imagination take the lead. Start by lightly layering the base color on your planet's surface, and then gradually build up the colors to create depth and variation. Don't forget to blend the colors seamlessly to avoid any harsh transitions.
Step 6: Add Background Elements
To enhance the composition, consider adding some background elements like stars or space dust. Use your pencil or white gel pen to draw tiny dots or specks to represent stars. You can also add a touch of sparkle by gently smudging some silver or gold colored pencil or using metallic markers.
Step 7: Final Touches and Cleanup
Take a step back and evaluate your drawing. Make any necessary adjustments to the shading, colors, or details. Once you're satisfied with the final result, use an eraser to gently remove any visible pencil lines or smudges, making your artwork clean and professional-looking.
Tip: For smooth, round planets, try lightly sketching your circles with a compass or tracing around a household object like a cup or lid—this keeps your shapes consistent and helps avoid lopsided planets. When adding texture or atmosphere, use gentle circular motions with your pencil or blending tool to mimic swirling clouds or stormy bands. Layering colored pencils or soft pastels can create rich, dimensional surfaces—start with light, broad base colors and gradually build up darker tones for shadows, leaving highlights where the light would naturally hit. If your planet has rings, draw them as slightly flattened ovals to match the planet's perspective, and use a kneaded eraser to softly lift out highlights and add transparency to the rings.
Conclusion
Congratulations on completing your journey of drawing planets! By following these step-by-step instructions, you have learned how to create visually captivating planetary illustrations. Remember, practice makes perfect, so keep honing your skills and exploring your creativity.
Now that you possess the knowledge to draw stunning planets, the only limit is your imagination. Embrace the wonders of the universe, and let your artistic abilities soar. Happy drawing!
Fun Facts About Planets
- Jupiter is the largest planet in our solar system, with a diameter of about 143,000 kilometers.
- Venus is the hottest planet, with surface temperatures hot enough to melt lead.
- Saturn's rings are made mostly of ice and rock particles.
- Mars is home to the tallest volcano in the solar system, Olympus Mons.
- Mercury has almost no atmosphere, causing extreme temperature swings.
- Neptune has the fastest winds in the solar system, reaching up to 2,100 kilometers per hour.
- Earth is the only known planet to support life.
- Uranus rotates on its side, making its axis nearly parallel to its orbit.
- Pluto, once considered the ninth planet, is now classified as a dwarf planet by the International Astronomical Union.
- Exoplanets are planets that orbit stars outside our solar system, and thousands have been discovered by missions.
Suggestions for Scenes and Settings for Planets Drawings
- Illustrate a close-up view of Saturn with its iconic rings casting shadows across the planet's surface.
- Draw a fantastical alien world with glowing, bioluminescent forests and swirling auroras in the sky.
- Capture the dramatic storms and swirling clouds of Jupiter, focusing on the Great Red Spot.
- Depict a tiny spacecraft orbiting a mysterious icy planet, with distant stars twinkling in the background.
- Create a view from the surface of Mars, looking up at Earth shining brightly in the alien sky.
- Design your own imaginary planet, complete with strange landforms, colorful minerals, and unusual weather patterns.
- Show a ringed planet rising over the horizon of one of its rocky moons.
- Draw a cluster of planets in a distant solar system, each with different colors, textures, and atmospheres.
- Imagine a futuristic city built on the surface of Venus, with shimmering domes and floating platforms above the clouds.
- [Depict a vibrant planet surrounded by asteroid belts](https://yonderoo.com/how-to-draw-an-asteroid-belt/) and comet tails, highlighting the dynamic environment of outer space.