Welcome to this step-by-step tutorial on how to draw a zombie head. In this guide, I will walk you through the process of creating a spooky and realistic zombie head drawing. So grab your pencil, paper, and let’s get started!
Materials Required
To complete this drawing, you will need the following materials:
- Pencil: Choose a medium or soft graphite pencil for the initial sketching.
- Paper: Use a good quality drawing paper that can withstand erasing and shading.
- Eraser: Have a kneaded eraser or a soft rubber eraser on hand for corrections.
- Blending stump or cotton swab: This will help you achieve smooth and seamless shading.
- Reference image: It’s always helpful to have a reference image or drawing of a zombie head to guide you throughout the process.
Now that you have your materials ready, let’s dive into the steps to create your zombie head drawing.
Step 1: Basic Outline
Start by lightly sketching a basic oval shape for the head. Remember that zombies are often depicted with distorted and uneven features, so feel free to experiment with the shape and proportions. Use light, loose lines to ensure easy adjustments later on.
Step 2: Facial Features
Next, add the facial features of the zombie. Begin with two circles for the eyes, placing them slightly below the center of the oval. Then, sketch the nose and a wide open mouth, complete with sharp, decaying teeth. Zombies often have sunken cheeks and a gaunt appearance, so keep that in mind as you sketch.
Step 3: Refine the Features
Now, it’s time to refine the facial features. Use more defined lines to outline the eyes, giving them a hollow, sunken look. Add depth to the nose by sketching its shape more precisely, and add details to the mouth, such as cracks and missing chunks of flesh. Take your time to capture the creepy essence of a zombie in these details.
Step 4: Shadows and Shading
To add depth and volume to your zombie head drawing, start shading the different areas. Begin by applying a light layer of shading on the entire head, using gentle strokes in the direction of the contours. Then, gradually build up the shadows around the eyes, nose, and mouth to create a more three-dimensional effect. Use your blending stump or cotton swab to blend the shading and create a smoother transition between light and dark areas.
Step 5: Texture and Details
Now, let’s focus on adding texture and details to make your zombie head drawing more realistic. Add wrinkles, folds, and bumpy skin texture to the forehead, cheeks, and neck. Keep in mind that zombies have decomposing flesh, so you can incorporate elements like exposed bones or patches of torn skin. This is where your reference image will come in handy to guide you in capturing these gruesome details accurately.
Step 6: Finishing Touches
As you near the completion of your drawing, take a step back and assess the overall composition. Make any necessary adjustments to balance the shadows, highlights, and details. Darken the areas that require more depth, and emphasize the highlights to create a contrast. Don’t be afraid to experiment and make your zombie head drawing as creepy as you desire!
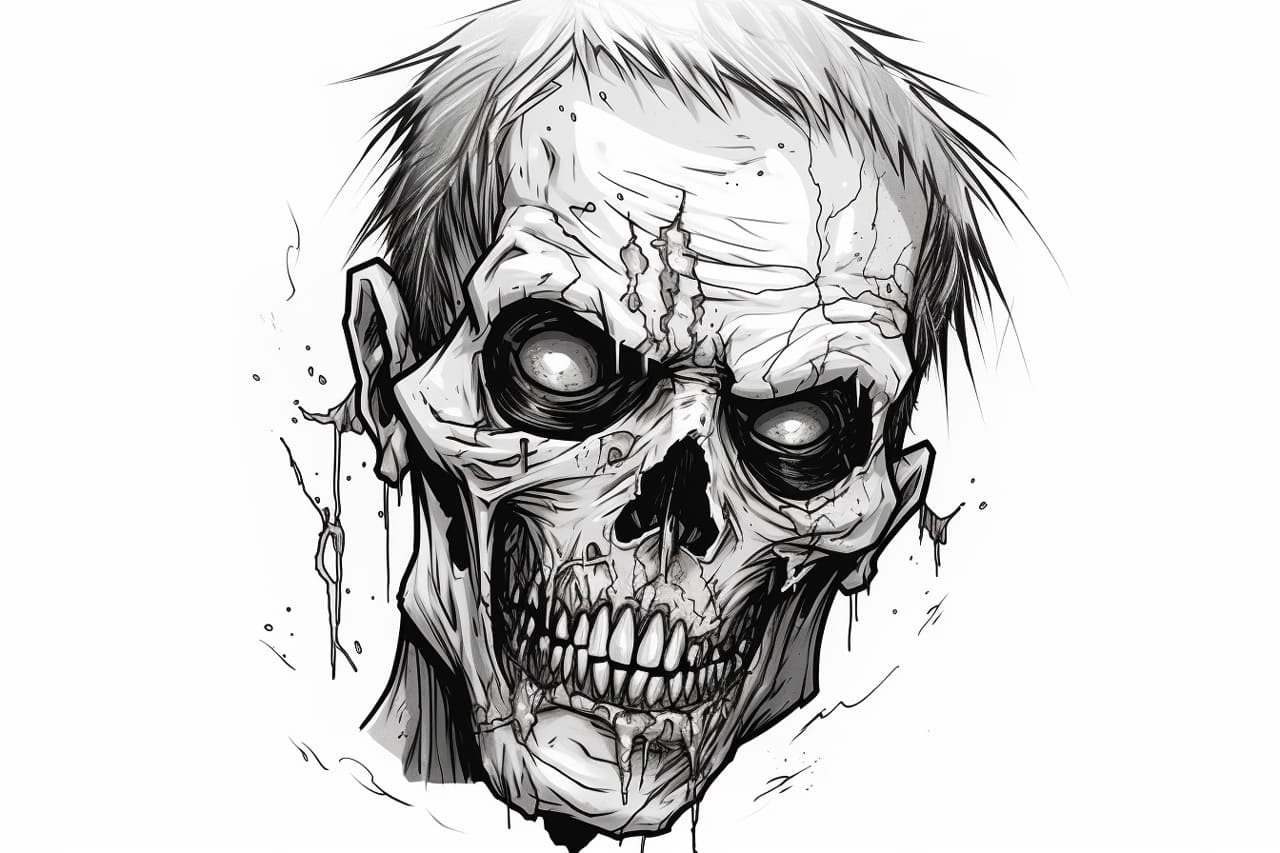
And there you have it – a spooky and realistic zombie head drawing! With practice and patience, you can continue to refine your skills and create more intricate and unique zombie artworks.
Conclusion
In conclusion, drawing a zombie head can be both challenging and fun. By following these step-by-step instructions and using the right materials, you can create a chilling and impressive zombie head drawing. Remember to start with a basic outline, refine the facial features, add shadows and shading, incorporate texture and details, and finish with finesse. So grab your pencil, paper, and let your imagination run wild as you bring your very own zombie head to life!