The Yin Yang symbol is a popular and meaningful design representing balance and harmony. It consists of two interlocking shapes, one dark and one light, symbolizing the duality and interconnectedness of life. Drawing a Yin Yang can be a fun and creative activity, whether you are an experienced artist or just starting out. In this step-by-step guide, we will walk you through the process of how to draw a Yin Yang symbol. Let’s get started!
Materials Required
Before we begin, let’s gather the materials you will need to draw a Yin Yang:
- Drawing paper or a sketchbook
- Pencils (preferably a range of softness, such as 2B, 4B, and 6B)
- Eraser
- Compass or round object for tracing circles (optional)
- Ruler (optional)
Now that you have all your materials ready, let’s move on to the steps of drawing a Yin Yang.
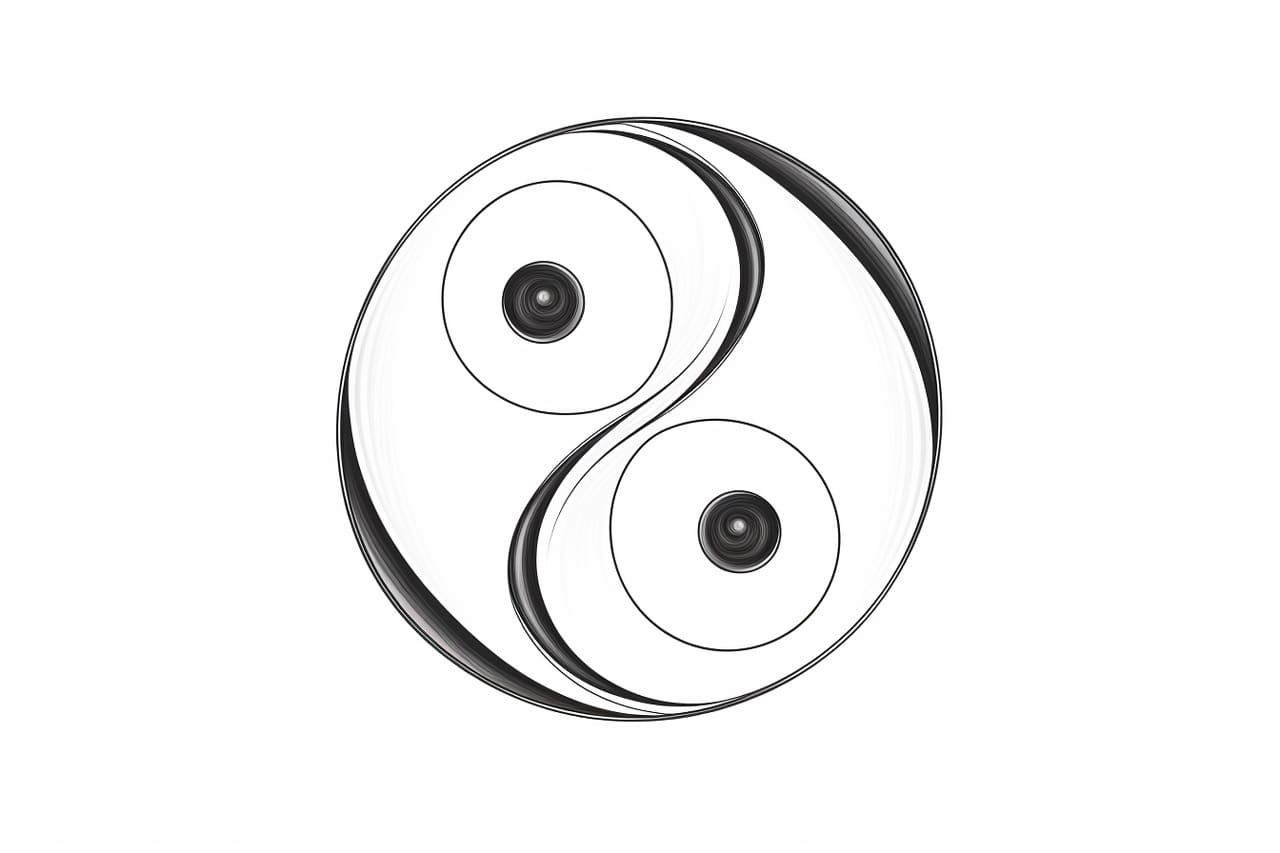
Step 1: Draw a Circle
Start by drawing a large circle in the center of your paper. You can use a compass to create a perfect circle, or simply trace around a round object such as a lid or a glass. This circle will serve as the overall shape of your Yin Yang symbol.
Step 2: Divide the Circle
Now, use your ruler or a steady hand to draw a vertical line across the center of the circle, dividing it into two equal halves. This line will act as a guideline for the placement of the Yin Yang’s contrasting colors.
Step 3: Draw Two Small Circles
Within the upper half of the circle, draw a smaller circle near the top. This circle should be about one-third the size of the overall circle. Repeat the same step within the lower half of the circle, drawing another small circle near the bottom. Make sure these two smaller circles are of the same size.
Step 4: Add the Contrasting Colors
In this step, you will be filling in the Yin Yang’s contrasting colors. Begin by shading the top half of the larger circle with a dark color such as black or deep gray. This represents the Yin, which symbolizes darkness, femininity, and passivity.
Next, shade the bottom half of the larger circle with a light color such as white or a light gray. This represents the Yang, which symbolizes lightness, masculinity, and activity. Make sure to leave the smaller circles within each half unshaded.
Step 5: Add the First Curve
To create the interlocking effect of the Yin Yang, draw a curved line that starts from the bottom left of the circle and ends at the top right. This curve should pass through the center of the two smaller circles you drew earlier. The curve should touch the dark and light colors at the points where they meet the larger circle.
Step 6: Add the Second Curve
Now, draw a symmetrical curved line that mirrors the first curve. This curve should start from the bottom right of the circle and end at the top left, also passing through the center of the two smaller circles. Again, make sure the curve touches the dark and light colors where they intersect with the larger circle.
Step 7: Refine and Adjust
Take a moment to review your Yin Yang drawing and make any necessary adjustments. Ensure that the curves intersect the larger circle at the correct points and that the contrasting colors are evenly balanced. Use an eraser to remove any unnecessary guidelines or stray pencil marks.
Step 8: Finalize and Enhance
Once you are satisfied with the basic structure of your Yin Yang, you can choose to further enhance your drawing. You may want to darken the outer lines of the Yin Yang for a bolder look or add shading to create depth and dimension. Experiment with different techniques and styles to make your Yin Yang unique.
Conclusion
Drawing a Yin Yang can be a rewarding artistic endeavor, allowing you to express the balance and interconnectedness of life through a simple yet powerful symbol. By following these step-by-step instructions and using your creativity, you can create a beautiful Yin Yang drawing. Remember to have fun and enjoy the process! Happy drawing!