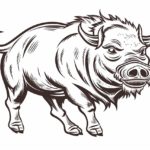
Welcome to this step-by-step tutorial on how to draw a yak! Yaks are fascinating creatures native to the Himalayan region and are known for their shaggy coats and majestic horns. Whether you’re an aspiring artist or just looking for a fun activity, this guide will teach you the techniques to create your very own yak drawing. So, let’s get started!
Materials Required
Before we begin, let’s gather the materials you’ll need for this drawing:
- Pencil (preferably an HB or 2B)
- Eraser
- Drawing paper or sketchbook
- Fine-tip black pen or marker (optional, for inking)
Now that we have our materials ready, let’s dive into the step-by-step instructions.
Step 1: Basic Shape
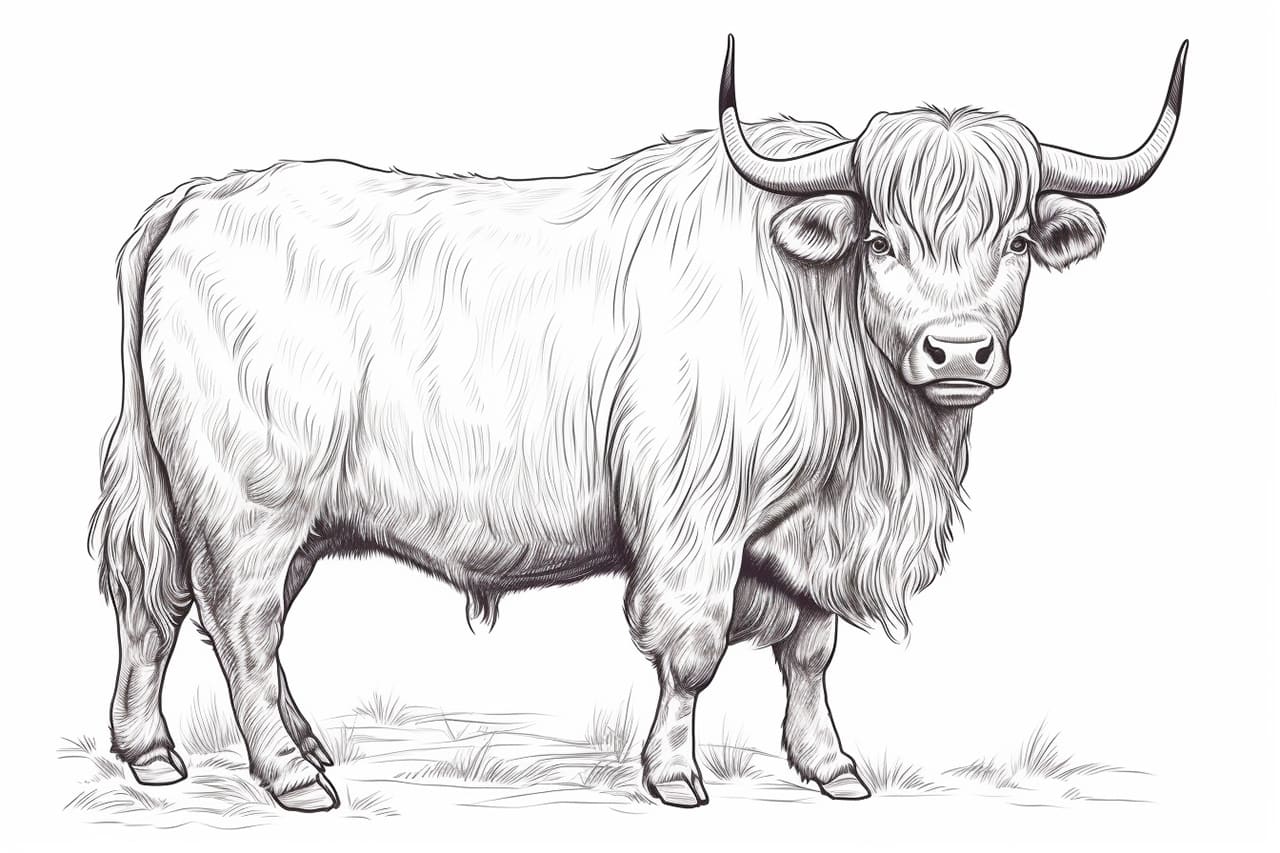
Start by sketching a large oval shape for the yak’s body. This will serve as the foundation for our drawing. Keep the lines light and loose, as we’ll be refining the shapes later.
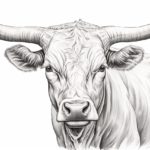
Step 2: Head and Horns
From the upper part of the oval, draw a smaller oval for the yak’s head. Position it slightly tilted for a dynamic look. Then, add two curved lines extending from the top of the head to form the yak’s horns. Yaks have long, curved horns, so take your time to get the shape right.
Step 3: Facial Features
Now, let’s add the yak’s eyes, nose, and mouth. Draw two small circles for the eyes, slightly slanted and evenly spaced. Beneath the eyes, draw a small curved line for the yak’s nose. Add a small curve below the nose to indicate the mouth. Yaks have a slightly upturned mouth, giving them an endearing expression.
Step 4: Ears and Mane
Next, sketch the yak’s ears on either side of its head. Yaks have large, pointy ears, so make sure to capture their shape accurately. Then, draw a set of curved lines extending from the top of the head to represent the yak’s shaggy mane. Add some loose, wavy lines to give the mane a textured appearance.
Step 5: Body Details
Now, let’s work on the body of the yak. Extend the initial oval shape to add volume, making the body wider towards the bottom. Draw two curved lines to outline the chest and belly of the yak. Add some lines within the body to suggest the shaggy fur typical of yaks.
Step 6: Legs and Hooves
To depict the yak’s legs, draw four straight lines extending from the bottom of the body. Curve the lines to create joints at the knees. At the end of each leg, draw a set of small, rounded shapes to represent the hooves. Yaks have sturdy legs and hooves adapted for rugged terrains.
Step 7: Tail
Moving on to the tail, sketch a long, tapered shape extending from the backside of the yak’s body. Add some lines within the tail to simulate the texture of fur. Yaks have a bushy tail that helps protect them from harsh weather conditions.
Step 8: Refine and Clean Up
Now that you have the basic structure in place, take a moment to refine and clean up your drawing. Erase any unnecessary lines and darken the essential outlines. This will make your drawing more defined and polished.
Step 9: Add Details
To make your yak drawing more realistic, add some details and texture to its features. Pay attention to the curves and contours of the horns, the shaggy fur, and the facial features. Use short, curved lines and small strokes to build up the texture gradually.
Step 10: Inking (Optional)
If you prefer a bolder look, you can now go over your pencil lines with a fine-tip black pen or marker. Inking can give your drawing a more finished appearance. Take your time and steady your hand to create smooth, confident lines.
Congratulations, you’ve successfully drawn a yak! Wasn’t that a fun and rewarding experience? Remember, practice makes perfect, so don’t hesitate to keep exploring and refining your skills. Keep experimenting with different poses and perspectives to further develop your artistry.
Conclusion
In this tutorial, we learned how to draw a yak step by step. By following these simple instructions and using your creativity, you can create your very own yak drawing. Remember to take your time, enjoy the process, and don’t be afraid to make mistakes. With practice, you’ll be amazed at how far you can progress as an artist.
Now, grab your pencil and let your imagination roam as you create beautiful yak illustrations. Happy drawing!