How to Draw a Whale
Learn how to draw a whale with this step-by-step tutorial. Capture the grace and beauty of these magnificent creatures in your own artwork.
Materials You'll Need
- Pencil
- Paper
- Eraser
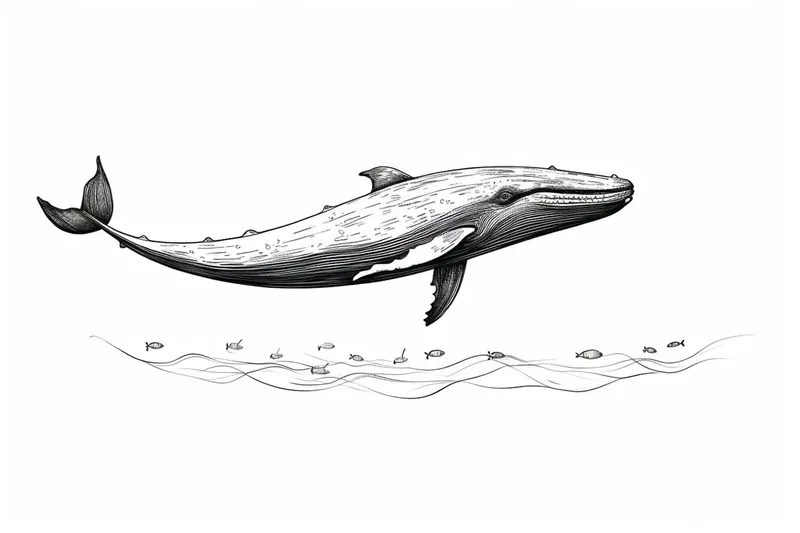
Whales are among the most awe-inspiring creatures on our planet, renowned for their enormous size, graceful movements, and gentle demeanor. These magnificent marine mammals have fascinated humans for centuries, appearing in countless works of art, literature, and folklore. Learning how to draw a whale gives you the unique opportunity to capture the beauty and majesty of these ocean giants, while also deepening your understanding of their distinctive shapes and features. From their streamlined bodies to their powerful tails and expressive eyes, each element of a whale offers a new challenge and a rewarding artistic experience.
Whether you're a budding artist looking to develop your skills or simply someone who loves marine life, mastering how to draw a whale can be both fun and educational. This subject is perfect for practicing foundational drawing techniques such as outlining basic shapes, adding volume and dimension, and refining details to create a realistic effect. Whales can be depicted in a variety of poses and styles, making this tutorial suitable for beginners who want to start with simple forms, as well as more advanced artists interested in experimenting with shading, textures, and dynamic compositions. Drawing whales can also be a wonderful way to express your creativity, create ocean-themed artwork, or add to a nature-inspired portfolio.
As you follow along with this step-by-step guide on how to draw a whale, remember that every artist's journey is unique. Don't be afraid to try different techniques, make adjustments, and let your imagination swim freely. With patience and practice, you'll soon be able to bring these gentle giants to life on your page. So gather your drawing supplies, dive into the process, and enjoy the rewarding adventure of creating your very own whale illustration!
Materials Required:
Before we dive into the drawing process, make sure you have the following materials at hand:
- [Drawing paper or sketchbook](https://yonderoo.com/best-sketchbooks-for-artists/)
- Pencils (ranging from 2H to 6B)
- Eraser (preferably kneaded eraser)
- Fine tip markers or pens
- Blending tools (such as a blending stump or cotton swabs)
- Reference image of a whale (for inspiration and guidance)
Having these materials ready will ensure a smooth drawing experience and help you achieve the desired results.
Step 1: Start with Basic Shapes
Begin by lightly sketching the basic shapes that form the structure of the whale. Whales have a large, rounded body, so start with an oval shape that represents the main body. Add a smaller oval at one end to indicate the head, and another elongated oval at the opposite end for the tail.
Step 2: Add the Fin and Tail
Next, it's time to add more details to your whale drawing. Sketch a triangular-shaped fin on the upper part of the whale's body, near where the head meets the body. This fin helps whales maintain their balance and stability in the water. Then, draw a simple, curved shape for the tail at the back of the whale's body. The tail is an essential feature that propels the whale through the water.
Step 3: Define the Head and Mouth
Now, let's focus on the head of the whale. Using the basic oval shape as a guide, refine the outline of the head, making it slightly narrower towards the front. Add a small, curved line to represent the whale's mouth, which is usually located on the underside of the head. Whales have a unique feature called a rostrum, a protruding snout that can vary in shape and size depending on the species.
Step 4: Create the Eye and Blowhole
To give your whale drawing more life, add the eye and blowhole. Position the eye on the side of the head, just above the mouth. Whales have comparatively small eyes, so keep it relatively small in size. Draw a simple oval or circular shape to represent the eye. Above the eye, draw a small, sideways teardrop shape to indicate the blowhole, where whales exhale and inhale air.
Step 5: Refine the Body and Tail
Now it's time to refine the body of your whale drawing. Start by carefully outlining the body shape, making it smooth and curvy. Pay attention to the contours and proportions, as they play a crucial role in capturing the likeness of a whale. Also, refine the shape of the tail, making it more detailed and dynamic. Whales have different tail shapes depending on the species, so refer to your reference image for guidance.
Step 6: Add Details and Texture
To make your whale drawing more realistic, add some details and texture. Whales have a smooth skin texture, which can be represented by drawing fine lines or crosshatching lightly on the body. Be careful not to overdo it, as subtlety is key. Add small details such as wrinkles or folds near the mouth and eye area to add character to your drawing.
Step 7: Erase and Clean up
Take a step back and evaluate your drawing. Use an eraser to gently remove any stray lines or smudges. Clean up the drawing by erasing any unnecessary construction lines and refining the outline of the whale. This will give your drawing a polished look.
Step 8: Add Shadows and Highlights
To create depth and dimension in your whale drawing, it's important to add shadows and highlights. Identify the direction of your light source and use a range of pencils from light to dark to create shading. Start by lightly shading the areas of the whale that are farther away from the light source, and gradually build up the shadows by increasing the pressure on your pencil. Use an eraser to create highlights on the shiny parts of the whale's body, such as the water droplets or glimmering skin.
Step 9: Finalize the Drawing
In the final step, review your drawing and make any necessary adjustments. Look for any areas that need refinement or additional shading. Take your time to ensure that your whale drawing looks balanced and captures the essence of these magnificent creatures. Once you are satisfied with the results, you can outline the drawing with a fine-tip marker or pen to give it a more finished look.
Tip: When drawing a whale, start by lightly sketching its body using elongated ovals and gentle curves to establish its impressive length and smooth, streamlined form—remember that whales are more curved and tapered than they might first appear! Focus on keeping the back arched and the belly slightly rounded, with the head and tail flukes proportionally smaller compared to the body. Use a soft pencil (like a 2B or 4B) for these initial lines so you can easily erase and refine the contours as you go. Once you're satisfied with the overall shape, gradually build up details like the fins, mouth line, and subtle texture along the skin, paying close attention to reference images for accuracy. This step-by-step approach helps prevent common mistakes, like making the whale too bulky or misplacing its fins, and sets a strong foundation for adding shading and depth later on.
Conclusion
Congratulations! You have successfully learned how to draw a whale. By following these step-by-step instructions and using your own creativity, you have created a beautiful whale drawing. Drawing whales can be a challenging but rewarding experience, allowing you to appreciate and understand these incredible animals more deeply.
Remember, practice makes perfect. Don't be discouraged if your first attempt doesn't turn out exactly as you envisioned. Keep practicing and experimenting with different techniques and styles. With time and persistence, your drawings will continue to improve.
So, grab your pencils and start exploring the fascinating world of whale drawings. Enjoy the process, have fun, and let your creativity soar!
Fun Facts About Whale
- The blue whale is the largest animal ever known to have lived on Earth, reaching lengths of up to 100 feet.
- Whales are mammals, which means they breathe air through lungs and give birth to live young.
- Some whale species, like the humpback whale, are famous for their complex songs that can travel great distances underwater.
- Whales can be found in every ocean on Earth, from the Arctic to the Antarctic.
- Unlike fish, whales have horizontal tail fins called flukes, which they move up and down to swim.
- Some whales, like the bowhead whale, can live over 200 years, making them among the longest-lived mammals.
- Whales play a crucial role in the marine ecosystem by helping to regulate the food chain and nutrient cycles.
- Orcas, also known as killer whales, are actually the largest members of the dolphin family.
- Some baleen whales can filter up to 4 tons of krill per day using their baleen plates.
Suggestions for Scenes and Settings for Whale Drawings
- A majestic blue whale gliding peacefully through the deep blue ocean, surrounded by shimmering schools of fish.
- A playful humpback whale breaching the water's surface, creating massive splashes under a radiant sunset sky.
- A pod of orcas swimming together near icy arctic waters, with distant glaciers and snow-capped mountains in the background.
- A mother whale gently nudging her curious calf in a tranquil underwater scene filled with swaying seaweed and coral.
- A close-up of a whale's eye and textured skin, capturing the wisdom and emotion of these gentle giants.
- A fantastical scene of a whale soaring among the clouds, blending the sea and sky in a dreamlike illustration.
- A whale swimming beneath a boat, giving a unique perspective from underwater looking up at both whale and vessel.
- A dramatic encounter between a whale and a group of dolphins, highlighting their size difference and playful interaction.
- An ancient whale skeleton resting on the ocean floor, telling a story of the passage of time and the mysteries of the deep.
- A whale illuminated by shafts of sunlight filtering through the water, creating a magical, ethereal atmosphere.