How to Draw a Troll
Learn how to draw a troll with this step-by-step tutorial. From basic shapes to intricate details, this guide will help you create your very own troll character.
Materials You'll Need
- Pencil
- Paper
- Eraser
Trolls have captivated the imagination of artists and storytellers for centuries, featuring in folklore, fantasy novels, and popular films as mysterious, larger-than-life creatures. Their exaggerated features—such as oversized noses, wild hair, and rugged appearances—make trolls a fascinating subject to draw, allowing for endless creativity and personal interpretation. Whether you envision your troll as a fearsome monster lurking under a bridge or a quirky, misunderstood character, learning how to draw a troll gives you the opportunity to explore character design and bring your own version of this legendary being to life.
Many artists are drawn to trolls because they offer a break from traditional portraiture and realistic drawing, making them perfect for those who want to experiment with fantasy art or build their own creatures for stories, games, or comics. This tutorial on how to draw a troll is suitable for artists of various skill levels. Beginners will benefit from the clear, step-by-step instructions, while more experienced artists can use these guidelines as a springboard to add personal flair and detail. Throughout the process, you'll practice core techniques such as basic shapes construction, line work, shading, and texturing, which are essential skills for any form of illustration.
Don't worry if you're new to drawing fantasy creatures—creating a troll can be a fun and rewarding challenge! With a little patience and creativity, you'll soon have a unique troll character to add to your portfolio or share with friends. Grab your materials and get ready to embark on an imaginative journey as we dive into the world of trolls, step by step. Let's unleash your creativity and discover just how much fun drawing a troll can be!
Materials Required
Before we dive into the drawing process, let's make sure we have all the necessary materials at hand. Here's what you'll need:
- Drawing paper or sketchbook
- Pencils (HB, 2B, 4B)
- Eraser
- Fine-tipped pens or markers (optional)
- Colored pencils or markers (optional)
Now that we have the materials ready, let's get started on our troll drawing!
Step 1: Basic Shape Guidelines
To begin, lightly sketch an oval shape in the center of your paper. This will serve as the troll's head. Below the oval, draw another slightly larger oval for the troll's body. These basic shapes will act as guidelines to help you maintain proportion as you proceed with the drawing.
Step 2: Facial Features
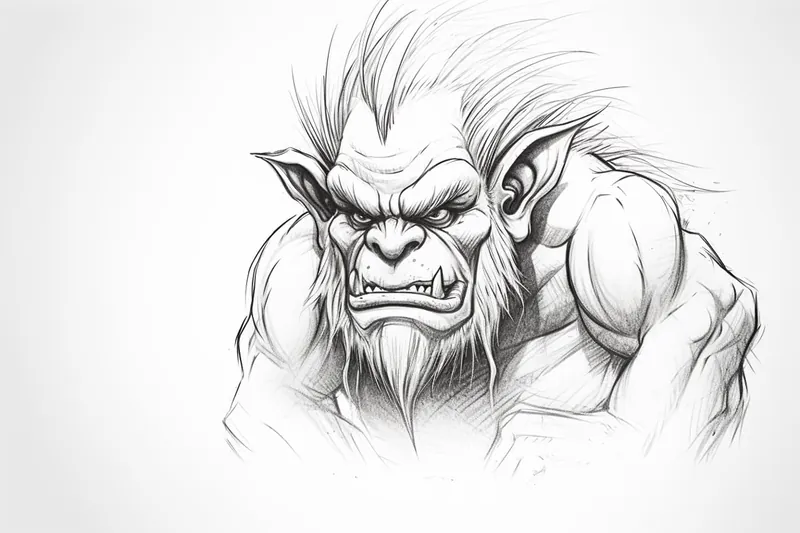
Now, it's time to add the troll's facial features. Start by drawing two large circular eyes within the upper part of the head oval. Place them slightly apart from each other. Next, draw a small triangular nose below the eyes, and a wide, grinning mouth beneath the nose. To create a more menacing expression, consider adding sharp, pointed teeth.
Step 3: Hair and Ears
Trolls are often depicted with wild and unkempt hair. To capture this characteristic, sketch a mass of messy hair on top of the troll's head. Experiment with different shapes and textures to add personality to your troll. Next, draw a pair of large, pointed ears on each side of the head. These ears can be positioned slightly higher than the eyes for an exaggerated effect.
Step 4: Body and Limbs
Now, let's move on to the troll's body and limbs. Start by adding thickness and volume to the previously drawn body oval. Extend the outline of the body downwards, creating a rounded shape. Next, draw two thick arms extending from the sides of the body. Add muscular definition by lightly sketching lines along the arms. For the hands, use simple shapes such as rectangles for the palms and elongated ovals for the fingers. Lastly, draw two sturdy legs with curved lines, making sure they are proportionate to the body.
Step 5: Clothing and Accessories
Trolls are often depicted wearing tattered and rugged clothing. Use your imagination to design the troll's outfit. Sketch torn sleeves, ragged pants, and mismatched boots. Add details like patches, stitches, or even belts and buckles for added interest. Additionally, you can give your troll accessories such as a necklace, bracelet, or even a weapon like a club or wooden staff.
Step 6: Refine and Add Details
Tip: As you work through the drawing process, don't hesitate to take breaks to step back and evaluate your work from a distance; this can help you spot areas that may need adjustment or refinement. Additionally, experimenting with different facial expressions and poses can add depth to your troll character, making it more dynamic and engaging.
Now that you have the basic structure of your troll, it's time to refine the drawing and add more details. Take a closer look at each section of your troll and make any necessary adjustments to ensure proper proportions and symmetry. Once you are satisfied, start adding texture and additional elements to bring your troll to life. You can enhance the depth and dimension of your drawing by adding shading, wrinkles, and fur texture.
Step 7: Inking and Coloring (optional)
If you prefer a more finished look, you can outline your drawing with fine-tipped pens or markers. This will give your troll a clean and defined appearance. Wait until the ink is dry before carefully erasing any visible pencil lines. If you'd like, you can also add color to your drawing using colored pencils or markers. Experiment with different shades to give your troll a vibrant and eye-catching look.
Conclusion
Congratulations! You have successfully learned how to draw a troll from start to finish. By following these step-by-step instructions and letting your creativity roam free, you can create your very own unique troll character. Remember to practice regularly and experiment with different styles and techniques. Have fun and happy drawing!
Fun Facts About Troll
- The word "troll" originates from Old Norse mythology, where trolls were often depicted as giants or supernatural beings.
- In Scandinavian folklore, trolls are said to turn to stone if exposed to sunlight, a trait popularized in many modern stories.
- Trolls have appeared in famous literature, including J.R.R. Tolkien's "The Hobbit," where they play a memorable role.
- Norwegian fairy tales often portray trolls as living in remote mountains or forests, far from human settlements.
- The iconic "Three Billy Goats Gruff" fairy tale features a troll living under a bridge, a motif that has become a classic in children's literature.
- Modern pop culture has reimagined trolls in various ways, from fearsome monsters in fantasy films to friendly characters in animated movies.
- In Iceland, trolls are part of the country's rich folklore, and some locals still believe in their existence.
- The word "troll" is also used in internet slang to describe someone who deliberately provokes others online.
Suggestions for Scenes and Settings for Troll Drawings
- A towering troll lurking under a crumbling stone bridge, peering curiously at travelers passing above.
- A gentle troll tending to a magical forest garden, surrounded by oversized mushrooms and glowing flowers.
- A mischievous troll hiding behind a waterfall, its wild hair blending with the rushing water.
- A clan of trolls gathered around a campfire in a rocky mountain cave, telling stories and roasting food.
- A troll attempting to fix a broken wooden cart on a misty, enchanted path at dawn.
- A troll and a group of woodland creatures sharing a meal in a sun-dappled glade.
- A fierce troll defending its treasure hoard in a dark, labyrinthine underground lair.
- A wise, elderly troll offering guidance to a lost traveler in a moonlit forest clearing.
- A playful troll splashing in a muddy swamp, with frogs and dragonflies all around.
- A troll disguised in human clothing, awkwardly trying to blend in at a village market.