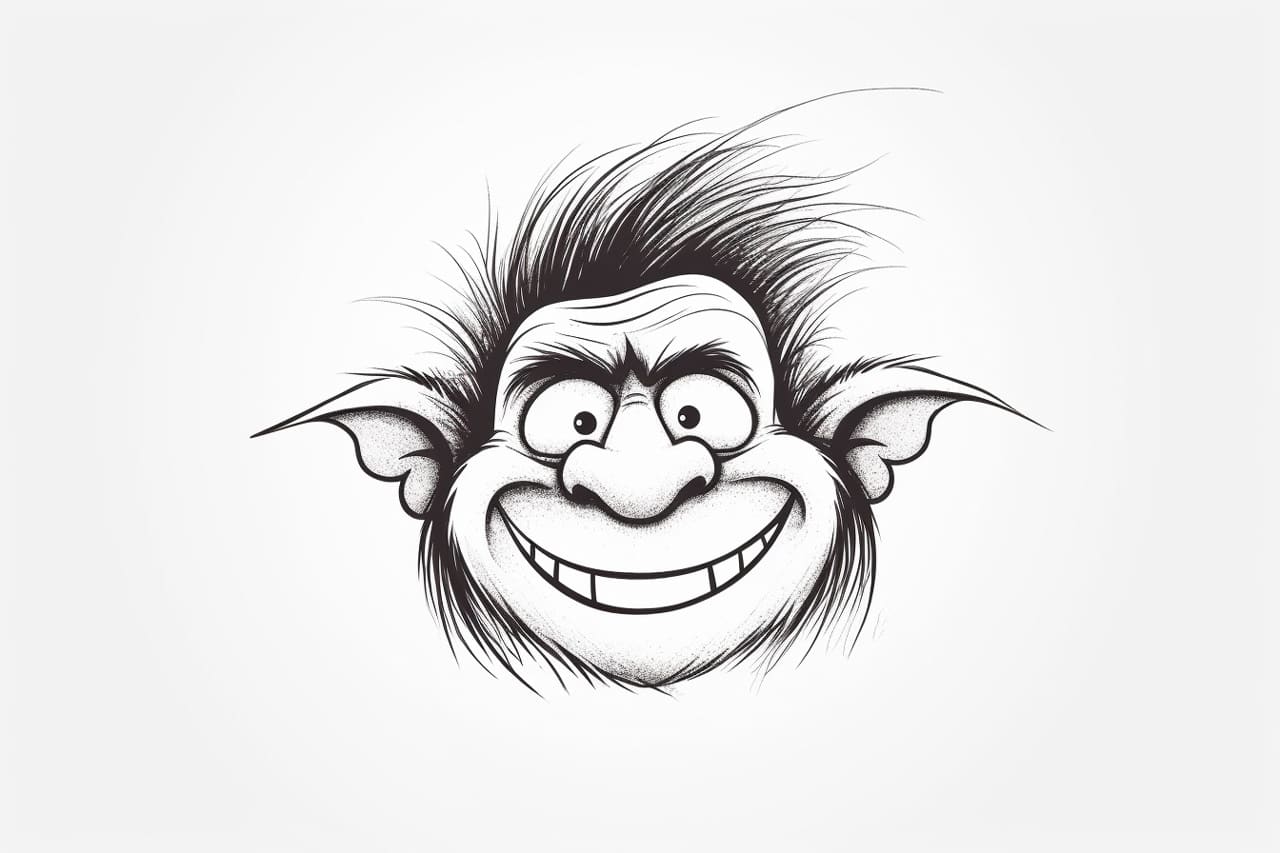
Trolls are mythical creatures that have gained popularity in recent years, particularly in internet culture. One of the most recognizable symbols of trolls is their mischievous grin, commonly known as the Troll Face. In this article, I will guide you through the step-by-step process of drawing a Troll Face. By the end, you will have your very own troll drawing to share with your friends and family.
Materials Required:
- Drawing paper
- Pencil
- Eraser
- Fine-tip black marker
- Colored pencils or markers (optional)
Step 1: Outline the Shape of the Face
Start by drawing a large oval shape in the center of the paper. This oval will serve as the outline of the troll’s face. Make sure it is proportionate and symmetrical.
Step 2: Add the Eyes
Place two circles within the oval shape to represent the troll’s eyes. These eyes should be slightly elongated, tilted inward, and positioned towards the top of the oval. Leave some space between them for the nose and mouth.
Step 3: Draw the Eyebrows
Create a pair of arched eyebrows just above each eye. These eyebrows should be thick and slanted downwards towards the center of the face, giving the troll a mischievous expression.
Step 4: Add the Nose
Draw a small oval shape beneath the space between the eyes. This will be the troll’s nose. The oval should be placed horizontally and should not be too big.
Step 5: Draw the Mouth
Now, let’s create the troll’s iconic mischievous grin. The mouth will be in the shape of a wide, upward curving line that starts from one side of the oval and ends on the other side. Imagine you are drawing a semi-circle across the face, with the ends curving upwards. The troll’s mouth should take up a significant portion of the face.
Step 6: Add the Teeth
Inside the open mouth, draw a set of jagged teeth using triangular shapes. Place the teeth at regular intervals along the mouth line. Add some smaller triangles at the top and bottom of the mouth to represent the lower and upper teeth.
Step 7: Add the Tongue
Draw a curved line inside the troll’s mouth, just below the upper set of teeth. This line will represent the tongue. Make sure it is not too big or too small, and try to give it a gentle curve.
Step 8: Add the Details
Now it’s time to add some defining features to our troll face. Draw two small circles for the pupils inside the eyes, leaving a small white spot to indicate the shine. You can also shade in the rest of the eye to give it more depth. Add some lines on the nose to create a suggestion of nostrils and some wrinkles on the forehead and cheeks to add character to the face.
Step 9: Outline with a Marker
Once you are satisfied with your sketch, carefully go over the lines with a fine-tip black marker to make the drawing more bold and defined. Trace the outline of the face, eyes, nose, mouth, and teeth. Be patient and take your time to ensure a clean and precise final result.
Step 10: Color Your Troll Face (optional)
If you want to add some color to your troll face, now is the time to do so! You can use colored pencils or markers to bring your artwork to life. Be creative with your choice of colors and have fun experimenting with different combinations. You can color the face, eyes, tongue, and teeth using any colors you like.
Conclusion
Congratulations! You have successfully learned how to draw a Troll Face. With just a few simple steps, you created a playful and mischievous character that is instantly recognizable. Remember to practice and experiment with different expressions and colors to develop your own unique troll artwork. Share your drawings with others and spread some troll-inspired fun!