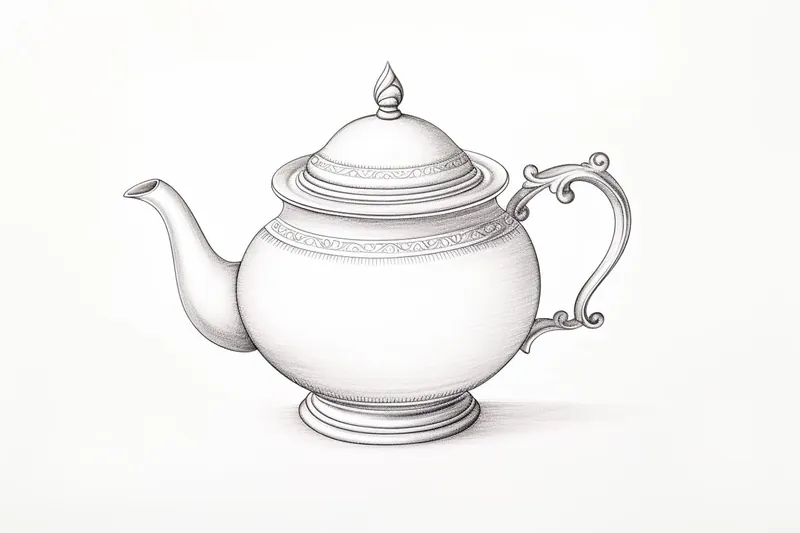
How to Draw a Teapot
Learn how to draw a teapot with this step-by-step tutorial. From basic shape to final details, create a realistic and detailed teapot drawing with ease.
Materials You'll Need
- Pencil
- Paper
- Eraser
The humble teapot is more than just a vessel for brewing tea—it's a symbol of comfort, hospitality, and everyday artistry found in kitchens around the world. Teapots come in a dazzling array of shapes, sizes, and materials, from elegant porcelain heirlooms to modern, minimalist designs. Drawing a teapot offers artists a chance to explore both functional design and decorative detail, making it a rewarding subject for sketching. Whether you're fascinated by the reflective surfaces of a metal teapot or the intricate patterns on a ceramic one, learning how to draw a teapot can help you capture the beauty of this classic object and enhance your observational skills.
Many artists are drawn to still life subjects because they provide a perfect opportunity to practice fundamental drawing techniques such as proportion, perspective, and shading. The teapot, with its gentle curves, rounded body, and distinctive spout and handle, is an excellent object for honing your skills in rendering three-dimensional forms on a two-dimensional surface. In this tutorial on how to draw a teapot, you'll be guided through each step, from sketching the basic shapes to adding shadows and highlights that give your drawing depth and realism. Whether you're a beginner looking to build your confidence or a more experienced artist wanting to refine your technique, this exercise will help you develop a keener eye for detail and a steadier hand.
Don't worry if this is your first time drawing a teapot—patience and practice are all you need! By the end of this tutorial, you'll have a teapot drawing you can be proud of, and you might even be inspired to create your own unique still life compositions. So gather your materials, find a comfortable workspace, and let's embark on this creative journey together. You're sure to surprise yourself with what you can achieve!
Materials Required
Before we begin, gather the following materials:
- [Drawing paper (preferably a heavier weight or sketchbook](https://yonderoo.com/best-sketchbooks-for-artists/))
- Pencils (preferably a range of graphite pencils such as HB, 2B, and 4B)
- Eraser (preferably a kneaded or soft eraser)
- Ruler
- Compass
- Reference photo (optional, but helpful for accuracy)
Now that you have your materials ready, let's dive into the steps of drawing a teapot.
Step 1: Draw the Basic Shape
Start by drawing a large oval shape on your paper. This will form the body of the teapot. Make sure to draw it lightly, as you will be refining and adding details later on. Use your ruler to help you create a symmetrical oval shape.
Step 2: Add the Handle
To the right side of the oval shape, draw a curved line that slightly angles downwards. This line will form the handle of the teapot. Make sure it is positioned correctly in relation to the body of the teapot. You can use your ruler to help you measure and align the handle.
Step 3: Draw the Spout
On the opposite side of the handle, draw another curved line that angles slightly upwards. This line will form the spout of the teapot. Ensure that it is positioned correctly and is aligned with the handle. Take your time to get the shape just right, as the spout is a defining feature of a teapot.
Step 4: Refine the Shape
Now that you have the basic structure of the teapot, it's time to refine the shape. Use your pencil to darken the outline of the teapot, making it more distinct. Pay attention to the curves and proportions, making sure they are accurate and pleasing to the eye.
Step 5: Add Details and Patterns
Teapots often have decorative details and patterns, so now is the time to add them. Look at your reference photo or use your imagination to create a design that suits your teapot. You can add lines, dots, flowers, or any other patterns that you like. Take your time with this step and have fun experimenting with different designs.
Step 6: Shade and Add Texture
To give your teapot drawing depth and dimension, it's important to add shading and texture. Start by identifying the light source in your drawing. This will determine where the light and shadows fall on the teapot. Use your graphite pencils to add shading, starting with lighter tones and gradually building up to darker ones. Pay attention to the curves and contours of the teapot, shading accordingly to create a three-dimensional effect.
Step 7: Refine and Erase
Now that your teapot drawing is taking shape, take a step back and assess the overall composition. Are there any areas that need refining or adjusting? Use your eraser to make any necessary corrections or lighten areas that may have become too dark. Take your time with this step, as it can significantly enhance the overall quality of your drawing.
Step 8: Finalize the Drawing
Once you are satisfied with the overall look of your teapot drawing, it's time to finalize it. Go over the outline and details, making sure they are clean and crisp. Add any final touches and adjustments to bring your drawing to a polished finish.
Tip: To accurately capture the essence of a teapot, start by breaking it down into basic geometric shapes: a cylinder for the body, a cone for the spout, and a sphere for the lid. Use a light pencil to sketch these shapes, focusing on the proportions and angles to ensure they harmonize well together. As you refine your drawing, pay close attention to the teapot's contours; observe how light interacts with its surface and add subtle curves to create depth. When it comes to shading, consider using a soft pencil or blending tool to achieve smooth transitions from light to dark, mimicking the reflective qualities of metal or the texture of ceramic. Don't forget to include highlights where the light hits, as these small details will bring your teapot to life!
Conclusion
Congratulations! You have successfully completed your teapot drawing. By following these step-by-step instructions, you have learned how to create a realistic and detailed representation of a teapot. Remember to practice regularly to enhance your drawing skills and explore different styles and techniques. Drawing teapots can be a great exercise in observation and precision, and with time and practice, you'll be able to tackle even more complex subjects. So keep creating and enjoy the process!
Fun Facts About Teapot
- The world's oldest known teapot dates back to the Yuan Dynasty in China, around the 13th century.
- The famous "Utah Teapot" is a standard reference object in computer graphics.
- Teapots are traditionally made from materials like porcelain, clay, and metal, each affecting the flavor of the tea.
- The British "Brown Betty" teapot, made from red clay, is renowned for its heat retention.
- In 1956, the song "I'm a Little Teapot" became a popular children's tune.
- Yixing teapots from China are prized for their ability to enhance tea flavor over time.
- The "teapot effect" describes how liquid dribbles down the spout, a phenomenon studied by physicists.
- Teapots have been featured in art and literature for centuries, symbolizing hospitality and comfort.
- Some teapots are designed with built-in infusers to make brewing loose-leaf tea easier.
Suggestions for Scenes and Settings for Teapot Drawings
- A vintage porcelain teapot sitting on a lace-covered table, surrounded by delicate teacups and fresh flowers.
- A modern, minimalist teapot with geometric designs, placed next to a stack of art books and a steaming mug.
- An ornate metal teapot reflecting a cozy kitchen scene, with fruit and pastries nearby.
- [A whimsical teapot shaped like an animal (e.g., a cat or an elephant](https://yonderoo.com/how-to-draw-an-elephant/)) pouring tea into a quirky cup.
- A teapot as the centerpiece of a tea party in a sunlit garden, with guests enjoying afternoon tea.
- A close-up study of a teapot's spout and handle, focusing on reflections and subtle details in the material.
- An old, chipped teapot resting on a rustic wooden windowsill, with soft morning light streaming in.
- A teapot being used in a traditional tea ceremony, with careful attention to cultural details and props.
- A fantasy-inspired teapot glowing with magical energy, surrounded by floating tea leaves and mystical objects.
- A collection of teapots from different eras and cultures displayed on a shelf, each with unique shapes and patterns.