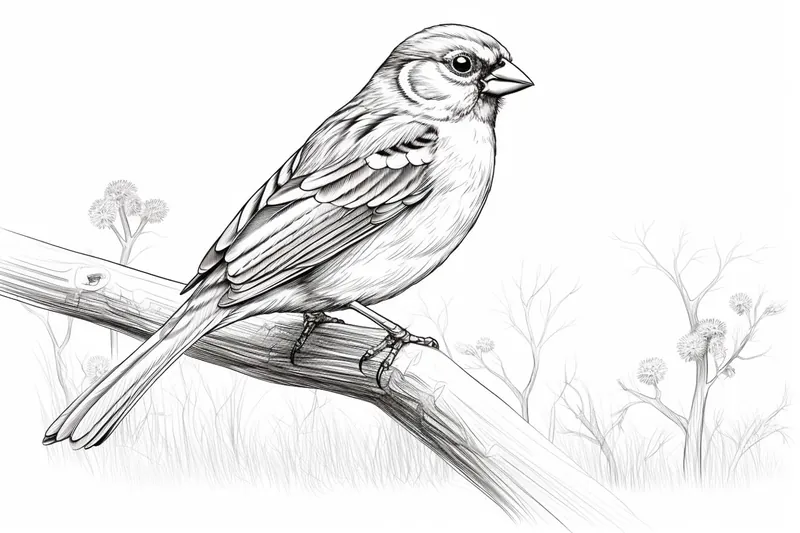
How to Draw a Sparrow
Learn how to draw a sparrow with this step-by-step tutorial. Create a beautiful and detailed drawing of a sparrow by following these easy instructions.
Materials You'll Need
- Pencil
- Paper
- Eraser
Sparrows are small, lively birds often found in gardens, parks, and city streets around the world. Known for their cheerful chirping and agile movements, sparrows have long been symbols of simplicity, freedom, and everyday beauty in art and literature. Learning how to draw a sparrow allows artists of all levels to capture the delicate features and charming personality of these beloved birds. Whether you are inspired by their presence in your own backyard or wish to add a touch of nature to your sketchbook, sparrows make a wonderful subject for developing your drawing skills.
Tackling a tutorial on how to draw a sparrow is a rewarding way to practice observing proportion, feather texture, and natural postures. This lesson is designed to guide both beginners and more experienced artists through each stage of the process, from basic shapes to refined details. You'll learn essential techniques such as layering pencil strokes to mimic feathers, shading to convey volume, and adding subtle highlights to bring your drawing to life. Even if you're new to bird illustration, following these clear, step-by-step instructions will help you build confidence and enjoy the creative journey.
So gather your drawing materials, get comfortable, and remember that each line you make brings you closer to mastering a delightful new subject. With patience and practice, you'll soon have a beautiful sparrow illustration to be proud of. Let's get started and discover just how enjoyable learning how to draw a sparrow can be!
Materials Required
Before we start, let's gather the materials you'll need for this project:
- Drawing paper: Choose a medium-weight paper that is smooth and suitable for pencil drawings.
- Pencils: You will need a range of pencils with different lead hardness. Start with an HB or 2B for sketching, and have a few softer pencils like 4B, 6B, or 8B for shading.
- Eraser: Use a kneaded eraser for lighter marks and a vinyl or gum eraser for more precise erasing.
- Blending stump or tortillon: These cylindrical tools are useful for blending and smoothing pencil strokes.
- Reference image: Find a clear and detailed reference photo of a sparrow to guide your drawing. You can use a bird identification book, a wildlife magazine, or search for images online.
Now that you have everything ready, let's dive into the steps of drawing a sparrow.
Step 1: Basic Shapes
Begin by lightly sketching two overlapping circles. The larger circle will represent the sparrow's body, while the smaller one will be its head. Remember to keep your pencil strokes faint, as you will be refining the shapes later.
Step 2: Outline the Body and Head
Using the basic shapes as a guide, start outlining the rough shape of the sparrow's body and head. Pay attention to the proportions and curves of the bird. Sparrows have a plump body and a rounded head, so make sure to capture these features in your drawing.
Step 3: Add the Beak and Eyes
Now it's time to add some facial features. Sketch a small triangle for the beak, positioned towards the lower part of the head. Sparrows have tiny beaks, so keep it small and precise. Next, draw two almond-shaped eyes above the beak. Pay attention to the position and size of the eyes, as they are essential for capturing the sparrow's personality.
Step 4: Sketch the Wings and Tail
Moving on to the wings, lightly outline the general shape of the sparrow's wings on either side of the body. Sparrows have short and rounded wings, so try to replicate that in your drawing. Next, sketch the tail feathers at the back of the body. Keep the tail relatively short, as sparrows do not have long tails like some other bird species.
Step 5: Refine the Details
Now that you have the basic structure of the sparrow in place, it's time to refine the details. Start by adding depth and definition to the body, head, wings, and tail. Pay attention to the curves, feathers, and texture of the bird. Sparrows have a mottled brown body with darker streaks, so use short, quick strokes to represent the feathers.
Step 6: Focus on the Face
The face is the most expressive part of the sparrow, so let's give it some attention. Add details to the beak, eyes, and feathers around the head. Use small, curved lines to represent the feathers, and make sure to add shading to create depth and realism. Take your time to capture the unique features of the sparrow, as they will bring your drawing to life.
Step 7: Shading and Texture
To enhance the realism of your drawing, focus on shading and adding texture. Observe the reference photo closely and replicate the patterns and textures of the sparrow's feathers. Use softer pencils like 4B or 6B to create darker areas and shadows, and blend the pencil strokes with a blending stump for a smoother appearance.
Step 8: Final Touches
Take a step back and evaluate your drawing. Are there any areas that need more depth or details? Make any necessary adjustments before moving on to the final touches. Give some extra attention to the eye area, as it can greatly affect the overall expression of the sparrow. Add highlights to the eyes and other shiny areas using an eraser, and refine any lines or details that need improvement.
Tip: To effectively capture the essence of a sparrow, start with light, loose sketches to block out the basic shapes—think of the body as an oval and the head as a circle that slightly overlaps. Use a soft pencil, like a 2B, for these initial lines; this allows for easy adjustments as you refine your drawing. Pay special attention to the proportions of the sparrow's features—its round body, short tail, and small beak are key to portraying its character. Once you have the basic outline, switch to a harder pencil, such as an H or 2H, to add feather details and texture; layering short, curved strokes can help create the illusion of soft feathers. Don't forget to observe real sparrows if possible, as their natural poses and movements can provide inspiration for dynamic compositions!
Conclusion
Congratulations on completing your sparrow drawing! By following these step-by-step instructions, you have created a beautiful representation of this charming bird. Remember, practice makes perfect, so keep drawing and exploring different techniques. With time, you'll refine your skills and be able to capture the beauty of any bird you desire.
So grab your pencils and paper, and let your creativity take flight as you embark on your artistic journey of drawing sparrows.
Fun Facts About Sparrow
- The house sparrow is one of the most widely distributed wild birds in the world, found on every continent except Antarctica.
- Sparrows are known for their cheerful chirping, which they use to communicate and defend their territory.
- Unlike many other birds, sparrows often build their nests in close proximity to humans, sometimes even inside buildings.
- Male house sparrows have a distinctive black bib on their chest, which signals their age and dominance.
- Sparrows primarily eat seeds and grains, but they will also consume insects, especially during the breeding season.
- The scientific name for the house sparrow is Passer domesticus, which reflects its close association with human habitats.
- Sparrows play an important role in controlling insect populations, making them beneficial for gardens and agriculture.
- Some species of sparrow, like the Eurasian tree sparrow, are considered symbols of good luck and happiness in various cultures.
Suggestions for Scenes and Settings for Sparrow Drawings
- A sparrow perched on a blossoming tree branch in early spring, surrounded by delicate flowers.
- A lively city street scene with sparrows hopping near a café table, pecking at scattered crumbs.
- A close-up of a sparrow bathing in a shallow garden birdbath, splashing water droplets around.
- A pair of sparrows building a nest together under the eaves of a rustic house or barn.
- A single sparrow singing joyfully from a wrought-iron fence as morning light glows behind it.
- A flock of sparrows in mid-flight, creating dynamic movement against a soft sky.
- A sparrow resting on a weathered park bench, surrounded by fallen autumn leaves.
- A young sparrow being fed by its parent on a leafy garden bush.
- A sparrow nestled in tall grass, partially hidden, with dewdrops glistening in the sunlight.
- A whimsical scene of a sparrow interacting with other backyard creatures, such as butterflies or squirrels.