How to Draw a Snowy Owl
Learn how to draw a snowy owl with this step-by-step drawing tutorial. Capture the beauty and grace of this magnificent bird on paper. Practice regularly and enhance your drawing skills.
Materials You'll Need
- Pencil
- Paper
- Eraser
Snowy owls are truly magnificent birds, instantly recognizable by their striking white plumage and piercing yellow eyes. Native to the Arctic regions, these birds have adapted to some of the harshest environments on Earth, making them symbols of resilience and beauty. Their feathers not only provide excellent camouflage against the snowy landscapes but also inspire artists and nature enthusiasts alike. Drawing a snowy owl offers a wonderful opportunity to practice capturing delicate textures, subtle shading, and the intricate patterns that make this species so unique.
If you have ever wondered how to draw a snowy owl, this tutorial is designed to guide you through each step with clear instructions and helpful tips. Whether you are a beginner eager to improve your animal drawing skills or an experienced artist looking to refine your technique, this project balances complexity with accessibility. You will learn how to render the soft, layered feathers, depict the owl's intense gaze, and bring out its majestic presence on paper. The techniques covered will enhance your understanding of proportion, texture, and light, making this a rewarding artistic endeavor.
So, gather your pencils and drawing materials, and prepare to embark on a creative journey that celebrates one of nature's most enchanting birds. Remember, patience and practice are key, and with each stroke, you'll get closer to capturing the snowy owl's essence. Let's dive into this step-by-step guide and discover the joy of how to draw a snowy owl with confidence and skill!
Materials Required
Before we begin, make sure you have the following materials at hand:
- Drawing paper
- Pencils (2H, HB, and 4B)
- Eraser
- Sharpener
- Blending stump
- Reference photo of a snowy owl (optional, but helpful for accuracy)
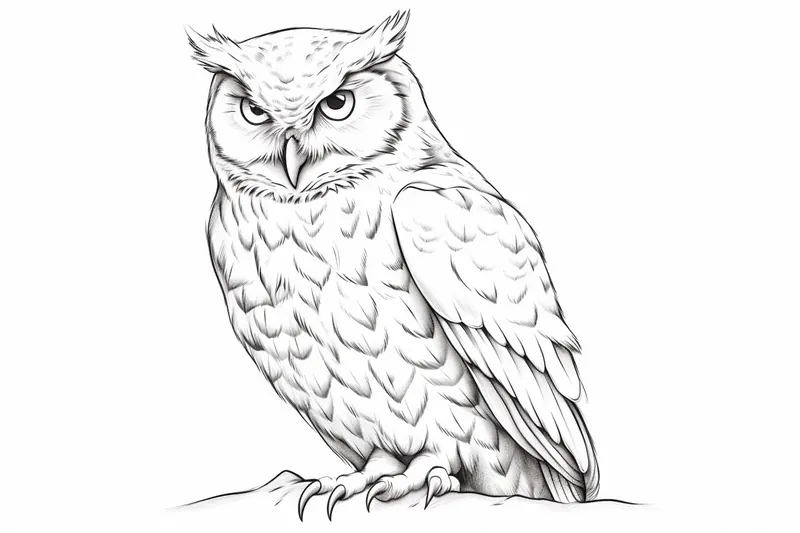
Step 1: Outline the Basic Shape
Start by lightly sketching the basic shape of the snowy owl's head using a 2H pencil. Begin with a circle for the head and add two curved lines underneath for the body. Remember to keep the lines light and loose, as you will be refining the details later on.
Step 2: Add Facial Features
Using an HB pencil, start adding the facial features of the snowy owl. Draw two large circular eyes towards the front of the head. Inside the eyes, draw smaller circles for the pupils. Add a curved line above the eyes for the eyebrows and a curved beak below the eyes. Take your time with this step, as the eyes and beak are key elements in capturing the owl's likeness.
Step 3: Define the Feathers
Now it's time to add the feather details to your snowy owl. Using an HB pencil, lightly sketch the outline of the feathers around the owl's face and head. Pay attention to the direction of the feathers and their shape. Remember, snowy owls have fluffy feathers, so try to capture that fluffiness in your drawing.
Step 4: Shade the Eyes and Beak
Using a 4B pencil, start shading the eyes and beak of the snowy owl. Begin by darkening the pupils, leaving a small white highlight to give the eyes a lifelike appearance. Shade the beak with short, light strokes, gradually building up the darkness. Pay close attention to the value and texture of the beak to make it look three-dimensional.
Step 5: Add the Body and Wings
Using an HB pencil, extend the lines of the body and wings of the snowy owl. Draw the wings slightly spread out to give the impression of flight. Add feather details to the wings, carefully observing the shape and direction of the feathers. Remember to keep your lines light and loose, as you will be refining them later.
Step 6: Refine the Details
Now that you have the basic outline and shape of your snowy owl, it's time to refine the details. Using an HB pencil, carefully go over your initial lines, making them darker and more defined. Pay attention to the feather details, facial features, and overall proportions of the owl. Take your time with this step to ensure accuracy in capturing the essence of the snowy owl.
Step 7: Start Shading the Feathers
Tip: To enhance your drawing of a snowy owl, consider using a variety of pencil techniques such as cross-hatching and stippling to create depth in the feathers and the owl's visage. Experiment with layering your shading, starting with lighter strokes and gradually building up darker tones, which will help you achieve a more realistic texture and dimension. Also, don't hesitate to take breaks and step back to review your work from a distance; this can provide a fresh perspective and help you spot areas needing refinement.
Using a 2H pencil, start shading the feathers of the snowy owl. Start with light, even strokes, following the direction of the feathers. Gradually work your way from light to dark, adding more depth and dimension to the feathers. Take your time with this step, as it requires patience and attention to detail.
Step 8: Add More Depth with a 4B Pencil
To add more depth and contrast to your snowy owl, switch to a 4B pencil. Darken the shadows and areas with more texture, such as the wings and body. Use the pencil to create texture and definition in the feathers, following the direction of the strokes. Remember to blend the shading with a blending stump for a smoother appearance.
Step 9: Finalize the Details
Now it's time to add the final touches to your snowy owl drawing. Use an HB pencil to refine the details, such as the facial features, feather patterns, and any additional texture. Pay close attention to the reference photo, if you're using one, to ensure accuracy in capturing the subtle details of the snowy owl's feathers and markings.
Conclusion
Congratulations, you have successfully drawn a realistic snowy owl! By following these step-by-step instructions and paying attention to detail, you have captured the beauty and grace of this magnificent bird on paper. Remember to practice regularly and experiment with different techniques to further enhance your drawing skills. So, grab your materials and keep drawing!
Fun Facts About Snowy Owls
- Snowy owls are one of the largest owl species, with females generally larger than males.
- They have thick feathers that cover even their legs and feet, providing insulation against Arctic cold.
- Unlike many owls, snowy owls are diurnal, meaning they hunt during the day.
- Snowy owls primarily feed on lemmings and other small mammals native to the tundra.
- Their white plumage provides excellent camouflage in snowy environments, helping them avoid predators and sneak up on prey.
- During irruption years, snowy owls migrate much farther south than usual, sometimes reaching the northern United States.
- Snowy owls have a wingspan of up to 5 feet, allowing them to glide silently while hunting.
- They are known for their distinctive hooting calls, which differ from the typical screeches of other owls.
Suggestions for Scenes and Settings for Snowy Owl Drawings
- A snowy owl perched majestically on a frosted pine branch with soft snowflakes falling around it.
- The owl in mid-flight against a backdrop of a vivid Arctic sunset, with warm colors contrasting its white plumage.
- A close-up portrait focusing on the owl's intense yellow eyes and intricate feather textures.
- A snowy owl blending into a snowy tundra landscape, emphasizing its natural camouflage.
- Juvenile snowy owls huddled together for warmth on an icy rock formation.
- The snowy owl hunting over a frozen lake with subtle reflections on the ice surface.
- An imaginative scene where the snowy owl is perched atop a mystical ice castle under the northern lights.
- The owl resting quietly on a snow-covered wooden fence during a calm winter night.
- A whimsical drawing of a snowy owl surrounded by winter flora like holly berries and frosty evergreens.
- A dynamic scene capturing the snowy owl swooping down to catch prey amid swirling snowdrifts.