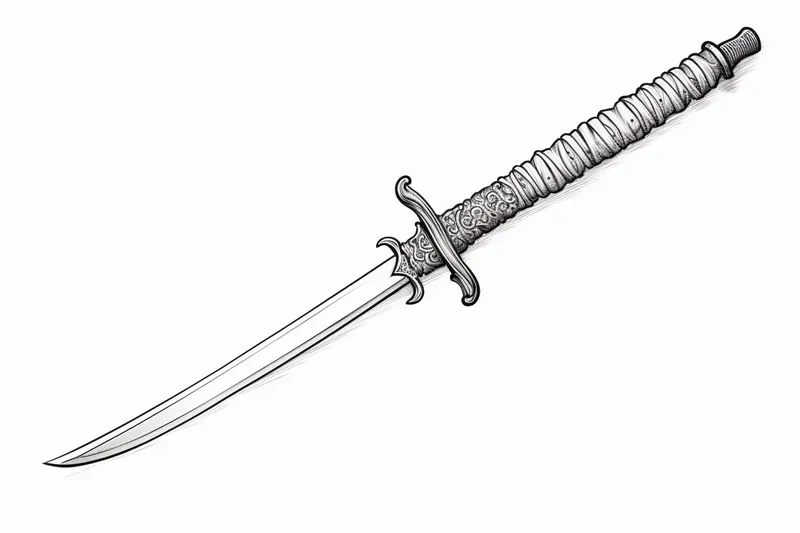
How to Draw a Samurai Sword
Learn how to draw a samurai sword step by step. This tutorial provides clear instructions and tips to help you create a realistic and detailed depiction of this iconic weapon.
Materials You'll Need
- Pencil
- Paper
- Eraser
Drawing a samurai sword is more than just sketching a weapon; it's an opportunity to connect with a rich cultural symbol that embodies honor, craftsmanship, and history. The samurai sword, or katana, is renowned for its elegant curve, sharp blade, and intricate details such as the tsuba (guard) and tsuka (handle). Capturing these elements on paper requires not only a keen eye for detail but also an understanding of the sword's unique structure and the artistry behind its design. Whether you're fascinated by Japanese culture, a fan of historical weaponry, or simply looking to improve your drawing skills, learning how to draw a samurai sword offers a rewarding artistic challenge.This tutorial on how to draw a samurai sword is designed to guide artists of various skill levels through the process step-by-step. From sketching the basic silhouette to refining the delicate embellishments, you will develop techniques such as line work, shading, and proportion that are essential for rendering realistic objects. While beginners will find clear instructions to build confidence, more experienced artists can focus on perfecting the intricate textures and metallic reflections that bring the sword to life. By practicing these skills, you not only enhance your technical ability but also deepen your appreciation for the craftsmanship of this iconic weapon.Embarking on this drawing journey encourages patience and attention to detail, qualities that are fundamental to creating striking artwork. Remember, every master artist started with simple lines and shapes, so don't be discouraged by the complexity of the sword's design. With dedication and practice, following this tutorial on how to draw a samurai sword will empower you to create a stunning piece that captures the spirit and elegance of the samurai warrior's legendary blade. Let's begin this artistic adventure together and bring this timeless weapon to life on your canvas!
Materials Required
Before we begin, let's gather the materials you will need to draw a samurai sword:
- Drawing paper or sketchbook
- Pencil (preferably HB or 2B)
- Eraser
- Ruler
- Pen or fine liner (optional for outlining)
Now that you have everything ready, let's jump into the steps involved in drawing a samurai sword.
Step 1: Basic Outline
Start by drawing a straight vertical line in the center of your paper. This line will serve as the core of the sword. Next, draw a shorter horizontal line about one-third of the way down from the top, intersecting the vertical line. This line represents the guard or tsuba of the sword.
Step 2: Blade and Point
Extend the vertical line upwards to create the blade of the sword. The blade should gradually taper towards the tip, forming a sharp point. Make sure to keep the lines clean and smooth. You can use a ruler to help achieve straight edges.
Step 3: Handle and Hilt
Draw a rectangle shape below the guard, extending from the vertical line. This rectangle represents the handle or tsuka of the sword. To add depth, draw another parallel line slightly curved inwards on each side of the handle to indicate the hilt or tsuka-ito.
Step 4: Guard and Pommel
Add details to the guard (tsuba) by drawing curved lines on each side of the horizontal line. These lines should resemble a flower or a symbolic design of your choice. Below the handle, draw a round or cylindrical shape for the pommel (kashira) of the sword.
Step 5: Details and Patterns
Now that we have the basic structure of the samurai sword, it's time to add some intricate details. Study reference images or traditional samurai sword designs to get inspiration for patterns and decorations. You can add engravings, dragon motifs, or other elements to make your sword unique. Take your time and use light pencil strokes to sketch out these details before finalizing them.
Step 6: Refine the Lines
Once you are satisfied with the overall composition and details, it's time to refine the lines. Go over the pencil lines with a pen or fine liner to create a bold, defined outline. Allow the ink to dry, and then erase any visible pencil marks. This will give your drawing a clean and professional look.
Step 7: Shading and Textures
To add depth and dimension to your samurai sword drawing, it's important to incorporate shading and textures. Use your pencil to create shading along the blade and handle. Pay attention to the light source in your drawing and add darker tones where shadows would naturally fall. You can also experiment with cross-hatching or stippling techniques to create interesting textures on the sword.
Step 8: Finishing Touches
Take a moment to evaluate your drawing and make any necessary adjustments or additions. Add highlights to certain areas to create a sense of light reflection. Use your eraser to clean up any smudges or unwanted marks. Remember to take your time and be patient – the final touches can make a significant difference in the overall appearance of your drawing.
Conclusion
Drawing a samurai sword is a challenge that requires both technical skill and artistic interpretation. By following these step-by-step instructions and paying attention to details, you can create a stunning depiction of this iconic weapon. Embrace the rich history and symbolism of the samurai culture as you explore this art form. So grab your materials and start your creative journey into the world of the samurai sword.
Fun Facts About Samurai Swords
- The samurai sword, or katana, is traditionally made using a complex folding process that can involve folding the steel over 15 times to create a strong, sharp blade.
- Katanas are known for their distinctive curved shape, which improves cutting ability and allows for swift, precise strikes.
- The tsuba, or guard of a samurai sword, was often intricately designed and served both as protection and a symbol of the samurai's status.
- Traditionally, the katana was worn edge-up in the obi (belt), allowing for a quick draw and strike known as iaijutsu.
- Samurai swords were not only weapons but also spiritual objects, often believed to house the soul of the samurai.
- The forging of a katana involves differential hardening, where the edge is harder than the spine, giving the blade both sharpness and flexibility.
- During the Edo period, samurai swords became highly regulated, and only samurai were legally allowed to carry them.
- The katana's handle, or tsuka, is traditionally wrapped with ray skin and silk cord to provide grip and durability.
Suggestions for Scenes and Settings for Samurai Sword Drawings
- A lone samurai standing on a misty mountain ridge at dawn, katana gleaming in the soft light.
- A close-up of a samurai sword resting on a tatami mat beside an ancient scroll with calligraphy.
- A fierce duel between two samurai under cherry blossom trees with petals swirling around their swords.
- An ornate katana displayed on a traditional wooden sword rack inside a dimly-lit dojo.
- A samurai warrior drawing his sword in slow motion, with a blurred battlefield background.
- A detailed study of a katana's tsuba and tsuka with intricate dragon engravings and silk wrapping.
- A samurai preparing his sword by oiling and polishing it under a paper lantern's warm glow.
- A mythical scene featuring a samurai sword glowing with supernatural energy during a stormy night.
- A peaceful shrine garden with a katana embedded in a stone pedestal as an offering.
- A historical samurai armory filled with various swords and armor pieces, emphasizing craftsmanship.