How to Draw a Sakura
Learn how to draw a sakura flower with this step-by-step tutorial. Capture the beauty of cherry blossoms in your artwork. Perfect for beginners.
Materials You'll Need
- Pencil
- Paper
- Eraser
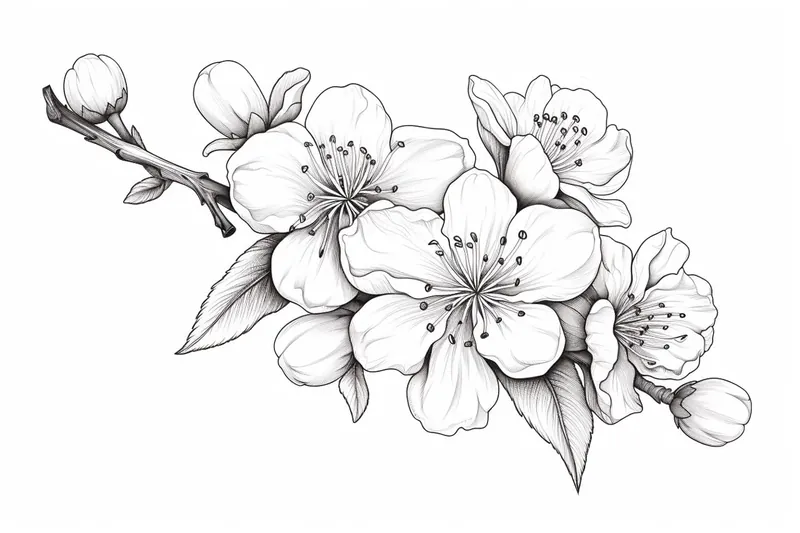
Sakura, or cherry blossoms, hold a cherished place in Japanese culture, symbolizing the transient beauty of life and the arrival of spring. These delicate flowers bloom briefly but leave a lasting impression with their soft pink petals and graceful forms. Drawing sakura is not only a way to appreciate this natural wonder but also an opportunity to hone your artistic skills by capturing their subtle details and ethereal quality. Whether you are a beginner or an experienced artist, learning how to draw a sakura can be both rewarding and meditative.
In this tutorial, we will guide you through the step-by-step process of how to draw a sakura flower, focusing on the gentle curves of the petals, the intricate stamen, and the overall composition that gives the flower its unique charm. While the subject might appear simple at first glance, drawing sakura requires attention to proportion, shading, and delicate line work to truly bring it to life on paper. This makes it an excellent exercise to develop your observation skills and control with pencils or pens. Plus, creating sakura art can add a touch of elegance to your portfolio or personal projects.
Whether you are seeking a calming artistic activity or looking to expand your repertoire with floral drawings, mastering how to draw a sakura is a wonderful place to start. Remember, art is about expression and practice, so don't worry about perfection—enjoy each stroke and watch your sakura blossom on the page. Grab your favorite sketchbook and drawing tools, and let's embark on this creative journey together!
Materials Required
Before we begin, let's gather the materials we'll need to draw a sakura:
- [Sketchbook or drawing paper](https://yonderoo.com/best-drawing-paper/)
- Pencils (HB, 2B, and 4B)
- Eraser
- Fine-tip black pen or marker
- Colored pencils or watercolors (optional)
Now that we have everything ready, let's dive into the steps of drawing a beautiful sakura flower!
Step 1: Sketch the Basic Shape
Start by lightly sketching a simple circle on your paper. This circle will serve as the foundation for your sakura flower. Don't worry about making it perfect; a rough shape will do just fine.
Step 2: Add the Petals
Using your HB pencil, sketch several curved lines radiating outward from the center of the circle. These lines will form the structure of the sakura petals. Remember to keep the lines light and delicate. Aim to create a soft and natural appearance.
Step 3: Define the Petals
Now, with your 2B pencil, carefully darken the outer edges of each petal. Gradually taper the lines as you approach the center of the flower. This shading technique will give depth and volume to your sakura petals, making them appear three-dimensional.
Step 4: Detail the Center
Using the same 2B pencil, add a small circular shape at the center of the sakura flower. This represents the stigma or inner part of the blossom. Keep it simple and subtle.
Step 5: Introduce Contrast
Take your 4B pencil and shade the area between the petals. This will create contrast, enhancing the overall appearance of the sakura flower. Make sure to blend the shading softly with your fingers or a blending tool for a smooth transition.
Step 6: Refine the Outline
With your HB pencil, carefully outline the entire sakura flower, including the petals and the center. Pay attention to the curves and edges, ensuring a clean and refined outline. Take your time with this step as it adds definition and structure to your artwork.
Step 7: Finalize the Details
Now, switch to a fine-tip black pen or marker. Trace over the refined outline and add any additional details you desire. You can enhance the petals with subtle lines to emphasize the texture and create a more realistic look. Be mindful not to overdo it; simplicity is key when capturing the essence of a sakura flower.
Step 8: Add Color (Optional)
If you prefer to add color to your sakura drawing, you can use colored pencils or watercolors. For a soft and delicate appearance, choose pale pinks or light shades of red. Start by lightly layering the color onto the petals and gradually build up the intensity. Remember to blend and shade for a more realistic effect.
Conclusion
Drawing a sakura flower allows us to appreciate the beauty and tranquility of nature. By following these step-by-step instructions, you can create your own stunning sakura artwork. Remember to practice, be patient with yourself, and enjoy the process. Let your creativity blossom and share your artwork with others!
Fun Facts About Sakura Trees
- Sakura trees bloom for only about one to two weeks each spring, symbolizing the fleeting nature of life.
- The tradition of hanami, or flower viewing, dates back over a thousand years in Japan.
- There are over 200 varieties of sakura trees, each with unique petal shapes and colors.
- Sakura petals are edible and often used in Japanese cuisine, such as sakura mochi and sakura tea.
- The cherry blossom is Japan's national flower and appears in many cultural symbols and artworks.
- In addition to Japan, sakura trees are celebrated in countries like South Korea, China, and the United States.
- The blooming of sakura is carefully tracked each year and is a major event for tourism in Japan.
- Sakura wood is sometimes used in traditional crafts and furniture for its beautiful grain and fragrance.
Suggestions for Scenes and Settings for Sakura Drawings
- A serene park during full bloom with sakura trees lining a peaceful walking path, petals gently falling like pink snow.
- A traditional Japanese tea ceremony set outdoors beneath a sakura tree, with delicate blossoms framing the scene.
- A close-up study of a single sakura branch with dew drops glistening on the petals in early morning light.
- A quaint riverside scene where sakura petals float on the water's surface, reflecting the soft colors of sunset.
- A young woman in a kimono standing amidst a sakura grove, capturing the harmony between culture and nature.
- A whimsical fantasy setting where sakura petals transform into glowing lights swirling around a mystical creature.
- A minimalist composition focusing on the interplay of light and shadow on sakura petals against a neutral background.
- An urban rooftop garden bursting with sakura blossoms, contrasting the natural beauty against city skyscrapers.
- [A gentle breeze scattering sakura petals over a traditional Japanese bridge arching over a koi pond](https://yonderoo.com/how-to-draw-a-pond/).
- A seasonal picnic scene with friends gathered under sakura trees, sharing food and laughter during hanami (flower viewing).