How to Draw a Puzzle
Learn how to draw a puzzle step-by-step in this helpful tutorial. Discover the materials you need and follow the instructions to create your own unique puzzle design.
Materials You'll Need
- Pencil
- Paper
- Eraser
Puzzles have captivated people of all ages for generations, encouraging creative problem-solving, patience, and attention to detail. Visually, jigsaw puzzles are instantly recognizable thanks to their interlocking pieces, each with its own unique shape. Learning how to draw a puzzle not only lets you recreate this iconic image on paper, but also opens up possibilities for designing personalized puzzles, cards, or illustrations that spark curiosity and fun. Whether you're an avid puzzler or simply enjoy artistic challenges, drawing a puzzle can add a playful element to your sketchbook or art projects.
People might choose to draw puzzles for a variety of reasons—from decorating a journal page or creating a themed greeting card, to designing custom puzzles for friends and family. This subject is also a great exercise in practicing symmetry, pattern creation, and understanding how shapes fit together. In this tutorial on how to draw a puzzle, we'll break down the process into manageable steps, making it approachable for artists of all levels. Beginners will gain confidence with simple shapes and outlines, while more experienced artists can experiment with shading and intricate designs to add depth and realism.
Don't worry if you've never tried drawing a puzzle before! With some patience and a little guidance, you'll soon discover that creating your own puzzle illustration is both enjoyable and rewarding. Gather your materials, get comfortable, and let's start turning those scattered pieces into a complete, eye-catching drawing. Remember, every artist brings their own unique style to the table—so embrace your creativity and have fun throughout the process!
Materials Required
Before we begin, let's gather the materials you will need for this project:
- Drawing paper or a sketchbook
- Pencil
- Eraser
- Ruler
- Compass
- Black pen or marker (optional, for outlining)
Now that we have everything we need, let's dive into the step-by-step process of drawing a puzzle!
Step 1: Decide on the Shape
The first step in drawing a puzzle is deciding on the shape you want your puzzle to be. Puzzles can come in a variety of shapes, such as squares, triangles, or even irregular shapes. Choose a shape that appeals to you and fits the theme of your puzzle.
Step 2: Draw the Outer Border
Using your ruler, draw the outer border of your puzzle. This will define the boundaries of your puzzle and create a neat frame for your design. Make sure the sides of the border are straight and evenly spaced.
Step 3: Divide the Puzzle into Sections
Next, decide how many sections you want your puzzle to have. This will depend on the level of complexity you desire. Use your ruler and pencil to draw straight lines across the puzzle, dividing it into equal sections. You can also create irregular sections if you prefer a more challenging puzzle.
Step 4: Add Interlocking Shapes
To make your puzzle more interesting and challenging, add interlocking shapes within each section. These shapes will fit together when the puzzle is solved. You can choose from a variety of shapes, such as circles, squares, or even more complex designs. Use your compass and pencil to draw these shapes within each section, making sure they interlock properly.
Step 5: Rethink and Refine
Tip: As you draw your puzzle, consider starting with light pencil sketches to outline your sections and interlocking shapes, allowing for easy adjustments before finalizing your design. This approach not only helps maintain symmetry and balance but also gives you the flexibility to explore different arrangements and make changes without the pressure of committing to darker lines too soon. Once satisfied with your layout, you can confidently trace over your pencil lines with a pen or marker for a polished finish.
Now that you have a rough sketch of your puzzle, take a moment to rethink and refine your design. Look for any areas that may need adjustment or improvements. Make sure the sections and interlocking shapes are visually balanced and appealing. This is also a good time to erase any unnecessary lines or mistakes.
Step 6: Outline with Pen or Marker (Optional)
If you want to add more definition and make your puzzle stand out, you can outline your design with a black pen or marker. This will give your puzzle a more finished look. Be careful and steady-handed as you trace over your pencil lines. Once the ink is dry, erase any remaining pencil marks.
Step 7: Add Details and Clues (Optional)
To make your puzzle even more engaging, consider adding details and clues to guide the solver. You can write numbers, letters, or symbols within each section to provide hints or instructions. Remember to keep the clues subtle and not too obvious, maintaining the challenge and enjoyment of solving the puzzle.
Challenge: For this drawing challenge, let's take your puzzle illustration to the next level by creating a themed puzzle scene! Imagine a whimsical world where your jigsaw pieces come to life—perhaps a puzzle depicting a bustling city, a serene nature landscape, or even an underwater adventure. Your challenge is to draw not just the puzzle pieces, but to incorporate elements around them that tell a story or evoke an emotion. Think about how the colors, patterns, and shapes of the pieces can interact with the scene, and don't hesitate to play with scale and perspective. This exercise will not only push your creativity but also enhance your ability to illustrate complex compositions. Embrace this opportunity to think outside the box and see how far your imagination can take you!
Conclusion
Congratulations! You have successfully learned how to draw a puzzle. Drawing a puzzle allows you to express your creativity and create a unique challenge for yourself or others. Remember to experiment with different shapes, sizes, and designs to create a wide variety of puzzles. Have fun and happy puzzling!
Fun Facts About Puzzle
- The earliest known jigsaw puzzle was created in 1767 by John Spilsbury, a London mapmaker, as a teaching tool for geography.
- The word "puzzle" comes from the verb "to puzzle," meaning to perplex or confuse, and first appeared in English in the late 16th century.
- Modern jigsaw puzzles are typically made from cardboard, but early versions were crafted from wood.
- The largest commercially available jigsaw puzzle contains over 51,000 pieces and measures nearly 29 feet long.
- Puzzle-solving has been shown to improve memory, spatial reasoning, and problem-solving skills.
- Crossword puzzles were first published in a newspaper in 1913 by Arthur Wynne in the New York World.
- Rubik's Cube, one of the world's best-selling puzzles, was invented in 1974 by Hungarian architect Ernő Rubik.
- Puzzle competitions, such as the World Puzzle Championship, attract participants from dozens of countries each year.
- Some puzzles, like Sudoku, originated in one country but became global phenomena through newspaper syndication.
Suggestions for Scenes and Settings for Puzzle Drawings
- Draw a close-up view of a jigsaw puzzle with one piece being placed in its spot, highlighting the hands or fingers in action.
- Illustrate a puzzle made from a favorite photo or landscape, with some pieces scattered around the edges and others already fitted together.
- Create a whimsical puzzle where each piece contains a miniature scene, such as animals, plants, or cityscapes, forming a bigger picture when assembled.
- Design a puzzle with irregular or themed shapes, like animal silhouettes, geometric forms, or fantasy creatures instead of traditional pieces.
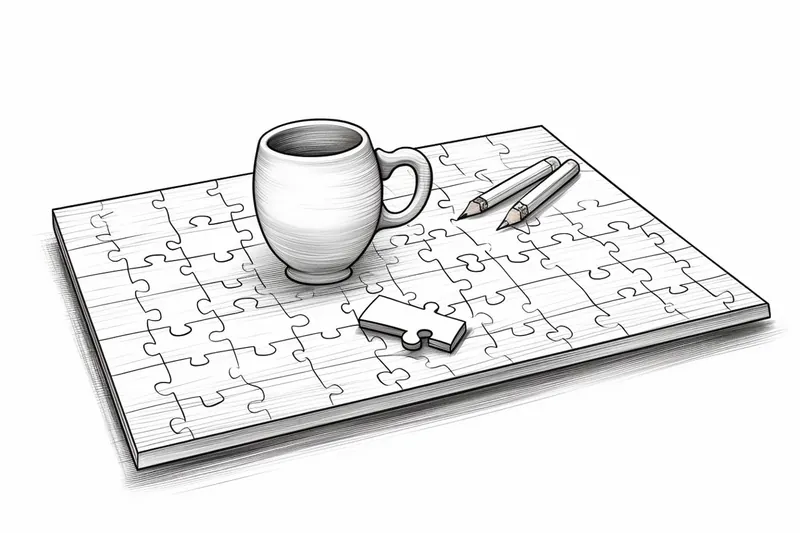
- [Show a puzzle in progress on a cozy table setting, surrounded by a cup of tea, lamp light](https://yonderoo.com/how-to-draw-a-lamp/), and scattered puzzle box and pieces.
- Imagine a puzzle piece as a portal or window revealing another world or scene behind it, blending reality and imagination.
- Depict a puzzle with missing pieces, where the empty spaces form an interesting pattern or reveal a hidden message.
- Draw a giant puzzle stretching across a floor with people or children working together to solve it, emphasizing teamwork and fun.
- Illustrate a puzzle with pieces that are decorated with different textures or patterns, such as wood grain, fabric, or mosaic tiles.
- Create a surreal puzzle blending into its surroundings, with puzzle pieces morphing into clouds, leaves, or waves at the edges.