Welcome to this step-by-step guide on how to draw a perfect star! Whether you are a beginner or an experienced artist, mastering the art of drawing a symmetrical star can be a rewarding experience. In this article, I will walk you through the process of drawing a perfect star, providing clear and concise instructions. So grab your drawing materials and let’s get started!
Materials Required
Before we begin, make sure you have the following materials:
- A pencil
- A ruler
- Eraser
- Paper
Now that you have everything you need, let’s learn how to draw a perfect star!
Step 1: Draw a Circle
To start, draw a circle on your paper. You can use a compass or trace around a circular object to create a perfect circle. This circle will serve as the foundation for your star.
Step 2: Divide the Circle
Next, divide the circle into equal sections. Start by drawing a horizontal line across the center of the circle, and then draw a vertical line perpendicular to the horizontal line. These lines will divide the circle into four equal sections.
Step 3: Add Diagonal Lines
To create the points of the star, draw diagonal lines connecting the opposite ends of each section. Start at the top of the circle and draw a line diagonally to the left, intersecting with the bottom right section. Repeat this process for each section, creating a total of five diagonal lines.
Step 4: Connect the Points
Now, connect the points where the diagonal lines intersect the circle. Start at the top of the circle and draw a straight line to the point where the first diagonal line intersects the circle. Repeat this process for each diagonal line, connecting the points to form the outline of the star.
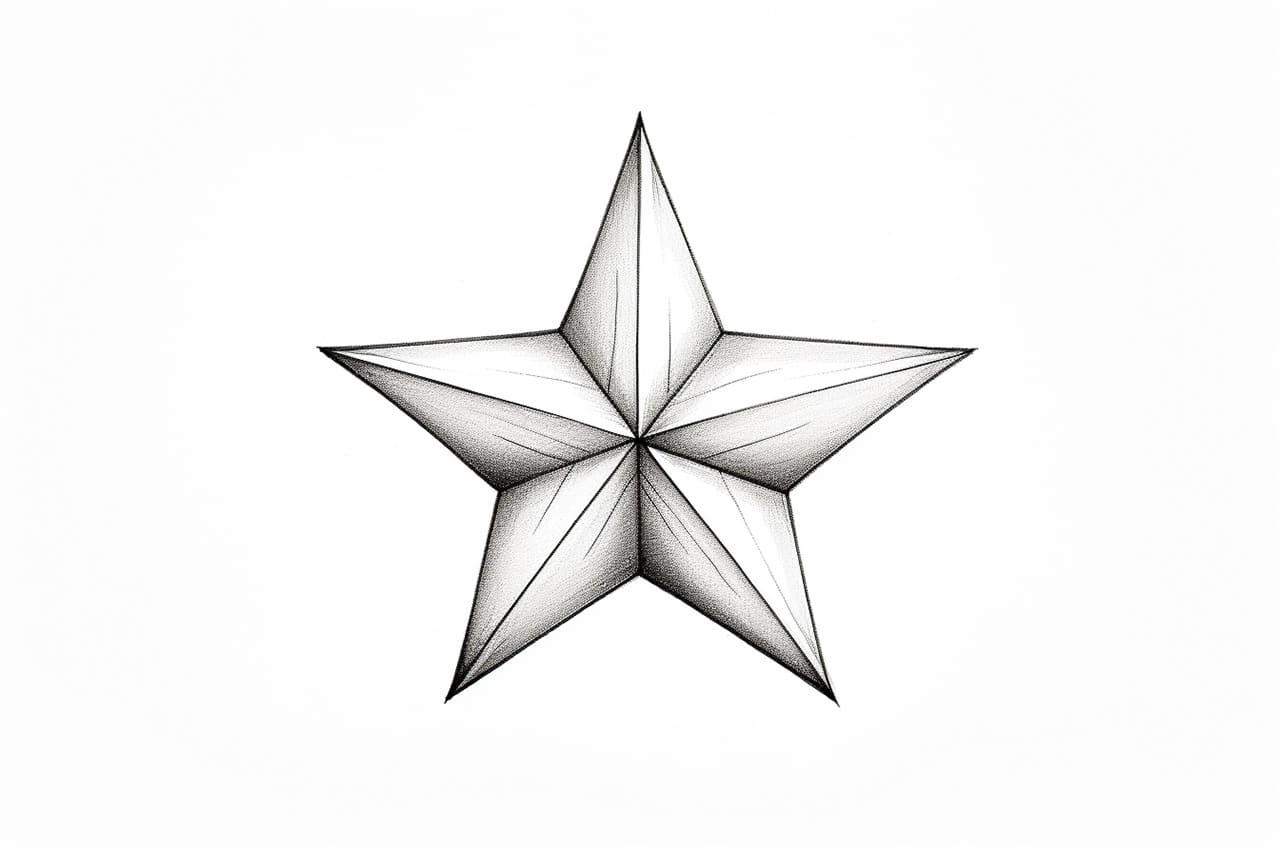
Step 5: Refine the Shape
Take a moment to evaluate the shape of your star. If any lines are not symmetrical or do not meet correctly, make small adjustments as needed. Use your ruler and eraser to refine the shape until you are satisfied with the proportions and symmetry of the star.
Step 6: Add Details
Once you have the basic outline of the star, you can add additional details to make it more visually appealing. Consider adding smaller, curved lines within the star to give it a more intricate look. Experiment with different patterns and designs to make your star unique.
Step 7: Darken the Lines
Now that you are happy with the shape and details of your star, carefully darken the lines using your pencil. Start from one point of the star and work your way around, following the outline. Apply a consistent amount of pressure to create bold, defined lines.
Step 8: Erase the Guidelines
Lastly, erase any remaining guidelines that you drew in the earlier steps. Be careful not to smudge or erase any of the darkened lines. Use your eraser to gently remove the pencil marks, leaving behind a clean and polished star.
Congratulations! You have successfully drawn a perfect star! With practice, you will become more comfortable and confident in creating stars of different sizes and styles.
Conclusion
In this tutorial, we have learned how to draw a perfect star step by step. Drawing a symmetrical star may seem challenging at first, but with the right techniques and practice, you can achieve great results. Remember to be patient and take your time during each step. By following these instructions and refining your skills, you will soon be able to create stunning stars in your artwork.
So grab your pencil and paper, and start drawing your perfect star today!