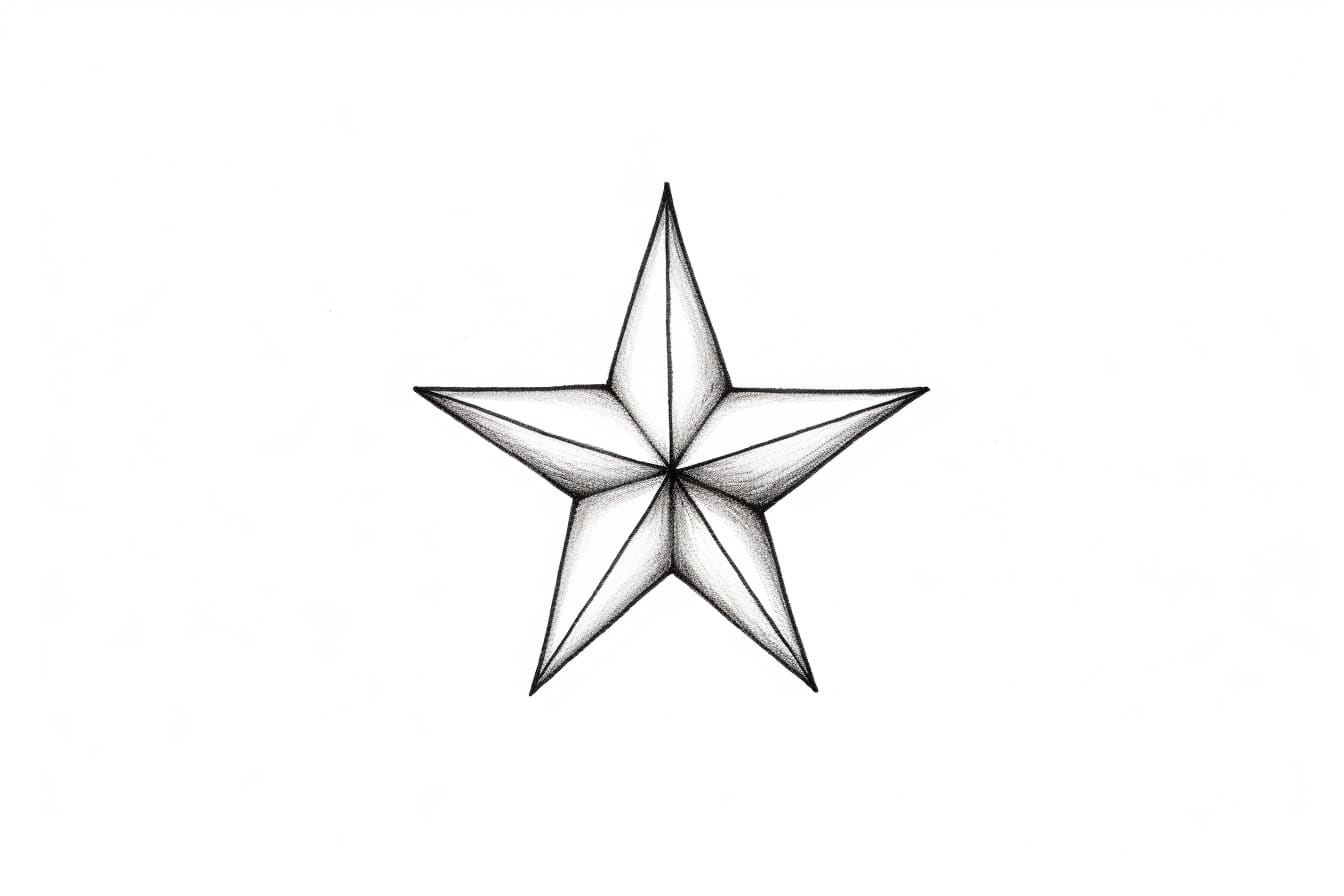
Welcome to this step-by-step tutorial on how to draw a small star. Whether you are a beginner or an experienced artist, drawing stars can be a fun and rewarding activity. In this guide, I will walk you through each step, explaining the techniques and methods required to create your own beautiful small star drawing. So, let’s get started!
Materials Required
Before we begin, let’s gather the materials you’ll need to draw a small star:
- Drawing paper or sketchbook
- Pencils (HB or 2B for sketching)
- Eraser
- Ruler (optional, for precise measurements)
- Compass or any round object (optional, for drawing perfect circles)
- Colored pencils or markers (optional, for coloring your star)
Step 1: Start with a Guide Line
To ensure symmetry and a pleasing shape, begin by drawing a straight vertical line. This line will serve as a guide for the center of your star. Use a ruler if desired to create a perfectly straight line.
Step 2: Draw an Upside-Down “V”
Next, draw an upside-down “V” shape starting from the top of the vertical line. The point where the “V” intersects the vertical line will be the center of your star. Ensure that each side of the “V” is equal in length.
Step 3: Create the Bottom Tip
Now, draw a straight line from the bottom point of the “V” to the bottom of the vertical line. This line will form the bottom tip of your star.
Step 4: Add the Left and Right Extensions
Extend two lines diagonally from each side of the “V” towards the bottom tip. These lines will form the left and right extensions of your star.
Step 5: Connect the Extensions
To complete the outline of the star, draw a straight line connecting the ends of the left and right extensions. At this point, the basic shape of your star should be visible.
Step 6: Refine the Star Shape
Take a moment to assess the proportions and overall shape of your star. If any lines need adjustment, lightly sketch over them and make the necessary corrections. Pay attention to symmetry and strive for a balanced appearance.
Step 7: Add Details
Now that you have the basic star shape, it’s time to add some details to make it more visually interesting. You can create small indentations or rounded bumps along each of the five points of the star. This will give your star a more textured and three-dimensional look.
Step 8: Erase Unnecessary Lines
Carefully erase any unnecessary guide lines and sketchy lines, leaving behind only the clean outlines of your star.
Step 9: Add Color (Optional)
If you wish to add color to your star drawing, now is the time to do so. Use colored pencils or markers to bring your star to life. You can choose a monochromatic look or experiment with different color combinations for a vibrant effect.
Step 10: Final Touches
Take a step back and assess your completed star drawing. Make any final adjustments or additions as needed. Maybe you want to add shading or highlights to create more depth and realism. This is your opportunity to add those finishing touches that will make your drawing truly unique.
Conclusion
Congratulations! You have successfully learned how to draw a small star. I hope this step-by-step guide has been helpful and enjoyable. Drawing stars can be a wonderful way to express your creativity and improve your artistic skills. Remember to practice regularly and experiment with different sizes and styles of stars. With time and practice, you will become more confident in your abilities. So, grab your pencils and start drawing stars!