How to Draw a Lake in 9 Steps
Learn how to draw with this step-by-step tutorial.
Materials You'll Need
- Drawing paper
- Pencil (HB or 2B)
- Eraser
- Blending stump
Lakes are one of nature's most peaceful and breathtaking sights, making them a wonderful subject for artists of all skill levels. Whether it's a crystal-clear alpine lake reflecting the mountains, a tranquil forest pond surrounded by lush greenery, or a misty body of water at sunrise, lakes offer endless inspiration for stunning artwork.
In this tutorial, we'll walk you through the process of how to draw a lake, starting with the foundational shapes and moving on to details like rippling water, reflections, and surrounding landscape elements. Whether you're a beginner picking up a pencil for the first time or an experienced artist looking to refine your nature drawings, these easy-to-follow steps will help you bring your vision to life.
By the end of this tutorial, you'll have the knowledge and techniques to create a beautiful, lifelike lake scene. So grab your drawing materials, find a quiet space, and let's begin our artistic journey into the world of tranquil waters!
Materials Required
Before we get started, let's gather the necessary materials for this drawing:
-
Drawing paper: Use a medium-weight paper that can handle various drawing techniques and textures. A size of 9x12 inches or larger should work well.
-
Pencils: You will need a range of graphite pencils, including H, HB, 2B, and 4B. These will allow you to create different shades and values in your drawing.
-
Erasers: A kneaded eraser and a regular eraser will be helpful for correcting mistakes and adding highlights.
-
Pencil sharpener: Keep your pencils sharp to achieve fine details and crisp lines.
-
Drawing board: Use a sturdy and flat surface to secure your drawing paper while working.
-
Reference photo: Find a high-quality photo of a lake that inspires you. This will serve as a reference for your drawing and help you capture specific details.
Now that you have all your materials ready, let's proceed to the step-by-step instructions.
Step 1: Sketch the Basic Outline
Begin by lightly sketching the basic outline of the lake using an H or HB pencil. Start with the horizon line and mark the position of the lake within the frame. Pay attention to the placement of any mountains, trees, or other elements surrounding the lake. Focus on capturing the overall shape and proportions accurately.
Step 2: Add Depth with a Pencil
Using a 2B or 4B pencil, start adding depth to your lake drawing. Shade the areas that are farther away from the viewer, such as the far shore and distant mountains, with light pencil strokes. Gradually build up the values and darks as you move closer to the foreground. This will create a sense of perspective and depth in your artwork.
Step 3: Define the Shoreline
To create a convincing shoreline, use short, curved lines to represent the irregular edges of the lake. Pay attention to any rocks, trees, or vegetation along the shoreline and incorporate them into your drawing. Vary the pressure on your pencil to create different textures and tonal values.
Step 4: Add Reflections
One of the key aspects of drawing a lake is capturing the reflections and ripples on the water's surface. Observe the reference photo and carefully replicate the shapes and colors of the surrounding objects reflected in the lake. Use smooth and light pencil strokes to create a slightly distorted mirror effect. Remember to adjust the values to match the lighting conditions of your scene.
Step 5: Render the Water
To depict the water's texture, use short, diagonal pencil strokes. Pay attention to the direction of the strokes, which should follow the natural flow of the water. Darken the areas where the water is deeper or has more turbulence. Keep the strokes lighter and more horizontal in calmer areas of the lake.
Step 6: Add the Sky
The sky plays a vital role in setting the overall mood of your lake drawing. Lightly shade the sky area with a graphite pencil, following the natural movements of clouds. Use a blending tool or your finger to create a smooth transition between the sky and the water. Take care not to smudge your drawing as you work.
Step 7: Detail the Foreground
Now, shift your focus to the foreground elements of your lake drawing. Whether it's grass, rocks, or other vegetation, add detailed textures and shapes to make them come alive. Pay attention to the lighting and shadows, as they will enhance the three-dimensional feel of your artwork.
Step 8: Refine and Add Highlights
Take a step back and evaluate your drawing so far. Look for areas that need refinement or additional details. Use an eraser to lighten or remove any unwanted marks. Add highlights to the water's surface, shoreline, and any objects reflecting light. This will bring a sense of realism and luminosity to your lake drawing.
Step 9: Finalize the Details
In this final step, focus on adding the finishing touches to your lake drawing. Take your time to refine any remaining details, such as the textures on the trees or the ripples on the water. Pay close attention to contrast and values to ensure a dynamic and visually appealing artwork.
Congratulations! You have successfully drawn a beautiful lake. Remember, practice is key to improving your drawing skills, so don't hesitate to try this tutorial multiple times with different variations and techniques.
Tip: To effectively capture the essence of a lake in your drawing, focus on layering your colors and textures for both the water and the surrounding landscape. Start with a light wash of blue or green for the water surface, then gradually build depth by adding darker shades along the edges and in areas where reflections occur. Use a soft brush or blending tool to create smooth transitions, mimicking the gentle ripples of the water.
For the surrounding foliage, employ a variety of greens and earth tones, applying lighter shades for highlights and darker tones for shadows to add dimension. Lastly, don't forget to observe real lakes or reference photos to accurately represent the unique characteristics of water and the environment, which will enhance the realism of your drawing.
Conclusion
Drawing a lake allows you to explore the beauty of nature and create a serene and captivating artwork. By following the step-by-step instructions in this tutorial, you have learned how to sketch the basic outline, add depth and reflections, render the water, and finalize the details. With practice and experimentation, you can further enhance your lakeside drawings and develop your unique artistic style. Now, grab your pencils, find a tranquil photo of a lake, and let your creativity flow as you create breathtaking artworks!
Gallery of Lake Drawings


Adding Elements to Your Lake Drawing
Once you've mastered the basic lake drawing techniques, you can enhance your artwork by adding various elements that bring your lake scene to life. Here are step-by-step guides for drawing three popular lake features that will make your drawing more dynamic and interesting.
How to Draw a Dock on a Lake
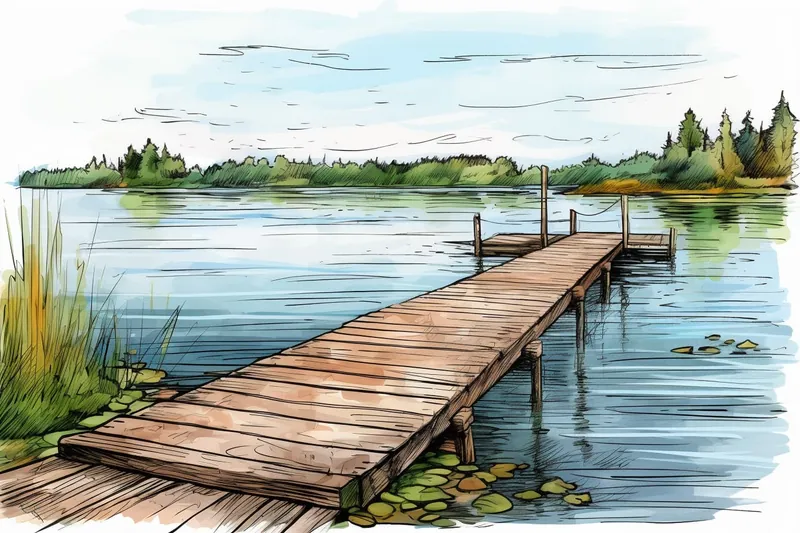
A wooden dock adds a perfect focal point and gives your lake drawing a sense of scale and human presence.
Step 1: Plan the Dock Placement Position your dock extending from the shoreline into the water, typically at a slight angle rather than perfectly straight across. This creates more visual interest and natural perspective.
Step 2: Draw the Dock Structure
-
Start with a long rectangle for the main platform, making it narrower as it extends into the distance
-
Add vertical support posts underneath, spacing them evenly
-
Draw the wooden planks running perpendicular to the dock's length using parallel lines
Step 3: Add Details and Texture
-
Include gaps between the wooden planks
-
Add a few loose boards or nail details
-
Draw rope or chain details if you want to include boat ties
-
Sketch weathering marks or wood grain for realism
Step 4: Create Water Interaction
-
Draw gentle ripples around the dock posts where they enter the water
-
Add reflections of the dock in the water, making them slightly wavy
-
Include shadows cast by the dock on the water surface
How to Draw a Cabin on a Lake

A rustic cabin nestled by the lakeside creates a cozy, inviting atmosphere in your drawing.
Step 1: Position and Basic Shape
-
Place the cabin on the shoreline or slightly back from the water's edge
-
Start with a simple rectangular or square base
-
Add a triangular roof shape on top
Step 2: Define the Cabin Structure
-
Draw the front face with a door and one or two windows
-
Add a chimney extending from the roof
-
Include a small porch or deck facing the lake
-
Sketch the roofline and any overhangs
Step 3: Add Cabin Details
-
Draw log cabin horizontal lines if making a log cabin, or vertical siding lines for a wooden cabin
-
Add window frames, shutters, and a detailed door
-
Include porch railings and steps
-
Draw smoke coming from the chimney for a lived-in feel
Step 4: Integrate with the Landscape
-
Add trees around the cabin for natural framing
-
Include a path leading from the cabin to the water
-
Draw the cabin's reflection in the lake water
-
Add some rocks or vegetation around the foundation
How to Draw a Boat on a Lake
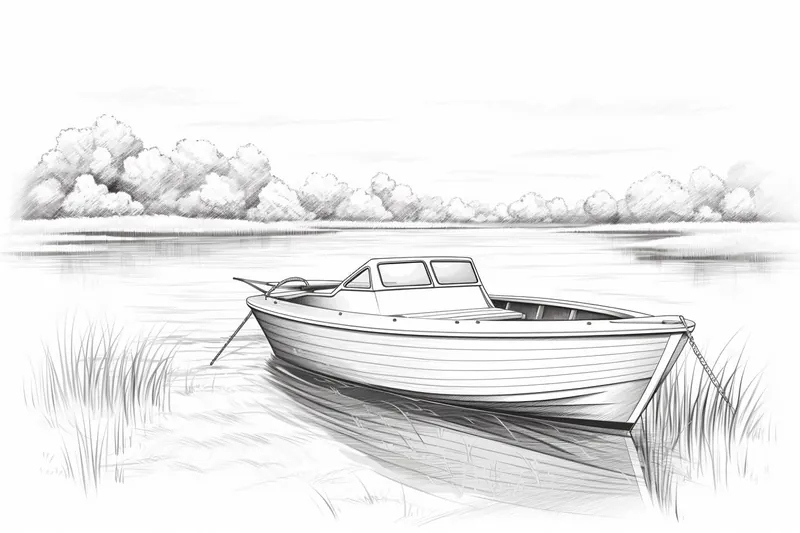
A boat floating peacefully on your lake adds movement and story to your scene.
Step 1: Choose Your Boat Type
-
For beginners: Start with a simple rowboat or canoe
-
Intermediate: Try a small fishing boat or sailboat
-
Advanced: Add a larger recreational boat
Step 2: Draw the Basic Boat Shape
-
Begin with an elongated oval or lens shape for the hull
-
Make one end slightly more pointed (the bow)
-
Add height to create the boat's sides
Step 3: Add Boat Details
-
Include seats or benches inside the boat
-
Draw oars resting across the boat or in the water
-
Add any mast, sail, or fishing equipment depending on boat type
-
Include small details like rope coils or a small anchor
Step 4: Position on the Water
-
Place the boat so it sits naturally on the water surface
-
Draw gentle ripples radiating outward from the boat
-
Add the boat's reflection in the water, distorted by the ripples
-
Include a small wake or disturbance in the water behind the boat if it's moving
Step 5: Final Touches
-
Add depth by shading the bottom of the boat darker
-
Include any people in the boat as simple silhouettes
-
Draw fishing lines in the water if it's a fishing scene
Bringing It All Together
These elements work beautifully together or individually. Consider the story you want your lake drawing to tell:
-
A peaceful morning scene with a lone boat and distant cabin
-
An active lakeside with a dock, boat, and cabin all visible
-
A simple, serene lake with just one focal element
Remember to maintain consistent lighting and perspective across all elements. If your lake has sunlight coming from the right, make sure all shadows on your dock, cabin, and boat follow the same light source. This attention to detail will make your enhanced lake drawing look professional and cohesive.
Practice drawing these elements separately first, then gradually incorporate them into your complete lake scenes. Each addition will make your artwork more engaging and give viewers more to explore in your drawing.
Fun Facts About Lakes
-
Lakes are bodies of water surrounded by land, and they are larger and deeper than ponds.
-
The largest lake in the world by area is the Caspian Sea, which is also considered the largest enclosed inland body of water.
-
Did you know there are bodies of water on Saturn's moon Titan that resemble lakes? They are filled with liquid methane and ethane.
-
Lakes can be formed by various natural processes including volcanic activity, tectonic movements, and glacial retreats.
-
The world's deepest lake is Lake Baikal in Siberia, which reaches depths of over 5,300 feet (about 1,620 meters).
-
Some lakes, known as crater lakes, are formed in the craters of dormant or extinct volcanoes, like Crater Lake in Oregon, USA.
-
There are saltwater lakes too, such as the Great Salt Lake in Utah, USA, and the Dead Sea bordered by Jordan and Israel.
-
Lakes are important habitats for many plant and animal species and play critical roles in local ecosystems.
-
In some cultures, lakes are considered sacred and are central to numerous myths and legends.
-
Despite being freshwater bodies, lakes undergo cycles of renewal that help maintain their ecological balance.
Suggestions for Scenes and Settings for Lake Drawings
-
Sunset Over the Lake: Capture a serene scene with the lake mirroring a vibrant sunset sky, complete with silhouettes of trees along the banks.
-
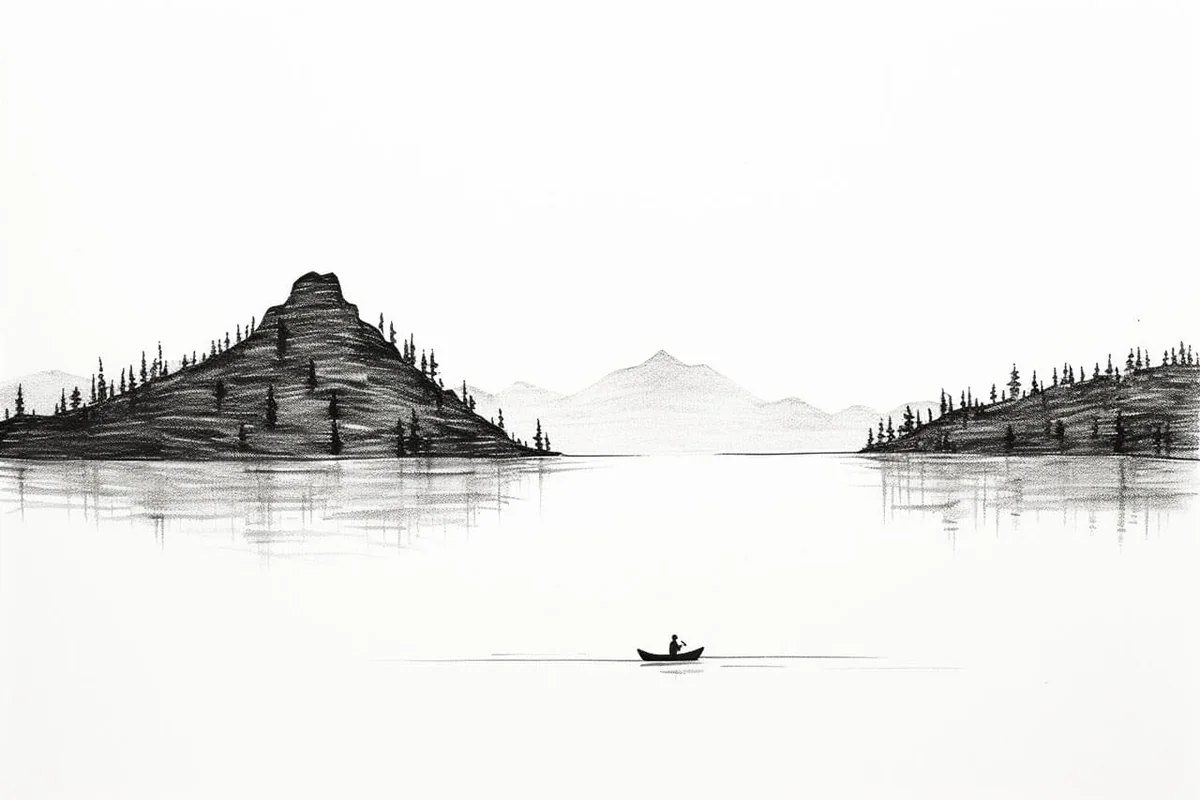
Mountain Lake Reflection: Illustrate a tranquil lake with towering mountains reflected in the still water, perhaps with a lone canoeist paddling.
-
Winter Lake Freeze: Show a lake partially frozen with patches of clear ice, snow around the edges, and children skating while bundled in warm clothes.
-
Forest Lake Picnic: Create a cozy scene with a picnic blanket on the shore, family enjoying food with boats gently floating on the lake.
-
Mystical Lake at Night: Design a magical nighttime setting where the lake glows with bioluminescence under a starry sky, surrounded by enchanted creatures.
-
Lake with a Waterfall: Draw a picturesque scene of a waterfall cascading into a peaceful lake, producing sparkles and a rainbow in the mist.
-
Campfire by the Lake: Depict a group of friends around a campfire by a lake, with their tents pitched nearby and the reflection of the flames dancing on the water.
-
Spring Blooms Lake: Illustrate a lake surrounded by blossoming trees, with their pink and white blossoms being mirrored in the water.
-
Bird's Eye View of a Lake: Create an aerial view showing the shapes and patterns of the lake with surrounding forests and wildlife tracks.
-
Fairytale Lake Castle: Imagine a whimsical castle sitting on an island in the middle of a lake, with bridges arching across the water.