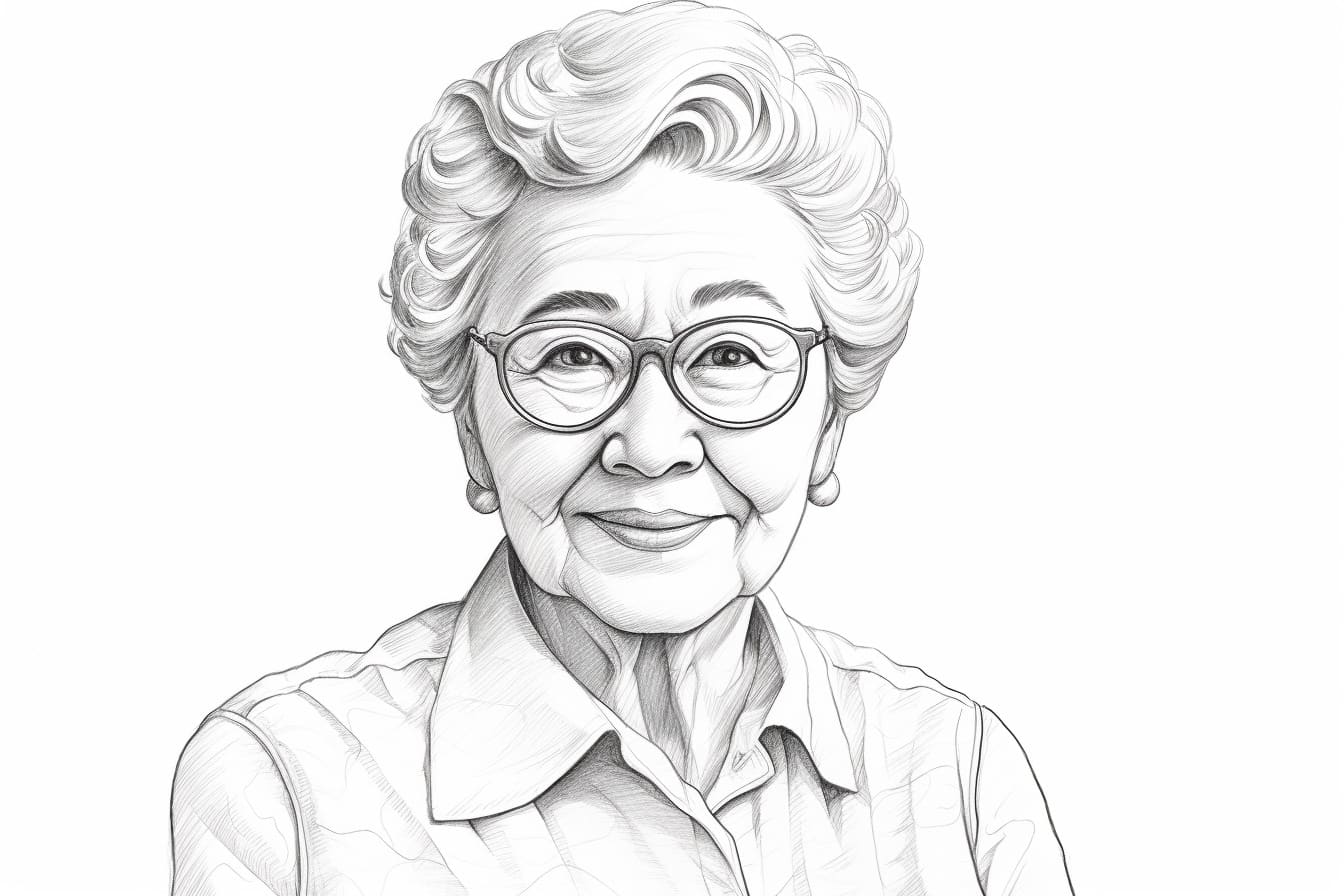
Welcome to this step-by-step guide on how to draw a grandma! Whether you are an experienced artist or just starting out, this tutorial will walk you through the process of capturing the essence of a grandma in your drawing. With clear instructions and helpful tips, you will soon be able to create a beautiful and realistic portrayal of a beloved grandmother figure. So, let’s grab our materials and get started!
Materials Required
To begin drawing a grandma, you will need the following materials:
- A pencil: Choose a pencil with a medium hardness (HB or 2B) for sketching and shading.
- Paper: Use a smooth paper such as drawing paper or sketchbook paper, preferably in a larger size such as 11×14 inches.
- Eraser: Select a soft eraser, such as a kneaded eraser, to remove any mistakes or unwanted lines.
- Drawing tools: If desired, you can also use additional drawing tools like colored pencils, markers, or pastels to add color or texture to your drawing.
Now that we have our materials ready, let’s move on to the step-by-step instructions for drawing a grandma.
Step 1: Basic Outline
Start by lightly sketching the basic shape of the head using a circular or oval shape. This will serve as the foundation for the grandma’s face. Next, draw a long, curved line down the center of the face to indicate the position of the nose. Add two vertical lines to mark the placement of the eyes, and a horizontal line for the mouth.
Step 2: Facial Features
Now, let’s focus on the grandma’s facial features. Sketch two small circles within the eye guidelines for the irises. Add smaller circles within the irises to represent the pupils. Above the eyes, draw curved lines for the eyebrows, paying attention to their shape and thickness.
Next, carefully sketch the nose, using the previously drawn guideline as a reference. Consider the shape and size of the grandma’s nose, and add any specific details like wrinkles or dimples. Then, draw the mouth by following the guideline, paying attention to the shape and expression.
Step 3: Adding Details
To make your grandma drawing more realistic, it’s time to add some details. Start with the eyes, adding eyelashes and shading around the eyes to create depth and volume. Use short, curved lines to represent the wrinkles around the eyes and mouth.
Continue by adding more facial features, such as wrinkles on the forehead, laugh lines, and any other unique characteristics that define your grandma’s appearance. Pay attention to the shape of the face and the placement of the ears. Remember, every grandma is unique, so don’t be afraid to highlight the special features that make her stand out.
Step 4: Hair and Accessories
Now, let’s move on to drawing the grandma’s hair. Start by sketching the general shape of the hair, considering the length and style. Pay attention to any specific details like bangs, curls, or a bun. Once the basic shape is in place, add texture and volume to the hair by adding small, curved lines or shading.
If your grandma wears any accessories like glasses, a hat, or earrings, now is the time to draw them. Pay attention to the proportions and details of these accessories, as they can add character to your drawing.
Step 5: Clothing and Body
In this step, we will focus on drawing the grandma’s clothing and body. Start by sketching the neckline and collar of the grandma’s outfit. Then, carefully draw the rest of the clothing, paying attention to the folds, wrinkles, and overall shape. Consider the type of clothing your grandma might wear, whether it’s a dress, blouse, or sweater.
Next, sketch the grandma’s body using simple shapes like ovals and rectangles. Pay attention to the proportions and make any necessary adjustments. Remember, the body should be proportionate to the head and the overall pose of your grandma.
Step 6: Shading and Final Touches
To add depth and dimension to your drawing, it’s time to add shading. Determine the direction of the light source, and use your pencil to create shadows and highlights accordingly. Observe the reference image or your imagination to identify areas that are in shade or receive more light.
Gradually build up the shading, starting with light strokes and gradually adding darker tones. Use blending techniques like smooth transitions or cross-hatching to create a realistic effect. Pay attention to the contours of the face, body, and clothing, and add details like patterns or textures if desired.
Finally, take a step back and assess your drawing. Make any necessary adjustments or corrections to ensure a well-proportioned and accurate representation of your grandma.
Conclusion
Drawing a grandma is a wonderful way to celebrate and honor the special bond between grandchildren and their grandmothers. By following these step-by-step instructions, you have learned how to capture the essence of a grandma in your drawing. Remember, practice makes perfect, so don’t be discouraged if your first attempts are not perfect. With time and dedication, your drawing skills will improve, and you will be able to create beautiful artworks that portray the unique qualities of grandmothers.
Thank you for joining us in this drawing tutorial. We hope you enjoyed the process and are proud of your final grandma drawing. Get your materials ready, and let your artistic journey continue!


