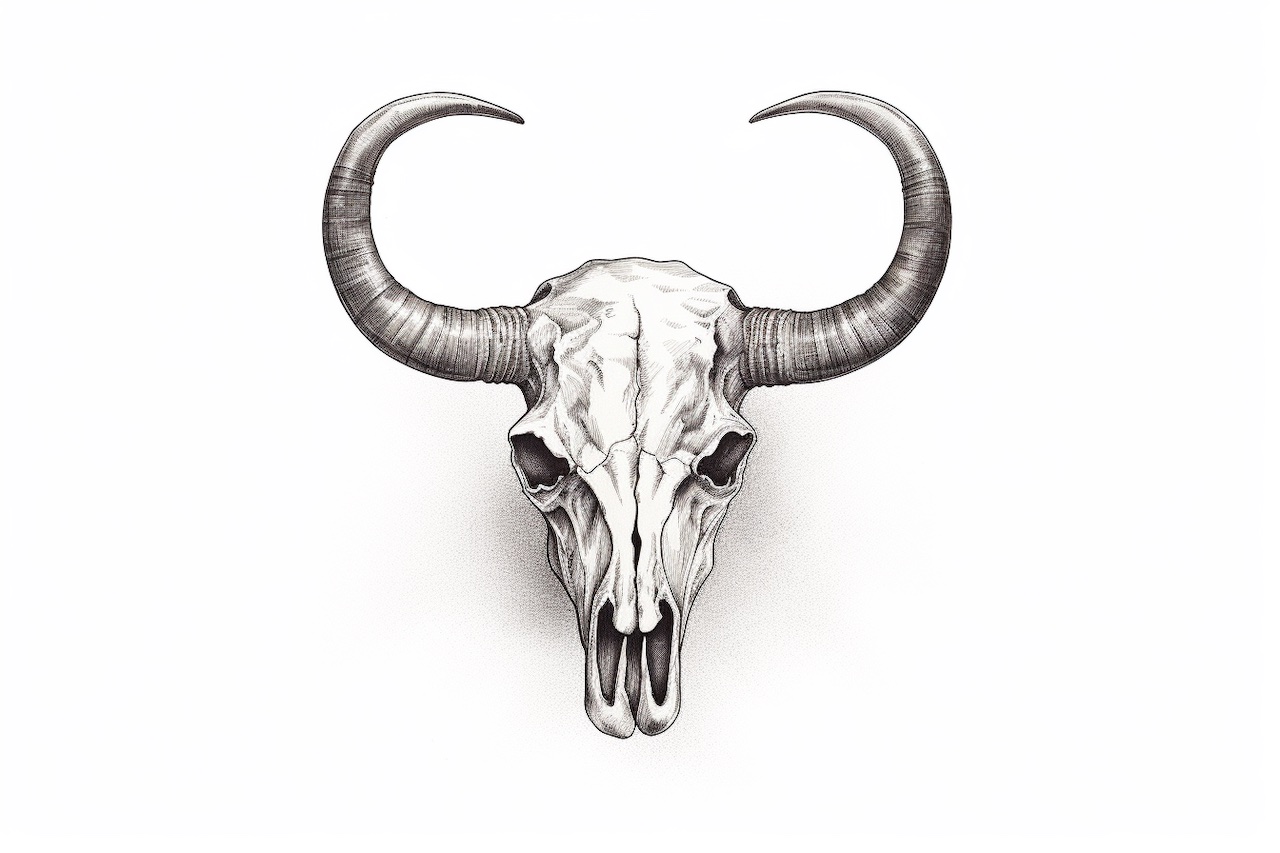
Welcome to this step-by-step guide on how to draw a cow skull. Whether you’re an aspiring artist looking to improve your skills or want to try your hand at drawing something new, this tutorial will walk you through the process in a clear and concise manner.
Drawing a cow skull may seem daunting at first, but with the right techniques and a little practice, you’ll be able to create a stunning piece of art. So let’s get started!
Materials Required
Before we begin, make sure you have the following materials ready:
- A pencil
- A sketchpad or drawing paper
- Eraser
- Ruler or straight edge
- Pen or fine liner (optional for inking)
Now that you have your materials ready, let’s dive into the step-by-step process.
Step 1: Outline the Basic Shape
Start by lightly sketching an oval shape in the center of your paper. This will serve as the base for your cow skull. Next, draw two straight lines coming down from the bottom of the oval, forming the jawline. The length of these lines will determine the size of the skull.
Step 2: Add the Eye Sockets
Draw two small circles on either side of the oval, slightly above the center. These will be the eye sockets. Leave a small space between these circles and the top of the oval to create the skull’s forehead.
Step 3: Define the Nose and Mouth
From the bottom of the eye sockets, draw a curved line that connects to the jawline. This will define the shape of the nose and mouth area. Take your time to carefully depict the curvature and width of this line, as it will determine the overall look of the skull.
Step 4: Create the Horns
Extend two curved lines upward from the sides of the oval, starting from the top of the forehead area. These lines should resemble the shape of long horns, curving slightly outward as they go up. Once you have the basic shape of the horns, add more details such as ridges or texture to make them more realistic.
Step 5: Refine the Shape
Using the outline as a guide, start refining the shape of the skull by adding curves and angles where necessary. Pay attention to the subtle details, such as the cheekbones and the hollow areas around the eye sockets. Take your time with this step, as it will greatly affect the overall appearance of your drawing.
Step 6: Add Texture and Detail
Now that you have the basic shape in place, it’s time to add texture and detail to your cow skull. Start by sketching small, random lines within the shape of the skull to give it a bony texture. You can also add shading to create depth and dimension. Take a closer look at reference images or real cow skulls to get an idea of the different textures and details you can incorporate.
Step 7: Finalize the Drawing
Once you’re satisfied with the overall look of your cow skull, go ahead and darken the lines you want to keep. You can use a pen or fine liner for this step. Take your time and be mindful of the details to create a polished and finished drawing.
Conclusion
Congratulations! You’ve successfully learned how to draw a realistic cow skull. By following these step-by-step instructions and practicing regularly, you’ll be able to create detailed and lifelike drawings of cow skulls in no time. Remember to be patient and enjoy the process of creating art.
Art is a wonderful way to express your creativity and explore new subjects. Now that you’ve mastered the technique of drawing a cow skull, feel free to experiment with different angles, sizes, and styles. Keep practicing, and soon you’ll be able to draw a variety of skulls with confidence.