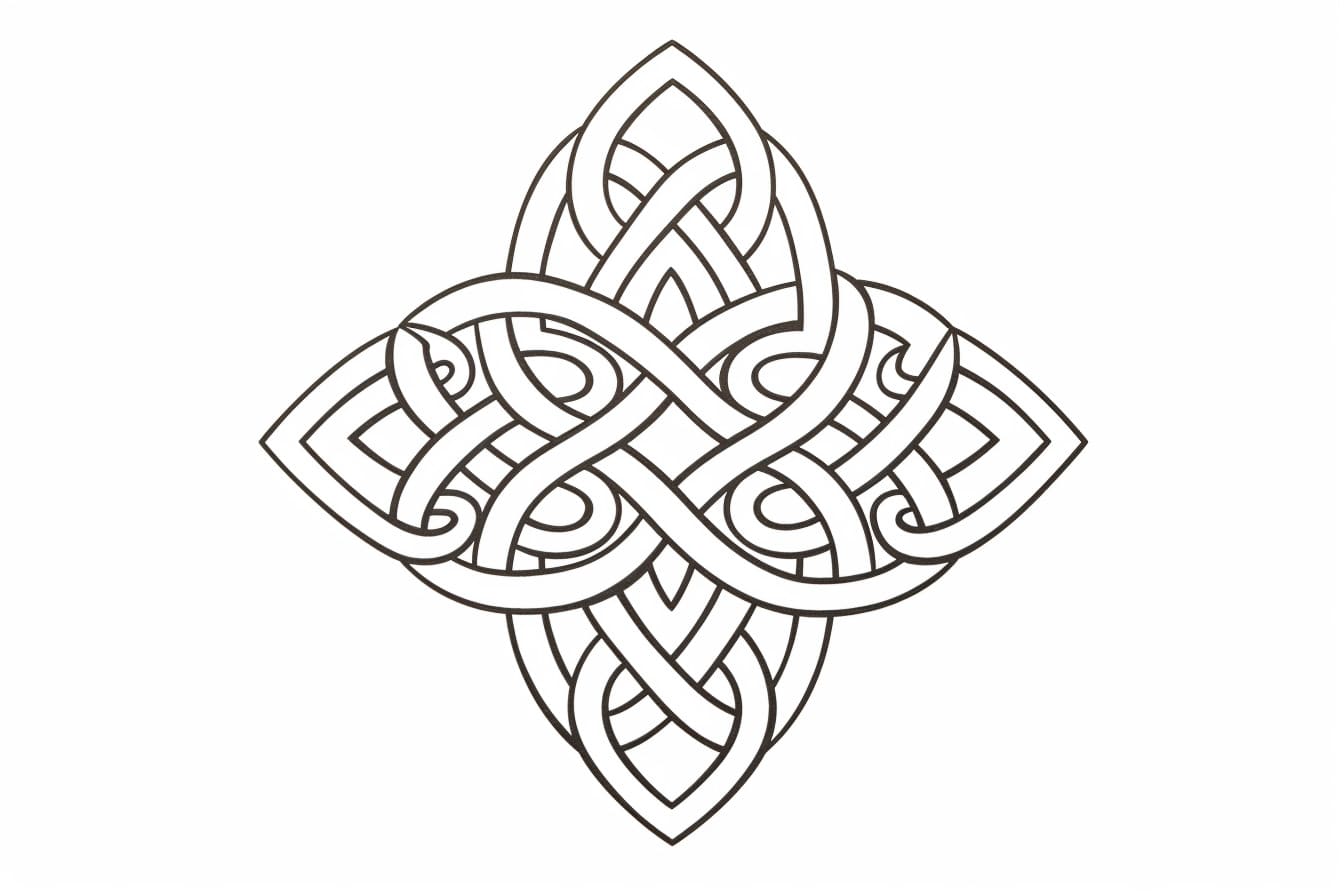
Welcome to this step-by-step tutorial on how to draw a Celtic symbol. Celtic symbols have been used for centuries in Celtic culture to represent various meanings and concepts. Drawing these symbols can be a great way to connect with Celtic heritage or enjoy the intricate designs. So, grab your pen and paper, and let’s get started!
Materials Required
To begin drawing your Celtic symbol, gather the following materials:
- Paper: Choose a smooth and sturdy paper that can withstand drawing without tearing easily. Drawing paper or sketchbook paper works well.
- Pencil: Select a soft graphite pencil, such as a 2B or 4B, for sketching your design. A softer pencil will allow you to create lighter lines that can be easily erased later on.
- Fine-tip pen: You will need a pen with a fine point for tracing and finalizing your Celtic symbol. A black or dark-colored pen is ideal for creating bold lines.
Once you have these materials ready, you are all set to start drawing your Celtic symbol!
Step 1: Research Celtic Symbols
Before diving into the drawing process, it’s essential to research and familiarize yourself with different Celtic symbols. Take some time to explore books, websites, or other resources that showcase Celtic art and its rich symbolism. This research will help you understand the meanings behind different symbols and inspire your own unique design.
Step 2: Plan Your Design
Now that you have some knowledge about Celtic symbols, it’s time to plan your own design. Consider the meaning you want your Celtic symbol to convey and brainstorm ideas for its visual representation. Sketch out some rough thumbnail drawings to experiment with different shapes, lines, and patterns.
Step 3: Create the Basic Structure
Begin by lightly sketching the basic structure of your Celtic symbol using a pencil. Start with simple geometric shapes, such as circles, squares, or triangles, to form the foundation of your design. Keep your lines light and loose as you are still in the initial sketching phase.
Step 4: Add Intricate Patterns
Now, it’s time to incorporate intricate patterns into your Celtic symbol. Celtic art is known for its beautiful interweaving knots, spirals, and other geometric designs. Use curved lines to create interlocking patterns within the shapes you drew in the previous step. Take your time to ensure each line flows smoothly and connects with the others.
Step 5: Refine Your Design
Once you are satisfied with the overall look of your Celtic symbol, go over your pencil lines with a darker pencil or pen to make them more defined. Remove any unnecessary pencil marks and erase any visible construction lines. This step will give your drawing a cleaner and more polished appearance.
Step 6: Trace with a Pen
Now that your design is refined, trace the final lines of your Celtic symbol using a fine-tip pen. Start from one end of the symbol and work your way across, paying attention to the intricate details and patterns. Use confident strokes and maintain a steady hand to achieve smooth lines.
Step 7: Add Finishing Touches
Once you have traced your Celtic symbol with the pen, take a moment to examine it and see if any further adjustments or enhancements are needed. Add any additional details or embellishments to make your symbol more visually appealing. This might include adding shading, hatching, or additional lines to create texture or depth.
Conclusion
Drawing a Celtic symbol can be a captivating and rewarding experience. As you dive into the intricate patterns and designs, you’ll discover the beauty and significance behind these symbols. Remember, each Celtic symbol has its own unique meaning, so take your time to research and plan your design accordingly. With practice and patience, you’ll be able to create stunning Celtic symbols that reflect your creativity and appreciation for this ancient art form.
So, grab your materials and start drawing your own Celtic symbol today. Unleash your creativity and let the spirit of Celtic culture inspire you!