Welcome to this step-by-step guide on how to draw a Batman symbol! Whether you’re a fan of the Dark Knight or simply want to improve your drawing skills, this tutorial will walk you through the process of creating this iconic superhero emblem. By following along with these instructions, you’ll be able to recreate the Batman symbol with ease. So, grab your drawing materials and let’s get started!
Materials Required
Before we dive into the drawing process, let’s make sure we have all the necessary materials:
- Drawing paper or sketchbook
- Pencil
- Eraser
- Fine-tip black marker or pen
- Ruler (optional, but helpful for precise measurements)
That’s it! With these materials in hand, you’re ready to embark on your artistic journey to create the Batman symbol.
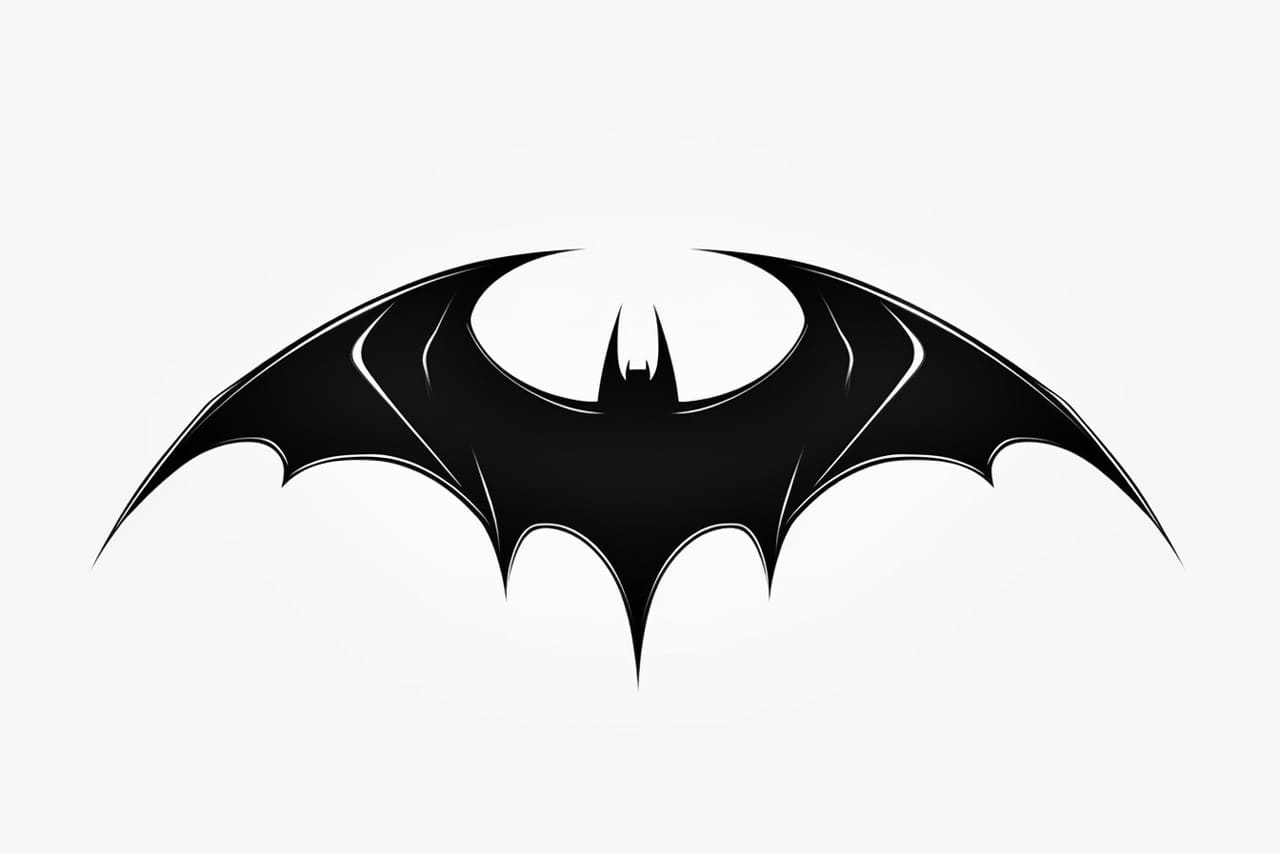
Step 1: Sketch the Outline
Begin by lightly sketching the outline of the Batman symbol. Start with a vertical line down the center of your paper, followed by two curved lines extending outward from the top of the center line. These lines should form a shape resembling the top half of an oval. Next, draw two shorter curved lines extending from the bottom of the center line, forming the bottom half of the oval. Make sure to leave enough space between the top and bottom halves for the bat wings.
Step 2: Add the Wings
Now, let’s add the bat wings to our symbol. Starting from the top of the oval, draw two curved lines that extend outwards and downwards, gradually curving upwards towards the tips. These lines should resemble the shape of a bat’s wings in flight. Repeat this process on the other side to create the second bat wing. Make sure to keep the size and proportions of the wings symmetrical.
Step 3: Define the Bat Ears
Batman’s iconic ears are an essential part of the symbol. Extend two straight lines upwards from the top of the oval, tapering towards the tips to create the bat ears. These lines should be symmetrical and slightly slanted inward.
Step 4: Refine the Outline
Now that you have the basic structure of the Batman symbol, it’s time to refine the outline. Go over your initial sketch, using a darker pencil or pen to trace along the lines you want to keep. Smooth out any uneven curves and make any necessary adjustments to ensure a clean and polished look.
Step 5: Fill in the Symbol
Using a fine-tip black marker or pen, carefully fill in the entire Batman symbol. Start by outlining the entire symbol, including the wings and ears. Then, fill in the inside of the symbol, making sure to stay within the lines. Take your time and be precise to achieve a professional-looking result. Once you have filled in the symbol, allow the ink to dry completely.
Step 6: Add Depth and Shadows (Optional)
This step is optional but can add dimension to your drawing. Using a pencil or marker, add some shadows and shading to certain areas of the Batman symbol to create depth. Focus on the areas where the wings overlap or where the symbol curves. Gradually build up the shading by layering strokes until you achieve the desired effect.
Step 7: Erase and Finalize
Once the ink has dried and any shading is complete, use an eraser to remove any visible pencil lines, leaving only the clean and bold Batman symbol. Take your time and erase gently to avoid smudging the ink. With the final touches complete, step back and admire your work!
Conclusion
Congratulations! You have successfully drawn a Batman symbol. By following these step-by-step instructions, you’ve recreated this iconic emblem. The Batman symbol is a timeless representation of justice and heroism, and now you can proudly showcase your artistic skills. So, keep practicing, and soon you’ll be able to draw the Batman symbol easily. Happy drawing!