Drawing a cannabis plant can be a fun and creative way to express your love for nature and appreciation for the cannabis plant. Whether you want to create a realistic representation or add your own artistic flair, this step-by-step guide will help you achieve a beautiful and detailed drawing. By following these instructions and using the right materials, you’ll be able to create a stunning cannabis plant illustration.
Materials Required:
To draw a cannabis plant, you will need the following materials:
- Drawing paper or sketchbook
- Pencil or pen
- Eraser
- Ruler
- Colored pencils or markers (optional)
Now that you have your materials ready, let’s get started!
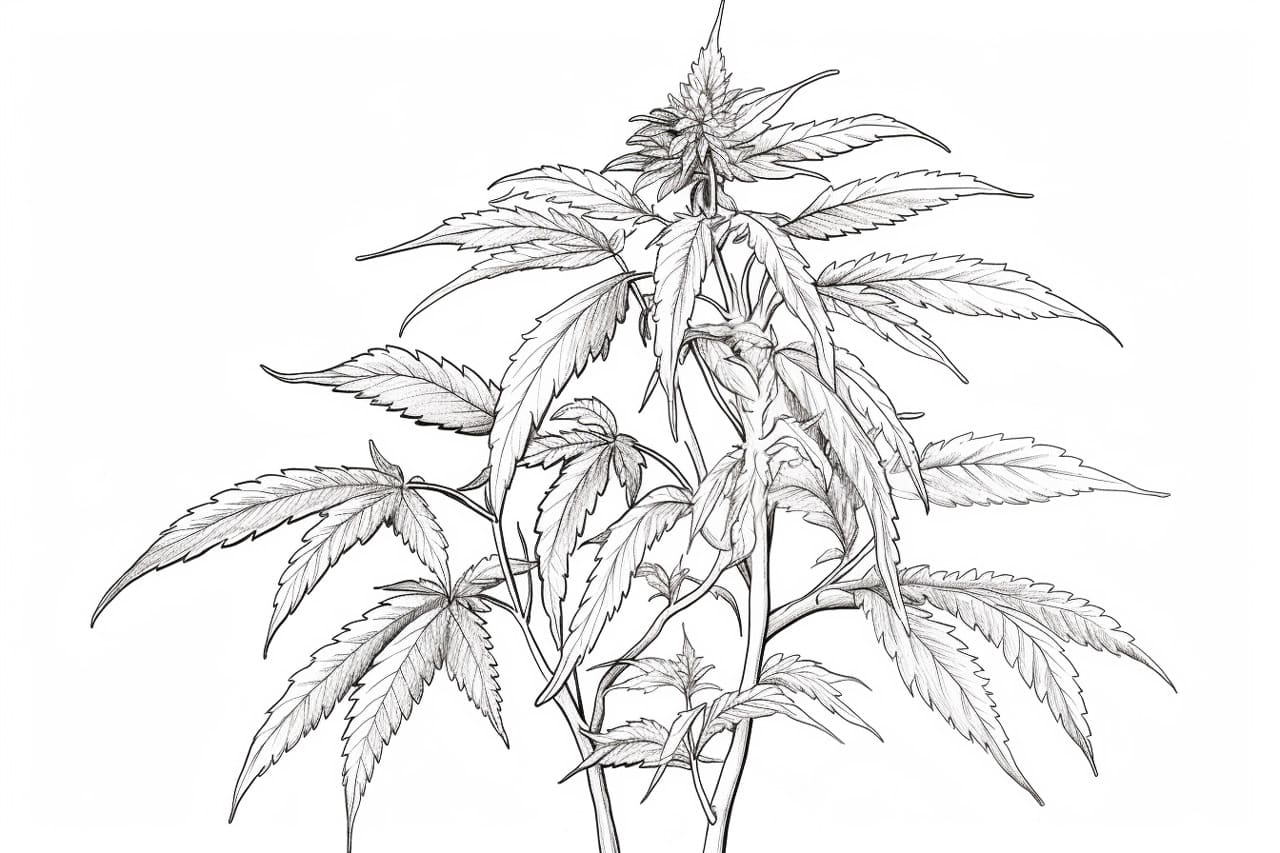
Step 1: Sketch the Outline
Begin by lightly sketching the outline of the cannabis plant on your drawing paper. Start with a vertical line in the center of the page to represent the main stem. Then, sketch three or four lines branching out from the main stem to create the primary branches. Make sure to leave enough space for the leaves and smaller branches later on.
Step 2: Add the Leaves
Next, draw the leaves of the cannabis plant. Begin by sketching long, narrow, and pointed leaf shapes along the primary branches. Make sure to vary the size and angle of the leaves for a more natural look. Remember that cannabis leaves are usually serrated, so add some tiny teeth-like shapes along the edges.
Step 3: Include the Smaller Branches
Now, draw the smaller branches that emerge from the primary branches. These branches should be thinner and shorter than the primary branches. Add them in a zigzag pattern, protruding slightly from the main stem and primary branches. Include some leaves on these smaller branches as well.
Step 4: Define the Buds
The buds are an essential part of the cannabis plant. To draw them, start by sketching small oval shapes at the tips of the smaller branches. Make sure these ovals are slightly elongated. Add some smaller oval shapes emerging from the sides of the larger ovals to represent smaller buds. Remember to make the buds different sizes and shapes to create a more realistic appearance.
Step 5: Add Details to the Leaves
To make the leaves more visually appealing, add some veining and texture. Draw some curved lines that radiate from the center of the leaf towards the edges. These lines should follow the shape of the leaf and give it a more realistic look. You can also add some texture by lightly sketching tiny dots or lines to represent the cannabis plant’s fine hairs.
Step 6: Refine the Stem and Branches
Now it’s time to refine the main stem and branches. Use your pencil or pen to darken the lines and make them more defined. Add some knots or irregularities along the stem and branches to give them a more natural appearance. You can also add some texture to the branches by lightly sketching horizontal lines or small vertical lines.
Step 7: Shade and Color (Optional)
If you want to add some depth and dimension to your cannabis plant drawing, you can shade and color it. Use your colored pencils or markers to add shades of green to the leaves and buds. Start with a lighter shade and gradually build up the layers for a more realistic effect. You can also add some highlights with a white pencil or marker to make certain areas stand out.
Conclusion
Drawing a cannabis plant can be a rewarding artistic endeavor. By following these step-by-step instructions and using the right materials, you can create a stunning and detailed illustration. Remember to take your time, be patient, and let your creativity guide you. Whether you choose to create a realistic representation or add your own artistic flair, enjoy the process and have fun with it!