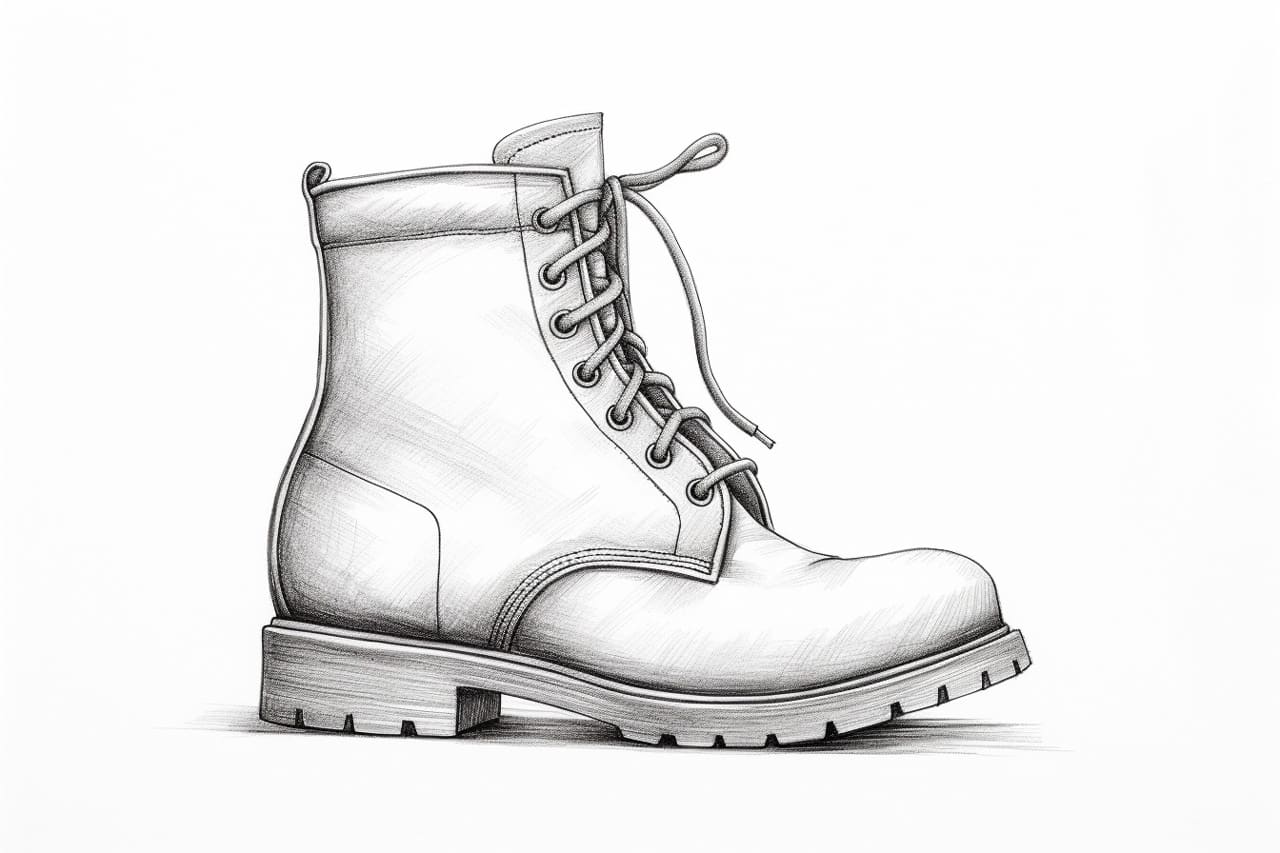
Welcome to this step-by-step guide on how to draw a boot. Whether you are an aspiring artist or just looking to have some fun with drawing, this tutorial will help you create a realistic and detailed boot. By following the instructions below, you will learn the techniques required to draw a boot from scratch. So grab your pencil and paper, and let’s get started!
Materials Required
To draw a boot, you will need the following materials:
- Paper – A sturdy drawing paper will work best for this project.
- Pencil – Choose a pencil with a medium lead for sketching and shading.
- Eraser – A good quality eraser will be useful for correcting mistakes.
- Ruler – A straight ruler or a T-square can help with drawing straight lines.
- Reference – It’s always helpful to have a reference image of a boot to guide you through the process. You can use a photograph, a real boot, or search online for reference images.
Now that we have all the materials ready, let’s move on to the step-by-step instructions.
Step 1: Draw the Basic Shape of the Boot
Start by drawing a vertical line on your paper. This line will serve as the center of the boot. Then, sketch a small oval shape at the top of the line. This will be the opening of the boot. Next, draw a larger oval shape at the bottom of the line to represent the sole of the boot.
Step 2: Add the Upper Part of the Boot
From the top of the opening, draw two curved lines that meet at a point slightly above the center of the vertical line. These lines will form the front of the boot. Then, extend two parallel lines from the sides of the sole, curving slightly inward. These lines will create the sides of the boot.
Step 3: Define the Boot’s Shaft
From the point where the curved lines meet, draw a slightly curved line extending upwards. This will form the back of the boot. Then, connect the ends of the back and front lines with two curved lines, creating the shaft of the boot. Make sure to leave some space at the top for the boot opening.
Step 4: Refine the Shape of the Boot
Now that you have the basic outline of the boot, it’s time to refine the shape. Use your reference to guide you in adding details and curves to make the boot look more realistic. Pay attention to the curves and angles of the boot’s upper part, the shaft, and the sole.
Step 5: Add Details to the Boot
To make the boot look more realistic, start adding details. Draw a seam line on the front of the boot, following the shape of the upper part. Add stitching details along the sides of the boot shaft and around the opening. You can also sketch some texture lines on the sole to represent the grip.
Step 6: Shade the Boot
To give the boot dimension and depth, add shading. Determine the light source in your drawing and shade accordingly. Use light, feathery strokes to gradually darken areas that are farther away from the light source. Pay attention to the shadows cast by the different parts of the boot and use darker shading in those areas.
Step 7: Erase and Refine
After shading, take a step back and evaluate your drawing. Use an eraser to clean up any stray lines or smudges. Adjust the shading as needed and refine any details that require additional attention.
Congratulations! You have successfully drawn a boot. With practice, you will become more comfortable with the process and be able to create boots of different styles and designs.
Conclusion
Drawing a boot may seem challenging at first, but by following the step-by-step instructions outlined in this guide, you can create a realistic and detailed boot. Remember to take your time, use a reference image, and practice regularly to improve your drawing skills. So grab your materials and start drawing boots today!