How to Draw a Bookshelf
Learn how to draw a bookshelf with this step-by-step tutorial. Create a beautiful bookshelf drawing using basic materials and techniques. Perfect for beginners and experienced artists.
Materials You'll Need
- Pencil
- Paper
- Eraser
A bookshelf is more than just a functional piece of furniture; it's a symbol of knowledge, creativity, and personal style. Drawing a bookshelf allows artists to explore perspective, proportions, and intricate details such as the arrangement of books and decorative items. Whether you want to capture the cozy atmosphere of a home library or the sleek design of a modern shelving unit, learning how to draw a bookshelf can enhance your artistic skills and add depth to your drawings.
This tutorial on how to draw a bookshelf is designed to guide you step-by-step through the process, making it approachable for artists of all skill levels. Beginners will benefit from practicing basic shapes and lines, while more advanced artists can focus on shading, texture, and perspective to create a realistic representation. Drawing a bookshelf involves understanding how to depict three-dimensional objects on a two-dimensional surface, which is a valuable skill for many drawing projects.
As you follow along, remember that patience and practice are key to mastering this subject. With each stroke, you'll gain confidence and develop your eye for detail. By the end of this guide, you'll not only have a beautiful bookshelf drawing to be proud of but also improved skills that will help you tackle more complex compositions in the future. So, grab your pencil and paper, and let's dive into how to draw a bookshelf that truly stands out!
Materials Required
Before we begin, let's gather the materials you will need:
- Paper: You can use any type of paper, but it's best to use a heavier weight paper such as sketch paper or drawing paper.
- Pencil: A regular graphite pencil will work fine, but if you prefer, you can use a mechanical pencil for more precision.
- Eraser: A good quality eraser will come in handy for making corrections and cleaning up your drawing.
- Ruler: A ruler or straightedge will help you draw straight lines and ensure accuracy.
- Colored pencils or markers (optional): If you want to add color to your drawing, you can use colored pencils or markers.
Now that we have our materials ready, let's get started on drawing a bookshelf!
Step 1: Outline the Basic Shape of the Bookshelf
Begin by drawing a horizontal line towards the bottom of your paper. This will be the base of the bookshelf. Next, draw two vertical lines rising from each end of the base line to create the sides of the bookshelf. You can adjust the height of these lines based on how tall you want your bookshelf to be.
Step 2: Add Shelves to the Bookshelf
Divide the vertical lines into equal sections to represent the shelves. Draw horizontal lines across the sides of the bookshelf, making sure they are parallel to the base line. The number of shelves you include is up to you, but it's common to have three or four shelves in a bookshelf.
Step 3: Draw the Back Panel of the Bookshelf
Now it's time to draw the back panel of the bookshelf. Start by drawing a vertical line on the left side of the bookshelf, parallel to the sides. Then, draw a series of horizontal lines across the bookshelf, connecting the vertical lines on each side. These lines represent the back of the bookshelf.
Step 4: Add Details to the Shelves
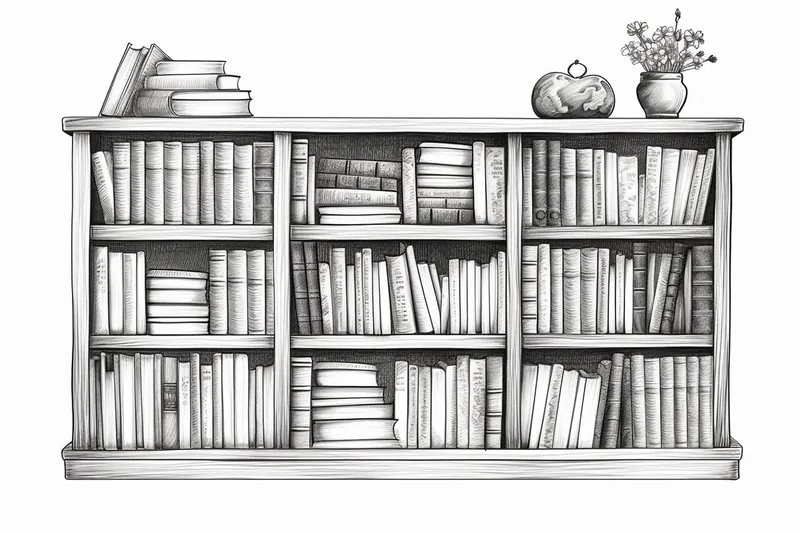
To make your bookshelf drawing more realistic, add some details to the shelves. Begin by drawing small rectangles or squares within each shelf to represent the books. You can vary the sizes and orientations of the books to add visual interest. You can also draw other items such as vases, picture frames, or figurines on the shelves to personalize your drawing.
Step 5: Refine the Lines and Add Depth
Now that you have the basic structure of the bookshelf, go over your drawing and refine the lines. Use your ruler to make straight lines where necessary, and erase any unnecessary lines or mistakes. To add depth to your drawing, you can use shading techniques to create highlights and shadows. Start by shading the areas where the shelves meet the sides and the back of the bookshelf, as these areas would naturally be darker.
Step 6: Optional - Add Color to Your Drawing
If you want to take your bookshelf drawing to the next level, you can add color using colored pencils or markers. Consider the materials of the books and the style of the room where the bookshelf is located when choosing your colors. Take your time and layer the colors to create depth and dimension. You can also add shading and highlights using colored pencils or markers to make your drawing more realistic.
Conclusion
Drawing a bookshelf can be a fun and rewarding experience. By following these step-by-step instructions and using your creativity, you can create a beautiful bookshelf drawing that showcases your artistic skills. Remember to practice and experiment with different techniques to improve your drawing abilities. So grab your pencils and paper, and let's get started on your bookshelf masterpiece!
Fun Facts About Bookshelf
- The earliest known bookshelves date back to ancient Mesopotamia, where clay tablets were stored on wooden shelves.
- Bookshelves are often designed to support the weight of many books, with some antique shelves made from solid hardwoods like oak or mahogany for durability.
- The term "bookshelf" first appeared in English texts in the 17th century, evolving alongside the rise of printed books; explore the history.
- Modern bookshelves come in a variety of styles, including floating shelves that create a minimalist look by appearing to "float" on the wall.
- In libraries, bookshelves are often arranged in compact shelving systems to maximize space, some of which are motorized for easy access.
- Bookshelves not only store books but also serve as decorative elements, reflecting personal style and sometimes becoming focal points in interior design; see examples at decorative uses.
- The largest bookshelf in the world is located in the Stuttgart City Library in Germany, featuring a striking cubic design and thousands of books.
- Adjustable bookshelves allow users to customize shelf height to accommodate books of various sizes, enhancing functionality.
Suggestions for Scenes and Settings for Bookshelf Drawings
- A cozy home library nook with a tall wooden bookshelf filled with worn, colorful books and a soft armchair nearby.
- A sleek, modern minimalist bookshelf in a bright, sunlit room showcasing a mix of books and geometric decorative objects.
- An antique study room featuring a vintage bookshelf cluttered with leather-bound volumes, old maps, and a globe.
- A children's bedroom with a playful bookshelf holding storybooks, toys, and whimsical trinkets.
- A creative artist's studio with an eclectic bookshelf displaying sketchbooks, art supplies, and inspirational objects.
- A rustic cabin interior with a rough-hewn wooden bookshelf stacked with nature guides and handmade crafts.
- A fantasy setting where the bookshelf is enchanted, with floating books and glowing magical artifacts.
- A bustling cafe corner with a bookshelf filled with novels, magazines, and a small potted plant, inviting visitors to relax.
- A futuristic living space where the bookshelf is integrated into smart technology panels, displaying digital books and holograms.
- An outdoor patio scene with a weathered bookshelf holding gardening books, seed packets, and small ceramic pots.