How to Draw a Baseball Player
Learn how to draw a baseball player with this step-by-step tutorial. Follow these instructions and create a dynamic and realistic representation of a baseball player.
Materials You'll Need
- Pencil
- Paper
- Eraser
Baseball is a beloved sport that captures the spirit of teamwork, skill, and athleticism, making the baseball player an iconic figure to portray in art. Whether you admire the dynamic motion of a player pitching a fastball, swinging a bat, or fielding a ground ball, learning how to draw a baseball player offers a fantastic opportunity to practice capturing human anatomy, movement, and character expression. This subject is perfect for artists who want to explore gesture drawing, proportions, and realistic details like uniforms and equipment. By drawing a baseball player, you can deepen your understanding of form and action while celebrating the energy of America's pastime.
This tutorial is designed to guide artists of all skill levels through the process, from the initial sketch to the final details. Whether you're a beginner eager to hone your foundational skills or an experienced illustrator looking to refine dynamic poses and clothing folds, you'll find valuable techniques here. We will break down the figure into manageable steps, focusing on accurate anatomy, proportion, and the nuances of baseball gear such as gloves, caps, and cleats. Along the way, you'll also learn about shading and line work that bring your drawing to life. Taking the time to study how to draw a baseball player can greatly enhance your ability to depict movement and personality in your artwork.
So, grab your favorite pencils and some quality paper, and get ready to embark on a creative journey that combines sports and art. With patience and practice, you will not only create a compelling image but also build confidence in your drawing skills. This tutorial will empower you to capture the excitement and intensity of a baseball player in action, encouraging you to keep pushing your artistic boundaries. Let's step up to the plate and start drawing!
Materials Required
Before we begin, gather the following materials:
- A pencil (preferably a 2B or HB pencil)
- Eraser
- Drawing paper or sketchbook
- Fine-tipped markers (optional for inking)
Now that you have everything you need, let's dive into the drawing process!
Step 1: Basic Proportions
Start by drawing a vertical line that represents the center of the baseball player's body. This line will serve as a guide to help you maintain proper proportions throughout the drawing. Then, sketch a circle on top of this line for the player's head.
Step 2: Head and Facial Features
Refine the shape of the head by adding details such as the ears and jawline. Divide the head into halves vertically and horizontally to help you place the facial features accurately. Draw two oval shapes for the eyes, a small triangle for the nose, and a curved line for the mouth. Don't worry about adding too much detail at this stage; we'll refine the features later.
Step 3: Body Outline
Using the vertical line as a reference, sketch a rectangle beneath the head to represent the torso. Add two slightly curved lines on each side to indicate the arms, and two straight lines below the torso for the legs. These lines will serve as a basic framework for the body.
Step 4: Arm and Leg Details
Refine the arms and legs by adding more detail. Draw the shoulder and upper arm on one side of the body, and then extend a curved line to represent the lower arm. Repeat this process on the other side. For the legs, draw the thigh, knee, and lower leg using curved lines. Remember to keep the proportions balanced.
Step 5: Baseball Uniform
Now it's time to add the details of the baseball player's uniform. Start by sketching the collar of the jersey and then draw the sleeves and pants. Add creases and folds to make the clothing appear more realistic. For the hands, draw simple shapes to represent the palms and fingers.
Step 6: Face and Hair
Go back to the head and refine the facial features. Add more depth to the eyes by drawing the iris and pupil. Give the eyebrows some shape and add eyelashes if desired. Next, draw the hair. Use curved lines to outline the hairstyle and add texture by drawing small strokes. Take your time to create a hairstyle that suits the baseball player's personality.
Step 7: Face Details and Expression
Refine the face by adding more detail. Add highlights to the eyes to make them appear lively, and shade the areas around the eyes for depth. Draw the lips with more precision and add lines to define the contours of the face. Experiment with different expressions to give your baseball player a unique personality.
Step 8: Final Details
Conclusion
Congratulations, you've successfully learned how to draw a baseball player! By following these step-by-step instructions, you've been able to create a dynamic and realistic representation of a baseball player. Remember to practice regularly to improve your skills and experiment with different poses and styles. Enjoy the process of drawing and have fun bringing your baseball player to life on paper!
Fun Facts About Baseball Player
- The first professional baseball player was Cap Anson, who played in the late 19th century.
- Baseball players can run the bases at speeds up to 20 miles per hour, showcasing incredible athleticism.
- The fastest recorded pitch by a baseball player was thrown by Aroldis Chapman at 105.1 mph.
- Baseball players wear gloves that can weigh up to 32 ounces to help catch fast-moving balls.
- The iconic baseball uniform number system was popularized by the New York Yankees in the 1920s.
- Many baseball players use visualization techniques to improve their batting performance.
- Baseball players often have superstitions, such as wearing lucky socks or following specific routines before games.
Suggestions for Scenes and Settings for Baseball Player Drawings
- A baseball player pitching a fastball with intense focus on the mound, capturing the dynamic motion and tension.
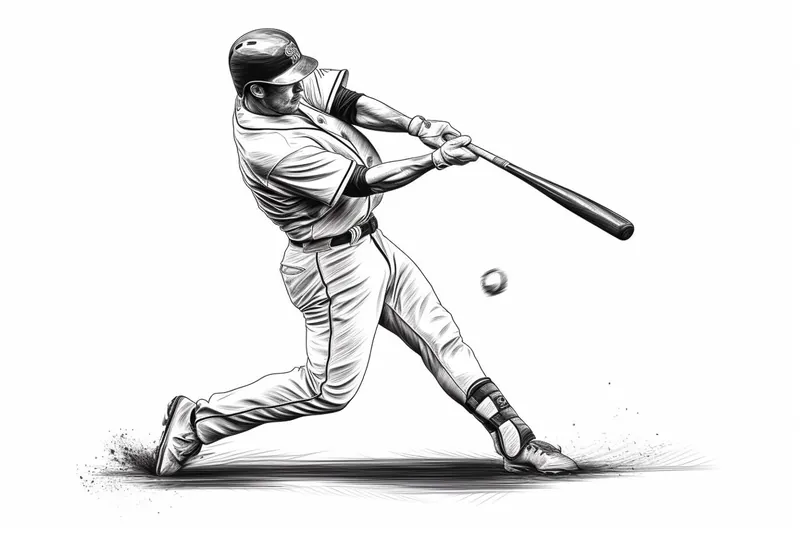
- A batter mid-swing at home plate, showing the power and energy of the moment with flying dust and dramatic lighting. baseball bat
- A fielder diving to catch a ground ball, emphasizing agility and quick reflexes in a close-to-the-ground pose.
- A catcher crouched behind home plate, ready to receive the pitch, with detailed gear like mask, mitt, and chest protector.
- A player sliding into a base with dirt flying, illustrating speed and the physicality of the game.
- A pitcher winding up for a curveball, highlighting arm motion and the twist of the torso.
- A baseball player adjusting their cap or wiping sweat from their brow, capturing a quiet, candid moment during a break. baseball cap
- A team huddle in the dugout, showing camaraderie and teamwork with multiple players interacting.
- A close-up portrait of a baseball player's face with focused eyes and detailed helmet and jersey textures.
- A player throwing a long throw from the outfield, illustrating strength and precision in the arm's movement.