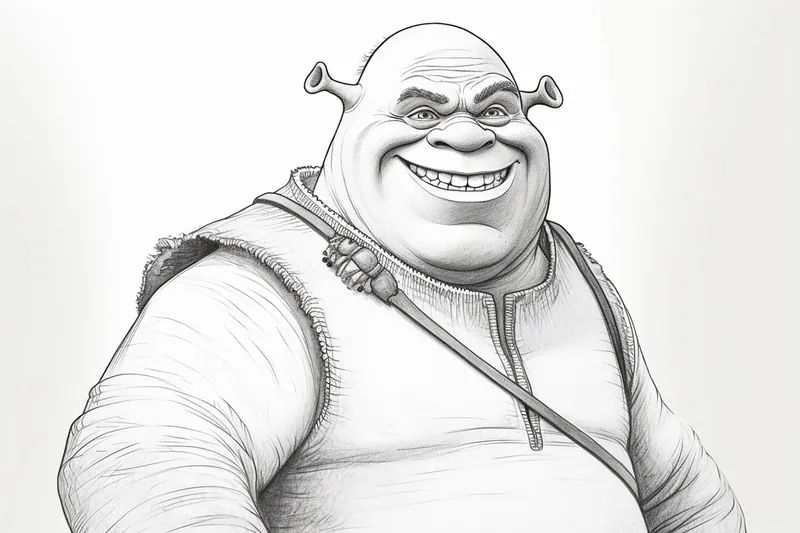
How to Draw Shrek
Learn how to draw Shrek, the lovable ogre, in this step-by-step tutorial. Follow along and create your own Shrek masterpiece with just a few simple steps.
Materials You'll Need
- Pencil
- Paper
- Eraser
Get ready to step into the magical world of Far Far Away! This tutorial will guide you through how to draw Shrek, the beloved green ogre from the hit animated movie series. Shrek is known for his distinctively rounded features, expressive eyebrows, and, of course, his famously friendly (and sometimes grumpy) demeanor. Drawing Shrek is not only a fun way to pay tribute to a character that has entertained audiences of all ages, but it also offers a fantastic opportunity to practice capturing personality and emotion in your art.
Whether you're a beginner looking to expand your drawing skills or a seasoned artist eager to try something new, learning how to draw Shrek can be both rewarding and educational. Shrek's unique design challenges you to work with shapes, proportions, and shading to bring out his memorable look. By following this step-by-step tutorial, you'll develop techniques for sketching cartoon characters, refining outlines, and adding the finishing touches that make Shrek unmistakably himself. This process is great for building confidence and adding a playful character to your portfolio or sketchbook.
Don't worry if you're new to drawing or if you think you can't capture Shrek's charm right away—every artist starts somewhere, and practice makes perfect! All you need are some basic materials and a willingness to have fun. By the end of this guide, you'll not only have learned how to draw Shrek, but you'll also have a piece of art you can be proud of. So, sharpen your pencils, clear some space, and let's get started on bringing this iconic ogre to life!
Materials Required
Before we begin, let's gather all the materials you will need for this drawing tutorial. Don't worry, nothing fancy is required—just the basics:
- [Drawing paper or sketchbook](https://yonderoo.com/best-sketchbooks-for-artists/)
- Pencils (HB, 2B, 4B)
- Eraser
- Black ink pen (optional, for outlining)
- Colored pencils or markers (optional, for coloring)
Now that we have everything we need, let's dive into the step-by-step instructions.
Step 1: Head and Facial Features
- Start by drawing a large oval shape for Shrek's head.
- Divide the oval into half with a horizontal line to mark the eye level.
- Draw two circles on the horizontal line as Shrek's eyes.
- Add eyebrows above each eye, making them thick and bushy.
- Draw a small rounded nose in the center of the face.
- Below the nose, draw a wide smile with two rows of crooked teeth.
- Finally, add some wrinkles and lines around the nose, mouth, and eyes to give Shrek his characteristic expression.
Step 2: Ears and Hair
- On either side of Shrek's head, draw two large, curved ears.
- Inside each ear, draw some small details to indicate folds and creases.
- Above the ears, add some wild and messy hair. Shrek's hair should be uneven and stick out in different directions.
Step 3: Body and Clothing
Tip: When drawing Shrek, take your time to focus on the proportions and shapes that define his character; use large, rounded forms to capture his friendly essence. Additionally, don't hesitate to experiment with different expressions and poses to bring out his personality even more—this will not only enhance your drawing but also give you a deeper understanding of character design. Remember, practice and exploration are key to mastering any character!
- Extend two slightly curved lines downwards from the head to create Shrek's shoulders and upper body.
- Draw two rounded shapes below the shoulders to represent the belly.
- Connect the body to the head with two curved lines to form the neck.
- Next, draw Shrek's clothing by adding a vest-like shape around his upper body.
- Add some detail to the clothing by drawing patches, stitches, and buttons.
Step 4: Arms and Hands
- From the shoulders, draw two slightly curved lines to create Shrek's arms.
- At the end of each arm, draw three overlapping ovals to form the fingers.
- Add some lines to indicate the folds and joints in the arms and hands.
Step 5: Legs and Feet
- Below the belly, draw two long, curved lines to create Shrek's legs.
- At the end of each leg, draw three oval shapes to form the toes.
- Add some lines to indicate the folds and joints in the legs and feet.
Step 6: Facial Details
- Start adding more details to Shrek's face by drawing his round pupils within the eye circles.
- Add some shading around the eyes to give them depth.
- Draw the irises and highlight with small circles to make them pop.
- Shade below the eyes to create the illusion of Shrek's cheekbones.
- Use quick, short strokes to add more detail and shading to his eyebrows, nose, and mouth.
Step 7: Coloring (Optional)
- If you want to add some color to your drawing, start by coloring Shrek's skin with a light green shade.
- Use a darker green shade to add some shadows and depth to the skin.
- Color the eyes light brown and the iris a darker shade of brown.
- Shrek's eyebrows and hair can be colored a darker shade of brown.
- Don't forget to color his vest and pants in the appropriate shades. Be creative with your choice of colors!
You have successfully drawn Shrek! Congratulations on completing this tutorial. I hope you enjoyed the process and are proud of your creation.
Mistake Alert: A common mistake when drawing Shrek is making his face too angular or slim, which can make him look more like a generic ogre and less like the lovable character from the movies. This often happens because artists are used to drawing human faces with pointed chins and defined cheekbones, but Shrek's charm lies in his broad, rounded features and softer jawline. To avoid this, focus on using large, oval shapes for his head and cheeks, and pay special attention to the way his jaw gently slopes rather than forming a sharp angle. Double-check your sketch by comparing it to reference images—if Shrek's face looks too narrow or sharp, try widening the cheeks and softening any hard lines until you capture his iconic friendly look.
Conclusion
In this tutorial, we learned how to draw Shrek step by step. By breaking down the process into simple instructions, we were able to create a recognizable and enjoyable representation of this beloved character. Remember, practice makes perfect, so keep drawing and exploring your artistic skills.
So grab your pencils and bring your favorite ogre to life on paper. Happy drawing!
Fun Facts About Shrek
- Shrek was released in 2001 and became the first film to win the Academy Award for Best Animated Feature.
- The character Shrek is based on a 1990 children's book by William Steig.
- Mike Myers, who voices Shrek, originally recorded his lines with a Canadian accent before switching to a Scottish accent.
- The film's soundtrack features the hit song "All Star" by Smash Mouth, which became closely associated with the movie.
- Shrek was such a success that it spawned three sequels and a spin-off, Puss in Boots.
- The animation team at DreamWorks created a new technology called "Shrek's OgreSkin" to make Shrek's skin look more realistic.
- Shrek's home, the swamp, was inspired by the real-life swamps of the southern United States.
- The name "Shrek" comes from the Yiddish word "shrek," meaning "fear" or "fright."
- Shrek was inducted into the National Film Registry in 2020 for being "culturally, historically, or aesthetically significant."
- Shrek's character design was influenced by various sources.
Suggestions for Scenes and Settings for Shrek Drawings
- [Shrek relaxing in his swamp, surrounded by lily pads and buzzing dragonflies](https://yonderoo.com/how-to-draw-a-dragonfly/).
- Shrek and Donkey crossing the rickety bridge to the dragon's castle.
- Shrek sharing a mud bath with Fiona, both laughing and covered in mud.
- Shrek, Donkey, and Puss in Boots setting off on an adventure through the enchanted forest.
- Shrek at the dinner table with Fiona, Donkey, and the fairy tale creatures, enjoying a feast.
- Heroic Shrek saving Princess Fiona from the tower while battling the fire-breathing dragon.
- Shrek and Fiona dancing under the moonlight at their swamp-side wedding.
- Shrek making funny faces in the mirror, trying on different outfits or accessories.
- Shrek and his children playing together in the swamp, building a mud castle.
- Shrek and Donkey on a journey, riding in a cart through Far Far Away's bustling streets.