Welcome to this step-by-step guide on how to draw bubble letters! Bubble letters are a fun and playful way to add creativity to your artwork. Whether you want to create eye-catching signs, decorate a birthday card, or just explore your artistic skills, learning to draw bubble letters is a great place to start. In this article, I will provide you with clear and concise instructions on how to draw bubble letters, along with a list of materials you will need. So, let’s get started!
Materials Required
Before we dive into the step-by-step instructions, let’s make sure you have all the necessary materials to draw bubble letters. Here’s what you’ll need:
- Paper: Choose a sheet of paper that is smooth and suitable for drawing. A plain white sheet will work best.
- Pencil: Pick a pencil with a soft lead (HB or B) for smooth and easily erasable lines.
- Eraser: Have an eraser on hand to correct mistakes or clean up stray lines.
- Ruler: A ruler will help you create straight lines and maintain consistent letter sizes.
- Coloring tools (optional): If you want to add color to your bubble letters, gather your preferred coloring tools such as markers, colored pencils, or crayons.
Now that you have everything you need, let’s move on to the step-by-step instructions for drawing bubble letters.
Step 1: Start with Simple Block Letters
Before we add the bubble effect, it’s essential to start with a solid foundation. Begin by drawing the outline of the letter in a blocky style. Use your ruler to create straight and even lines. Remember to leave enough space around the letter to accommodate the bubbles.
Step 2: Round the Corners
To give our letters a more bubble-like appearance, round the corners of each block letter. Imagine that you are turning the corners into circles. This step is crucial in creating the illusion of a rounded, three-dimensional bubble shape.
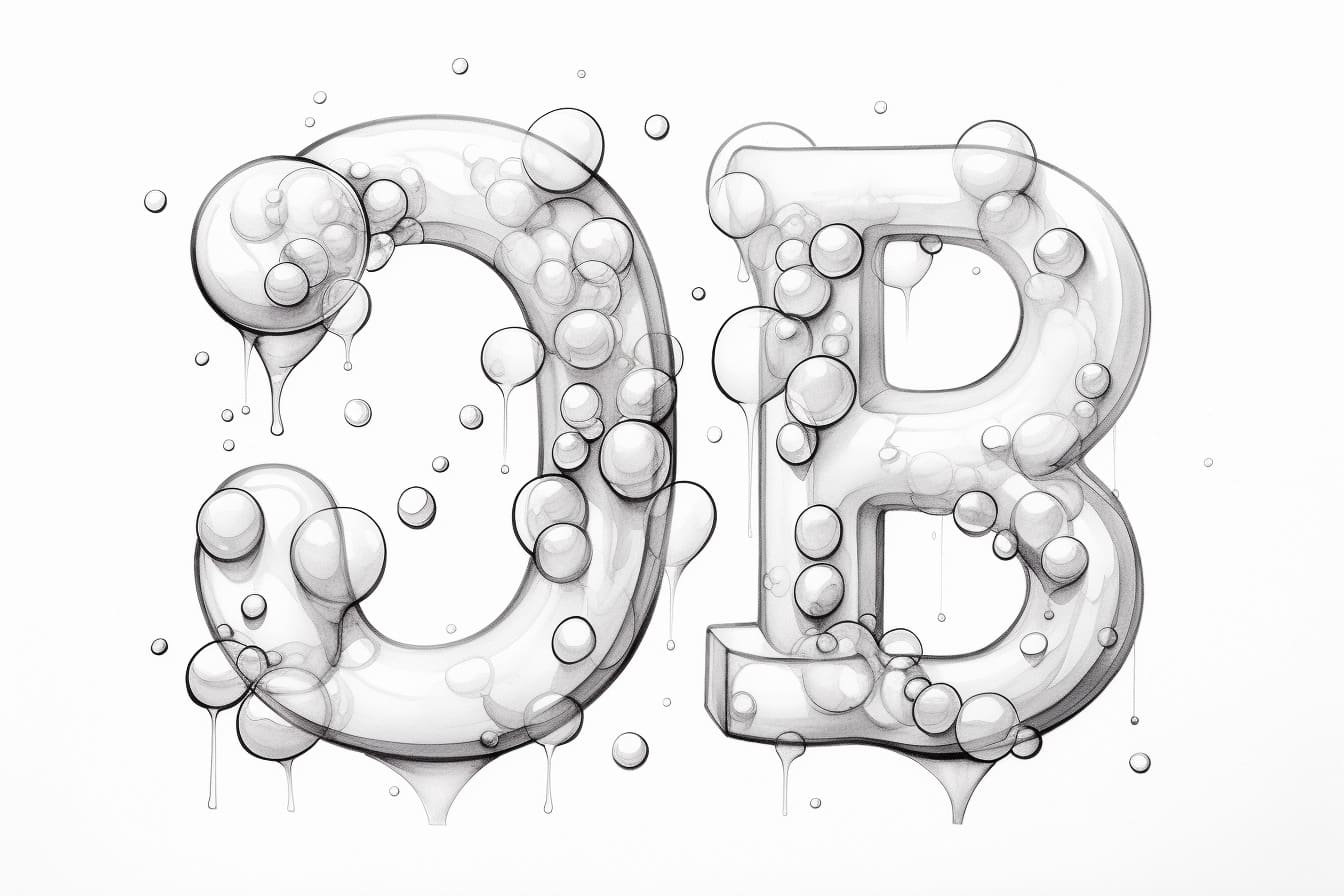
Step 3: Add the Bubble Effect
Now it’s time to add the signature bubble effect to our letters. Begin by creating a parallel outline around each rounded letter shape. This outline will determine the thickness and size of the bubbles. Make sure the outline is evenly spaced, creating an even thickness across the entire letter.
Step 4: Connect the Bubbles
Next, connect the inner and outer bubble outlines by drawing curved lines. These curves should be drawn on the inside of the letter, following its shape. Connect the curves to create an inner outline that represents the shiny surface of the bubble. Take your time and ensure that the curves flow smoothly.
Step 5: Bring Out the Highlights
To make your bubble letters pop, we need to add highlights. Choose a direction for the light source, which will determine where the highlights will appear. Lightly shade the areas of the bubble that are closest to the light source, leaving the rest of the bubble shaded or colored.
Step 6: Color and Decorate
If you choose to add color to your bubble letters, now is the time to do so. Pick your colors, and carefully fill in each letter, leaving the highlights untouched. Consider using bold and vibrant colors to make your bubble letters even more eye-catching. Once you’ve colored your letters, you can add additional decorations such as patterns, gradients, or shadows to enhance the overall effect.
Conclusion
Congratulations on learning how to draw bubble letters! With the help of this step-by-step guide, you now have the knowledge to create playful and stylish bubble letters for any occasion. Remember to start with simple block letters and gradually add the bubble effect to create a three-dimensional appearance. Don’t forget to add highlights and colors to bring your bubble letters to life. So, grab your materials and let your creativity flow! Enjoy the process and have fun experimenting with different lettering styles. Happy drawing!