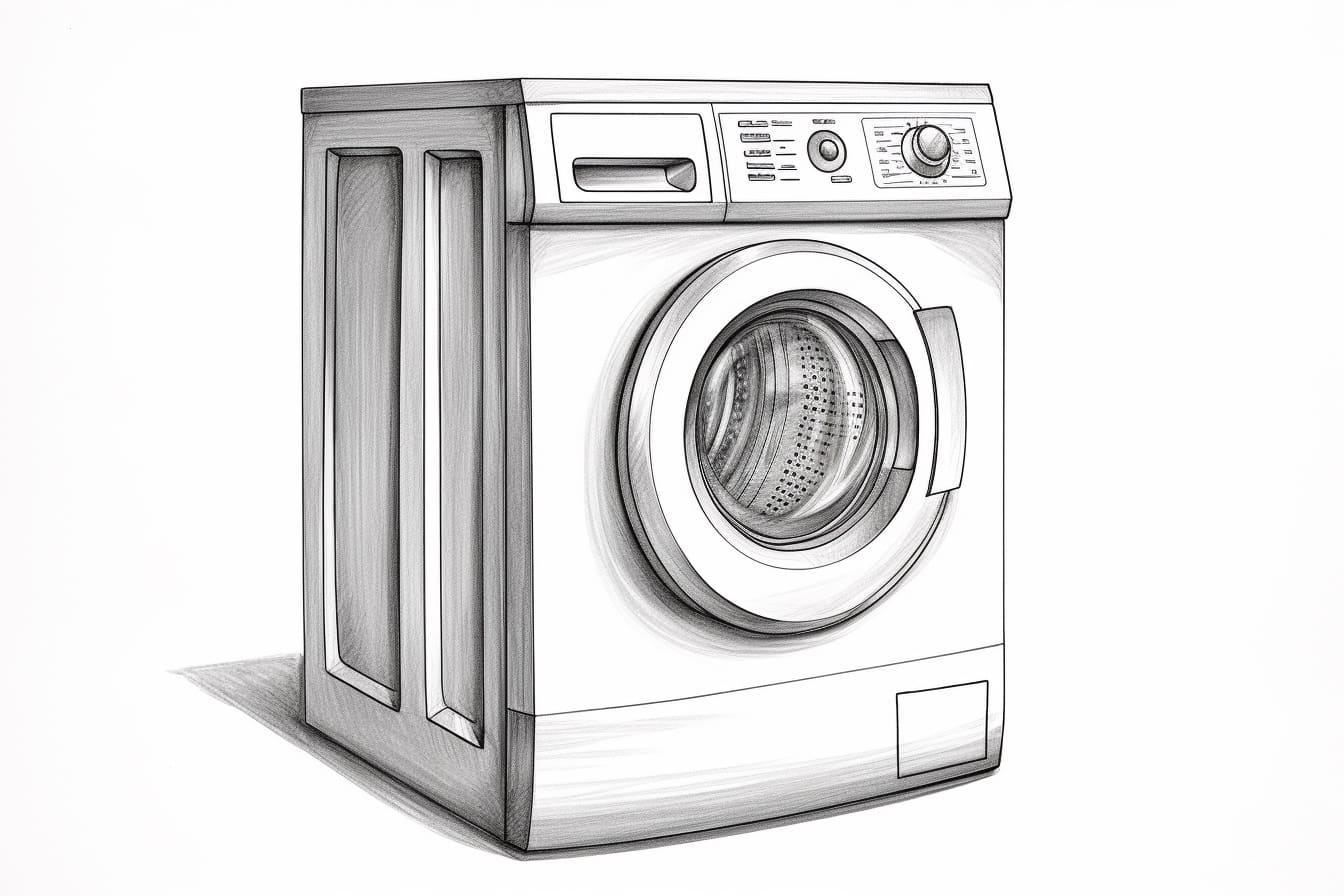
As an artist, learning to draw everyday objects can be both challenging and rewarding. In this step-by-step guide, we will walk you through the process of drawing a washing machine. By following these simple instructions, you’ll be able to capture the details and proportions of this common household appliance. So, grab your pencil and let’s get started!
Materials Required
Before we dive into the drawing process, let’s gather the materials you’ll need:
- Pencil (preferably HB or 2B)
- Eraser
- Drawing paper
- Ruler
- Compass (optional, for drawing circles)
- Reference image of a washing machine (preferably a front-facing view)
Once you have these materials ready, let’s move on to the drawing steps.
Step 1: Draw the Basic Shape
Start by drawing a rectangular shape to outline the main body of the washing machine. Use light lines to avoid any permanent marks. Take your time to make sure the proportions are accurate and adjust as necessary.
Step 2: Add the Control Panel
Next, draw a smaller rectangular shape at the top of the main body to represent the control panel. Divide this shape into smaller sections for buttons and knobs using vertical and horizontal lines.
Step 3: Sketch the Door
Below the control panel, draw a square or rectangular shape to represent the door of the washing machine. Make sure it is proportionate to the main body. You can add a handle by drawing a small rectangle or circle on the door.
Step 4: Create Depth with Shadows
To add depth to your drawing, start by shading the different parts of the washing machine. Use light strokes to indicate areas that will be lighter and darker strokes for areas that will be in shadow. Pay close attention to the reference image to capture the nuances of light and shadow.
Step 5: Add Details and Textures
Now it’s time to add details such as buttons, knobs, and other elements present on the control panel. Use your reference image to ensure accuracy. You can also sketch any text or labels that appear on the washing machine.
For added realism, create textures on the body of the washing machine. Use short, curved lines to replicate the look of metal or plastic, depending on the material of your chosen reference image.
Step 6: Refine Your Drawing
Take a step back and evaluate your initial sketch. Check for any inconsistencies or inaccuracies in the proportions or details. Erase any unnecessary lines and refine the overall shape of the washing machine. Pay attention to the curves and edges to achieve a polished look.
Step 7: Darken and Define
Now that you have a solid foundation, go over the lines of your drawing with a darker pencil or pen. This will help define the shape and make your drawing stand out. Take your time and use confident strokes to trace the outlines and important details.
Step 8: Final Touches and Highlights
To give your drawing a finishing touch, add highlights using an eraser. This will create the illusion of reflection and enhance the three-dimensional look of the washing machine. Lightly erase areas where light would naturally hit the surface, such as the control panel and edges.
Conclusion
Drawing everyday objects can challenge your observation skills and help you improve as an artist. By following these step-by-step instructions, you should now have a beautiful drawing of a washing machine. Remember to practice regularly and experiment with different objects to expand your artistic abilities.
Whether you’re a beginner or an experienced artist, drawing everyday objects is a valuable exercise. So, pick up your pencil, explore the world around you, and have fun creating art!