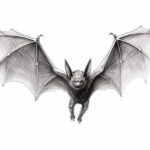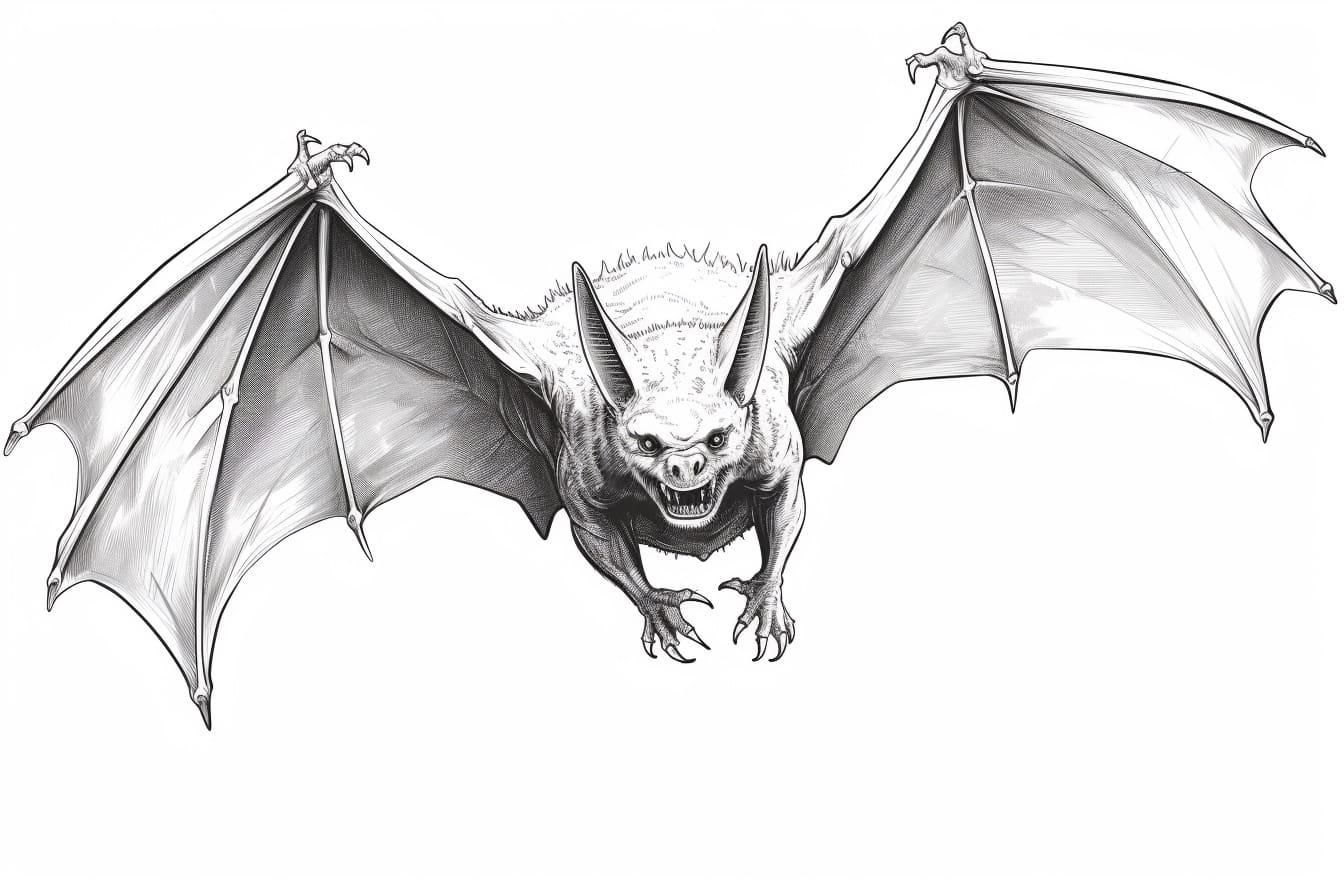
Would you like to learn how to draw a spooky and fascinating creature, like a vampire bat? Drawing can be a fun and rewarding hobby, and with a little guidance, anyone can create impressive artwork. In this step-by-step guide, we will explore the process of drawing a vampire bat from scratch. So grab your drawing materials and let’s get started!
Materials Required
Before we begin, make sure you have the following materials:
- Drawing paper: Choose a high-quality paper suitable for your preferred drawing medium. A heavier weight paper, such as bristol board or watercolor paper, works well for detailed drawings.
- Pencils: You’ll need a set of drawing pencils with different graphite grades. Ranging from soft to hard, these pencils allow you to create a range of light and dark values in your drawing. A set that includes grades 2H, HB, 2B, 4B, and 6B should be sufficient.
- Eraser: A kneaded or putty eraser is ideal for correcting and lighting areas of your drawing.
- Blending tools: You can use blending stumps or tortillons to blend and smooth out graphite or charcoal marks.
- Reference image: Find a clear and detailed reference image of a vampire bat online or in a book. This will help you observe the bat’s anatomy and details while drawing.
Now, let’s dive into the step-by-step process of drawing a vampire bat.
Step 1: Basic Shapes
Start by lightly sketching the basic shapes that form the body of the vampire bat. Use simple geometric shapes like circles and ovals to outline the head, body, wings, and legs. Remember to keep your lines light and easily erasable as you’ll refine them later.
Step 2: Outline the Body
Using the basic shapes as a guide, start outlining the main body of the vampire bat. Pay attention to the proportions and the curves of the body. Bats have a distinct belly, so make sure to include that in your drawing. Add the outline for the wings, detailing the finger-like structure.
Step 3: Add Facial Features
Focus on the head of the bat and add the facial features. Start with the eyes, which are typically large and alert. Draw the ears as triangular shapes on top of the head. Use reference images to capture the unique details of a vampire bat’s face, including the shape of the snout and the position of the fangs.
Step 4: Refine the Wings
To create a realistic wing structure, observe the reference image closely. Add the details of the wing membranes, paying attention to the curves and textures. Vampire bats have elongated fingers that support the wing structure, so don’t forget to include them.
Step 5: Define the Fur
Create the illusion of fur on the bat’s body by adding short, curved lines along its contours. Use varying line thickness and direction to give the fur a three-dimensional appearance. Take your time to get the texture right, as it adds depth and realism to your drawing.
Step 6: Refine the Details
Now it’s time to refine the details of your vampire bat drawing. Spend some time adding small features like the claws, facial expressions, and any other distinctive markings you see in your reference image. Be patient and take breaks if needed to ensure your lines are accurate and clean.
Step 7: Shade and Texture
To bring your vampire bat to life, add shading and texture to your drawing. Observe the light source in your reference image and add shadows accordingly. Use different pencil grades to create different tones and values, adding depth and dimension to your drawing. Consider the texture of the wings and fur, and apply appropriate shading techniques to depict them realistically.
Step 8: Final Details and Highlights
As you near the end of your drawing, add any final details you may have missed. Use your eraser to lighten areas to create highlights, giving your bat a sense of volume and form. Don’t be afraid to experiment and make adjustments until you’re satisfied with the overall look of your drawing.
Conclusion
Congratulations! You have successfully learned how to draw a vampire bat. By following these step-by-step instructions and using your creativity, you can create a stunning and spooky bat drawing. Remember, practice makes perfect, so keep honing your drawing skills and exploring new subjects. Happy drawing!