How to Draw a Tapir
Learn how to draw a tapir with easy step-by-step instructions. Capture the unique features of this fascinating animal through detailed guidance.
Materials You'll Need
- Pencil
- Paper
- Eraser
Tapirs are truly one of nature's most intriguing mammals, instantly recognizable by their distinctive, elongated snouts and sturdy, barrel-shaped bodies. Native to the jungles and forests of Central and South America as well as parts of Southeast Asia, tapirs are often described as gentle and shy, spending much of their time foraging for fruit and leaves. Their unusual appearance, which seems to combine features of pigs, anteaters, and even elephants, makes them a captivating subject for artists of all levels. By learning how to draw a tapir, you'll not only develop your observation skills but also gain a greater appreciation for the diversity of the animal kingdom.
Whether you're a wildlife enthusiast, a budding zoologist, or simply someone looking for a new artistic challenge, drawing a tapir can be both fun and rewarding. Tapirs offer a great opportunity to practice capturing unique animal shapes, working with proportions, and experimenting with texture—especially when rendering their thick skin and expressive faces. This tutorial on how to draw a tapir will guide you step-by-step, making it accessible for beginners while still offering techniques that more advanced artists can use to refine their skills. No matter your experience, you'll gain valuable practice in sketching basic forms, layering details, and bringing character to your artwork.
So gather your drawing materials and get ready to embark on this artistic journey! Don't worry if your first attempt isn't perfect—drawing is all about progress and personal expression. With patience and practice, you'll find that creating a lifelike tapir is both achievable and enjoyable. Let's get started and see what you can create!
Materials Required
Before we begin, make sure you have the following materials on hand:
- [Drawing paper or sketchbook](https://yonderoo.com/best-sketchbooks-for-artists/)
- Pencil
- Eraser
- Fine-tip black pen or marker
- Colored pencils or markers
Now that you have everything you need, let's dive into the steps of drawing a tapir.
Step 1: Outline the Tapir's Body
Tip: As you work through the steps of drawing your tapir, consider using reference images to enhance your understanding of their unique features and proportions. Observing real tapirs or high-quality photographs can provide insights into their anatomy, textures, and patterns, helping you capture more lifelike details in your artwork. This practice will not only improve your drawing skills but also deepen your appreciation for these fascinating creatures.
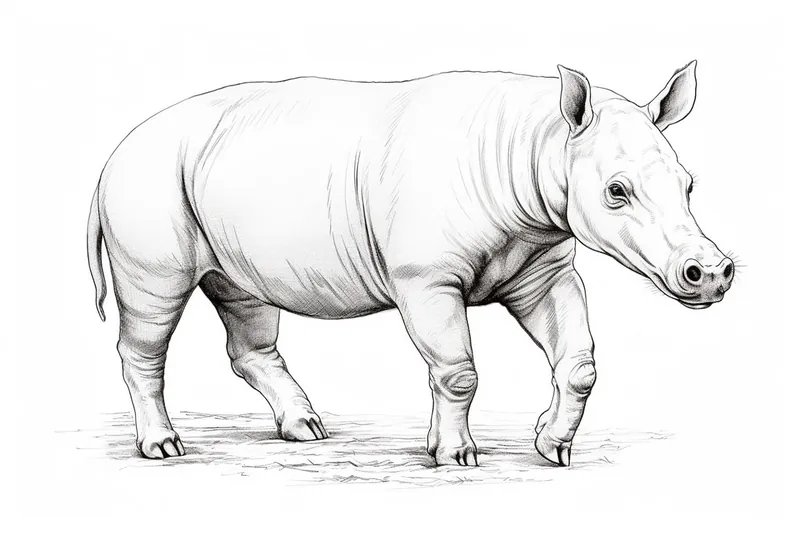
Start by lightly sketching the basic shape of the tapir's body using your pencil. Tapirs have a large, oval-shaped body with a smaller head and short legs. Remember to keep your lines loose and don't worry about getting everything perfect at this stage. Focus on capturing the overall proportions and shape of the tapir.
Step 2: Add the Head and Facial Features
Using your initial outline as a guide, add the tapir's head above the body sketch. Pay attention to the placement and size of the head in relation to the body. Tapirs have small, round ears and prominent snouts. Sketch the ears on either side of the head and the snout in the center, extending it out from the face.
Step 3: Refine the Body and Limbs
Now it's time to refine the tapir's body and limbs. Use your pencil to add more details and define the shape. Tapirs have a thick, muscular body, so make sure to emphasize the curves and volume. Add the legs, making them short and sturdy. Don't forget to sketch the hooves at the end of each leg.
Step 4: Draw the Facial Details
Focus on the tapir's face and add more details to bring it to life. Sketch the eyes, which are small and round, and place them on either side of the snout. Next, draw the tapir's nostrils at the tip of the snout. Take your time to carefully observe the reference image or picture of a tapir to capture the unique features accurately.
Step 5: Outline the Tapir's Coat
Tapirs have a distinctive coat pattern that consists of light-colored markings on a dark-colored body. Use your pencil to lightly outline the coat pattern. Start by drawing curved lines along the tapir's back, emphasizing the rounded shape of the body. Then, add irregular shapes and lines to represent the light-colored patches on the tapir's face, haunches, and underbelly.
Step 6: Finalize the Details
At this point, your tapir sketch is nearly complete. Take a moment to review your drawing and refine any areas that need adjustment. Add more details to the tapir's face, such as the mouth and any wrinkles or fur markings. You can also darken the coat pattern lines to make them more prominent.
Step 7: Ink or Trace Your Drawing
Once you are satisfied with your pencil sketch, it's time to ink or trace over the lines with a fine-tip black pen or marker. This will give your drawing a clean and polished look. Take it slow and pay attention to the details as you go. Allow the ink to dry before erasing any remaining pencil lines.
Step 8: Color Your Tapir
Now comes the fun part – adding color to your tapir drawing! Use colored pencils or markers to bring your tapir to life. Tapirs usually have a dark brown or black body color, so start by filling in the main body with these darker shades. Then, choose a lighter shade to color the accent patches on the face and body. Experiment with different color combinations to make your tapir truly unique.
Did You Know?: Tapirs have an incredible secret talent—they're excellent swimmers and often use water as a safe haven to escape predators or simply cool off. Their flexible, trunk-like snout isn't just for sniffing out tasty fruit; it also acts like a built-in snorkel, allowing them to breathe while mostly submerged. This unique adaptation helps them move gracefully through rivers and ponds, making water an essential part of their daily lives. As you draw your tapir, imagine how its body is perfectly shaped for both forest wandering and aquatic adventures, and try to capture the gentle, peaceful nature that comes from this fascinating lifestyle.
Conclusion
Congratulations on completing your tapir drawing! By following these step-by-step instructions, you've learned how to capture the distinct features and markings of this remarkable animal. Remember to practice regularly to improve your drawing skills and explore different art techniques. Keep up the great work, and have fun drawing more fascinating creatures like the tapir!
Fun Facts About Tapir
- Tapirs are ancient mammals that have existed for over 20 million years.
- There are four recognized tapir species, including the Malayan tapir, which is the largest and only found in Asia.
- Tapirs use their flexible, trunk-like snouts to grab leaves and fruit.
- Baby tapirs are born with striped and spotted coats for camouflage.
- Tapirs are excellent swimmers and often escape predators by diving into water.
- The Malayan tapir has a distinctive black and white coloration, which helps break up its outline in the forest.
- Tapirs play a crucial role in their ecosystems by dispersing seeds through their droppings.
- All tapir species are currently threatened or endangered due to habitat loss and hunting.
- Despite their pig-like appearance, tapirs are more closely related to rhinos and horses than to pigs.
Suggestions for Scenes and Settings for Tapir Drawings
- A tapir wandering through a lush, misty rainforest with dense foliage and hanging vines.
- A playful baby tapir splashing in a muddy jungle pool alongside its mother.
- A group of tapirs foraging for fruit under the dappled sunlight of a tropical forest canopy.
- A tapir peeking out from behind large, broad-leafed plants, blending into its natural habitat.
- An Asian tapir resting near a bamboo grove, with distinctive white and black coloring.
- A tapir at a riverbank, drinking water with its reflection visible in the calm water.
- A tapir crossing a narrow jungle path at dawn, with beams of sunlight piercing through the trees.
- A stylized tapir surrounded by vibrant, oversized jungle flowers and colorful birds.
- A tapir family taking shelter during a gentle rainstorm, with droplets creating ripples around them.
- A whimsical scene of a tapir dreaming, surrounded by floating fruit and leafy patterns.