How to Draw a Tadpole
Learn how to draw a tadpole with this clear and concise tutorial. Follow the step-by-step instructions to create a detailed and lifelike representation of a tadpole. Perfect for beginners and experienced artists looking to enhance their skills.
Materials You'll Need
- Pencil
- Paper
- Eraser
Welcome to an exciting exploration into the world of drawing aquatic life! In today's tutorial, we'll discover how to draw a tadpole, a remarkable creature that represents the earliest life stage of frogs and toads. Tadpoles are instantly recognizable by their rounded heads and long, swishing tails. Not only are they fascinating to observe in nature, but their simple, streamlined shapes make them an excellent subject for artists of all ages. Understanding the anatomy of a tadpole can also help deepen your appreciation for the incredible metamorphosis these creatures undergo as they transform into adult amphibians.
Learning how to draw a tadpole is a fantastic choice for beginners who want to practice basic shapes and smooth lines, as well as for more experienced artists looking to capture the essence of living forms. This tutorial will take you through each step, from sketching the basic outlines to adding the tiny details that bring your tadpole to life. You'll get to experiment with shading techniques and learn how to suggest gentle movement with just a few strokes of your pencil. Drawing tadpoles not only hones your observational skills but can also be a fun addition to nature journals, school projects, or whimsical art collections. So, gather your drawing materials, let your curiosity lead the way, and remember—every artist starts with a single line. Let's dive in together and create a charming tadpole illustration you'll be proud of!
Materials Required:
- Drawing paper
- Pencil (preferably HB or 2B)
- Eraser
- Fine-tipped pen or marker (optional)
- Colored pencils (optional)
- Reference image of a tadpole (optional)
Step 1: Basic Shapes
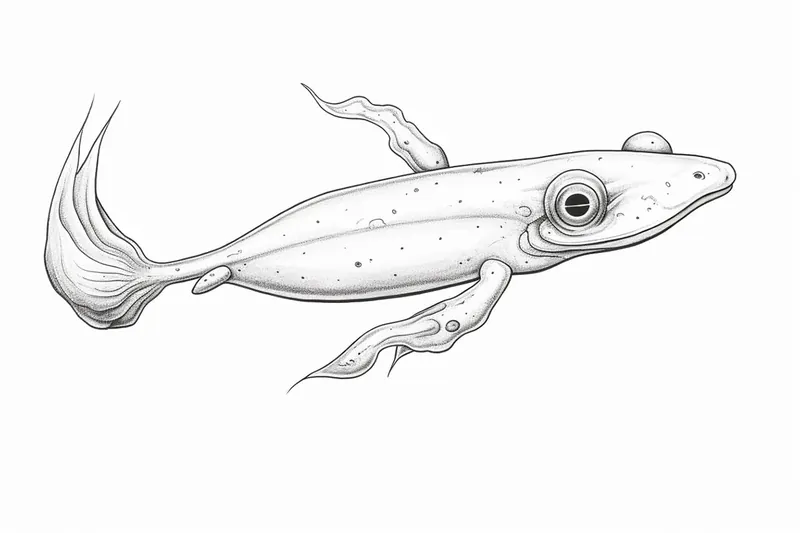
Start by drawing a guideline for the tadpole's body. Sketch a long oval shape in the center of your paper, which will serve as the main body of the tadpole. This oval should be slightly tilted, with the upper end narrower than the lower end.
Step 2: Head and Tail
From the front end of the oval, draw a smaller rounded shape to represent the tadpole's head. At the other end of the oval, begin sketching the tail. Tadpoles have long, thin tails, so ensure that your tail follows a curved line and narrows down towards the tip.
Step 3: Eyes and Mouth
Next, add the details of the tadpole's face. Draw two small, circular shapes near the front of the head to represent the eyes. Within each eye, add a smaller circle to indicate the pupils. Then, draw a small curved line to depict the mouth.
Step 4: Fins
Tadpoles have fins on both sides of their body. Starting from the lower part of the tadpole, draw a curved line that extends about halfway down the body. Repeat this step on the other side to create the opposite fin. These fins should be relatively thin, showcasing the tadpole's streamlined shape.
Step 5: Details
Now, let's add some additional details to make our tadpole drawing more lifelike. Draw a few curved lines along the tail to represent the segmented nature of the tail. You can also add some lines around the eyes and mouth to define them further.
Step 6: Shading and Texture
To give depth and texture to your drawing, add shading. Begin by lightly shading the entire tadpole, leaving the belly area lighter. Gradually darken the shading as you move towards the tadpole's back. This shading technique will create a sense of volume and dimension. You can also add some texture to the fins by drawing small, overlapping lines.
Step 7: Finalize the Outline
Once you are satisfied with the shape and details of your tadpole, finalize the outline by going over your drawing with a pen or marker. Use smooth, confident strokes to outline the tadpole's form, making sure to emphasize the curves and contours.
Step 8: Optional Coloring
If you want to add color to your drawing, grab your colored pencils. Tadpoles are typically brown or green, but you can use your creativity to experiment with different shades and patterns. Start by lightly coloring the tadpole, gradually adding darker shades to create tonal variations. Remember to blend the colors smoothly for a realistic appearance.
Tip: To capture the unique shape of a tadpole, start by using a soft pencil (like a 2B or 4B) for your initial sketch; this will allow you to create smooth, flowing lines that can easily be adjusted. Begin with a simple oval for the head and a long, tapering shape for the tail, remembering that the tail should be more fluid and dynamic—consider adding gentle curves to suggest movement. Once your outline is in place, use an eraser to refine any lines and emphasize the rounded body of the tadpole. For shading, focus on the areas where the light naturally falls, using a blending stump or your finger to create soft gradients, especially along the tail where it meets the body. This technique will give your drawing depth and help convey a sense of life and motion, making your tadpole truly come alive on the page!
Conclusion
Congratulations! You have successfully learned how to draw a tadpole. By following these step-by-step instructions, you should now have a detailed and lifelike representation of a tadpole on your paper. Drawing is a skill that improves with practice, so don't be afraid to experiment and explore other techniques. Remember, every great artist started as a beginner, and with dedication and passion, you can continue to develop your drawing abilities. So, keep practicing and enjoy the process of creating art. Happy drawing!
Fun Facts About Tadpole
- Tadpoles are the larval stage of amphibians like frogs and toads, undergoing a dramatic transformation called metamorphosis.
- Most tadpoles breathe through gills before developing lungs as they mature into adult frogs.
- Tadpoles are primarily herbivores, feeding on algae and plant material in their early life stages.
- The tail of a tadpole is gradually absorbed and disappears as it transforms into a froglet.
- Some species of tadpoles can recognize and avoid predators using chemical cues in the water.
- Tadpoles can vary greatly in size and shape depending on their species and environment.
- In some environments, tadpoles can speed up their development in response to environmental stress like drying ponds.
- Tadpoles play a crucial role in aquatic ecosystems by helping to control algae populations.
- Some tadpoles are known to be cannibalistic under certain conditions.
- The study of tadpoles is important for understanding various aspects of biology and ecology.
Suggestions for Scenes and Settings for Tadpole Drawings
- A group of tadpoles swimming together in a sunlit pond, surrounded by lily pads and gentle ripples.
- A close-up view of a single tadpole resting on a submerged leaf, with tiny air bubbles rising to the surface.
- Tadpoles darting around colorful pebbles and aquatic plants at the bottom of a clear stream.
- A tadpole in the process of metamorphosis, with small legs starting to appear, set against a muddy pond edge.
- A whimsical scene where a tadpole interacts with curious pond insects, such as water striders or dragonfly larvae.
- A nighttime setting with a tadpole illuminated by moonlight filtering through the water, creating shimmering patterns.
- A cross-section illustration showing tadpoles at different life stages, from eggs to nearly developed frogs.
- A tadpole exploring an underwater log covered in moss and tiny snails.
- A playful scene where a tadpole is chased by the shadow of a fish, adding a touch of gentle suspense.
- A vibrant, stylized tadpole set against an abstract watercolor background to highlight its graceful form.