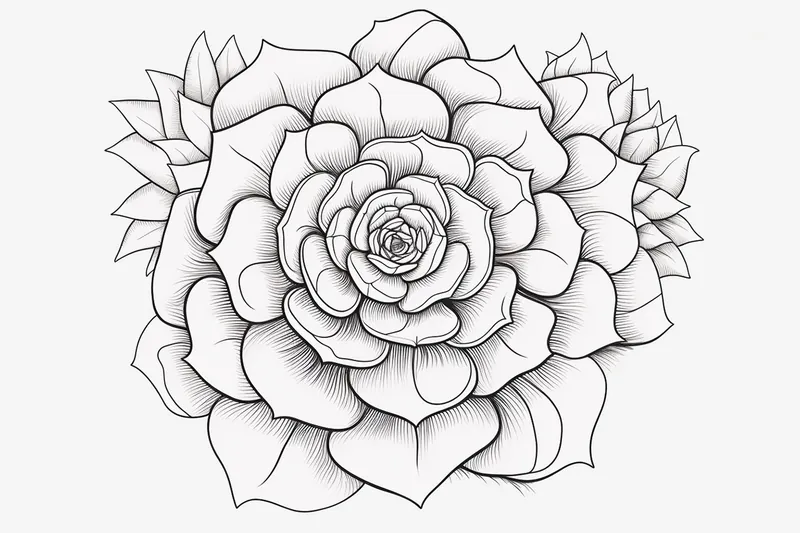
How to Draw a Succulent
Learn how to draw a succulent with this step-by-step tutorial. Capture the unique shapes and vibrant colors of succulents in your artwork.
Materials You'll Need
- Pencil
- Paper
- Eraser
Succulents have taken the world by storm, not just as low-maintenance houseplants but also as charming subjects for artwork. These unique plants are instantly recognizable thanks to their thick, fleshy leaves arranged in intricate rosette patterns, and their wide array of colors, from soothing greens and blues to pinks and purples. Drawing a succulent is a wonderful way to celebrate the beauty of nature and add a touch of organic elegance to your sketchbook or art projects. Whether you're a fan of botanical illustration or simply love bringing a bit of the outdoors into your creative routine, learning how to draw a succulent can be both relaxing and rewarding.
People are often drawn to succulents for their delightful shapes and the calming vibe they bring, making them an ideal subject for artists who want to experiment with organic forms and gentle gradients of color. In this tutorial, we will guide you step-by-step through how to draw a succulent, starting with basic outlines and moving on to adding depth and detail through shading and texture. This process not only helps improve your observation skills but also teaches you techniques like layering, blending, and capturing subtle variations in form. Whether you're a complete beginner or looking to expand your botanical drawing skills, this tutorial is designed to be accessible and enjoyable for all levels.
So, gather your drawing materials and let your creativity flourish! Remember, every artist's interpretation is unique, and practice is the key to improvement. Don't worry about making your succulent perfect—focus on enjoying the process and watching your skills grow, just like the resilient plants themselves. Let's dive in and discover how drawing a simple plant can bring a fresh burst of inspiration to your artwork!
Materials Required:
To draw a succulent, you will need the following materials:
- Pencil: A regular graphite pencil, preferably HB or 2B, for sketching and shading.
- Paper: Choose a smooth, medium-weight paper that is suitable for sketching. A sketchbook or drawing pad would be ideal.
- Eraser: A kneaded eraser or a soft plastic eraser for correcting mistakes and refining your drawing.
- Fine Liners: A set of fine liner pens with different tip sizes for adding details to your drawing.
- Colored Pencils or Markers (optional): If you want to add some color to your succulent drawing, gather a set of colored pencils or markers.
Now that you have all the necessary materials, let's dive into the step-by-step process of drawing a succulent.
Step 1: Observing Succulent Forms
Before you start drawing, take a moment to observe different succulent varieties. Notice their shapes, textures, and patterns. This observation will help you understand the basic structure of succulents and guide you in creating a realistic depiction.
Step 2: Sketching the Basic Shape
Begin by lightly sketching the basic shape of your succulent. Start with a circular or oval shape for the main body of the plant. Keep the lines loose and don't worry about perfection at this stage. Remember, succulents come in various forms, so feel free to experiment with different shapes.
Step 3: Adding Leaves
Next, start adding leaves to your succulent. Succulent leaves are typically thick and fleshy, with interesting patterns and textures. Use curved lines to create the outline of each leaf, making sure to vary the sizes and shapes. Some succulents have smooth leaves, while others may have jagged or spiky edges.
Step 4: Detailing the Leaves
Once you have sketched the basic leaf shapes, it's time to add some details. Succulent leaves often have intricate patterns or lines running across them. Take a closer look at your reference or real succulents and replicate these patterns on your drawing. Use a thinner fine liner or pencil to add these details with precision.
Step 5: Shading and Adding Depth
To give your succulent drawing a three-dimensional look, add shading and depth. Identify the direction of the light source in your drawing, and imagine how it would fall on the succulent's leaves. Use your pencil to create areas of light and shade accordingly. Apply lighter pressure for the lighter areas and increase pressure for darker ones.
Step 6: Adding Texture
Succulent leaves often have a unique texture, with lines, bumps, or dots on their surface. Use your pencil or fine liner pen to carefully add these textures to your drawing. Pay attention to the patterns and irregularities that make each leaf distinctive. This step will bring your succulent drawing to life and make it more realistic.
Step 7: Refining and Cleaning Up
Take a step back and assess your drawing. Look for any areas that need refining or cleaning up. Use your eraser to gently remove any unwanted lines or mistakes. You can also add additional details or make adjustments as needed. This step is crucial as it helps you achieve a polished and professional-looking succulent drawing.
Step 8: Adding Color (Optional)
If you want to add some color to your succulent drawing, now is the time to do it. Use colored pencils or markers to carefully fill in the leaves and add vibrant hues. Consider referring to a reference photo or real succulent to match the colors accurately. Start with lighter shades and gradually build up the intensity of the colors.
Tip: When drawing succulents, start by lightly sketching the central point and then build outward with overlapping oval or teardrop shapes to create the signature rosette pattern. Use a soft pencil for these initial lines so you can easily adjust the leaf placement as you go—succulents often have irregular, natural arrangements that look best when not perfectly symmetrical. To give your succulent a realistic, plump appearance, shade the base of each leaf gently and add subtle highlights along the edges where the light would naturally hit. If you're working in color, try layering different greens and soft pinks or blues, blending gently to capture the plant's delicate color transitions.
Conclusion
Drawing a succulent is an enjoyable and rewarding activity, allowing you to explore nature's beauty through art. By following these step-by-step instructions, you can create a stunning succulent drawing that showcases the unique characteristics of these fascinating plants. So, gather your materials and let your creativity bloom with a succulent-inspired masterpiece! Remember that succulents are often found in the desert, and you can use them to enhance your landscape drawings.
Fun Facts About Succulents
- Succulents store water in their thick leaves, stems, or roots, allowing them to survive in arid environments.
- There are over 10,000 species of succulents, including popular varieties like aloe, agave, and echeveria.
- Succulents perform a unique type of photosynthesis called CAM (Crassulacean Acid Metabolism), which helps them conserve water.
- Some succulents, like the jade plant, are believed to bring good luck and prosperity.
- Succulents can thrive indoors with minimal care, making them ideal houseplants for beginners.
- The world's largest succulent, the baobab tree, can store thousands of liters of water in its trunk.
- Many succulents produce vibrant flowers, often blooming in response to environmental stress.
- Succulents are found on every continent except Antarctica.
Suggestions for Scenes and Settings for Succulent Drawings
- A cluster of succulents arranged in a decorative ceramic pot on a sunny windowsill, with soft shadows and scattered pebbles.
- A close-up botanical study focusing on the intricate textures and subtle color gradients of a single succulent leaf.
- A whimsical terrarium scene featuring multiple succulent varieties surrounded by tiny fairy lights or miniature garden decorations.
- [Succulents growing among rocks and sand in a desert landscape, with cacti](https://yonderoo.com/how-to-draw-a-cactus/) and distant mountains in the background.
- A hanging macramé planter filled with trailing succulent varieties, depicted against a patterned wall or window.
- An overhead view of a geometric garden bed, with succulents arranged in a colorful, symmetrical pattern.
- Succulents paired with blooming desert flowers, highlighting contrasting textures and colors.
- A dreamlike setting where succulents grow in unexpected places, such as on the branches of a tree or along a winding path.
- A detailed illustration of a succulent wreath, incorporating a variety of leaf shapes and hues for a festive look.
- Succulents arranged as a centerpiece on a rustic wooden table, with gardening tools, sketchbooks, or teacups nearby.