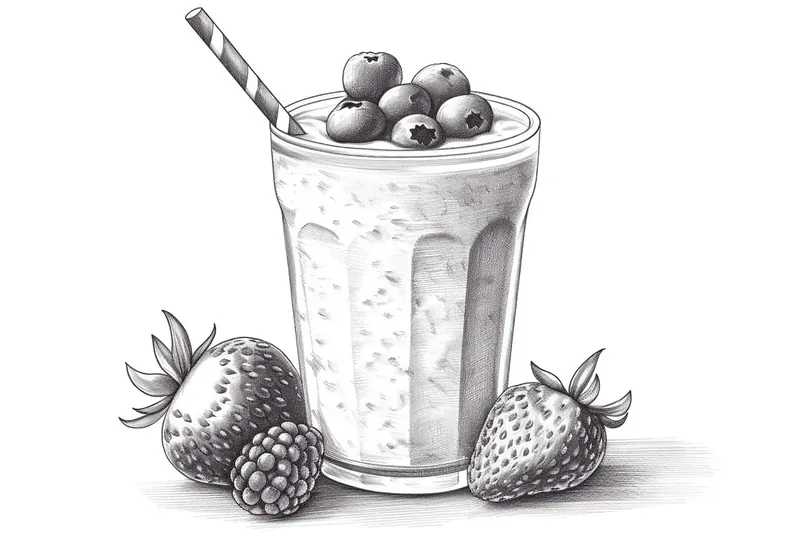
How to Draw a Smoothie
Learn how to draw a smoothie step-by-step with this tutorial. From sketching the outline to adding color, create realistic and mouth-watering smoothie artwork.
Materials You'll Need
- Pencil
- Paper
- Eraser
Smoothies are not only a delicious and healthy treat, but they've also become a symbol of vibrant lifestyles and creativity. With their colorful layers, playful garnishes, and inviting textures, smoothies make a fantastic subject for art. Whether it's a classic berry blend topped with fresh fruit or a vivid green smoothie bursting with leafy goodness, each smoothie glass tells its own flavorful story. Drawing a smoothie lets you capture that sense of freshness and fun, making it a delightful addition to your sketchbook or even as a cheerful design for cards, posters, or menus.
Learning how to draw a smoothie is a great exercise for artists of all skill levels. Beginners will enjoy practicing basic shapes and experimenting with color blending, while more advanced artists can focus on adding realistic details like the transparency of glass or the frothy texture on top. This subject gives you the opportunity to practice using different techniques, such as layering with colored pencils or shading with markers, to achieve a mouthwatering result. Plus, drawing a smoothie is a relaxing and rewarding process that encourages you to play with color combinations and compositions.
Whether you're looking to improve your drawing skills or simply want to create a fun and lively piece of art, this step-by-step guide on how to draw a smoothie will help you bring your vision to life. Don't worry if you're new to drawing; with a little patience and creativity, you'll soon have a smoothie illustration that looks good enough to sip! So, gather your materials and let's get started on this refreshing art adventure together.
Materials Required
To draw a smoothie, you will need the following materials:
- Paper: Start with a clean sheet of paper that is suitable for drawing. Opt for a thicker paper if you prefer using markers or wet mediums.
- Pencils: Use a set of drawing pencils with a range of graphite hardness, such as HB, 2B, 4B, and 6B. These will allow you to create different shades and textures in your drawing.
- Eraser: Have a good quality eraser on hand to correct any mistakes or lighten areas of your drawing.
- Blending tools: Consider using blending stumps, tortillions, or even a cotton swab to smooth out graphite and create subtle gradients.
- Colored pencils (optional): If you want to add a pop of color to your drawing, colored pencils can be a great addition.
- Reference image: Find a high-resolution photo of a smoothie that you like. This will serve as your reference guide throughout the drawing process.
Now that you have gathered your materials, let's dive into the step-by-step instructions for drawing a smoothie.
Step 1: Sketch the Outline
Start by lightly sketching the basic outline of your smoothie using an HB pencil. Pay attention to the shape and proportions of the glass or cup in which the smoothie is served. Take your time at this stage to ensure accuracy in your drawing.
Step 2: Add the Details
Once you have the basic outline, start adding more details to your smoothie. Begin by sketching the rim and base of the glass. Then, outline the fruit or toppings that are visible on top of the smoothie. Take note of the angles and shapes of these elements, as they will add a realistic touch to your drawing.
Step 3: Shade the Glass
Next, focus on shading the glass or cup of your smoothie. Use a 2B or 4B pencil to create the gradient effect that glass often has. Start from the top of the glass, where it is usually lighter, and gradually darken as you move towards the bottom. Use long, smooth strokes to achieve a realistic texture.
Step 4: Draw the Straw
If your smoothie is served with a straw, now is the time to add it to your drawing. Use a combination of straight and curved lines to depict the straw's shape realistically. Pay attention to any bends or folds in the straw and draw them accordingly.
Step 5: Render the Fruit and Toppings
Now, let's focus on the delicious fruit and toppings that adorn the smoothie. Take your time to carefully observe the reference image and recreate the shapes and textures of the ingredients. Use a combination of light and dark shading to give them dimension and make them look more realistic.
Step 6: Blend and Smooth
To create a smooth and polished look in your drawing, use a blending stump, tortillion, or a cotton swab to blend and smooth out any visible pencil strokes. This will help create a seamless transition between different shades and textures in your smoothie drawing.
Step 7: Add Color (Optional)
If you want to take your smoothie drawing to the next level, consider adding color using colored pencils. Choose colors that match the fruits and toppings in your smoothie. Use light layers at first and gradually build up the intensity as needed. Blend the colors smoothly using a blending tool or by layering different shades.
Tip: To effectively capture the vibrant layers of a smoothie, start with a light pencil sketch to outline the glass shape and the smoothie's contents, ensuring you emphasize the curvature of the glass for a realistic look. Choose a variety of colored pencils or markers that reflect the smoothie's ingredients—think rich greens for spinach, bright reds for berries, and creamy whites for yogurt or ice. Layer your colors by applying lighter tones first, then gradually build up darker shades to create depth and dimension; this mimics the way light interacts with the smoothie. To achieve a frothy texture on top, use a white gel pen or paint for highlights, giving your drawing that inviting, fresh look. Remember, the key is to enjoy the process—experiment with color combinations and don't be afraid to let your creativity flow!
Conclusion
Congratulations! You have successfully learned how to draw a delicious and realistic smoothie. By following these step-by-step instructions and using the right materials, you can create stunning smoothie artwork that will make anyone's mouth water. So, grab your drawing supplies and start sketching your favorite fruity concoctions. Happy drawing!
Fun Facts About Smoothie
- The word "smoothie" was first popularized in the 1930s, but the drink became mainstream in the 1960s with the rise of health food stores.
- Smoothies can be a great source of fiber, vitamins, and antioxidants when made with whole fruits and vegetables.
- Green smoothies, made with leafy greens like spinach or kale, are popular for their nutrient density and vibrant color.
- The addition of yogurt or kefir to smoothies provides probiotics, which support gut health.
- Some smoothie bowls are so thick they're eaten with a spoon and topped with granola, seeds, and fruit.
- Acai berry smoothies, originating from Brazil, have become a global trend for their unique flavor and antioxidant content.
- Blending fruit breaks down fiber, which can make smoothies easier to digest but may also cause a quicker spike in blood sugar.
- Some athletes use smoothies as a convenient way to refuel after workouts, combining protein, carbs, and electrolytes.
Suggestions for Scenes and Settings for Smoothie Drawings
- A vibrant smoothie bar counter with multiple colorful smoothies lined up, surrounded by fresh fruits and leafy greens.
- A picnic blanket in a sunny park, featuring a tall glass of smoothie with playful garnishes and a scattering of berries around it.
- A whimsical breakfast scene with a smoothie bowl topped with intricate fruit arrangements, granola, and edible flowers.
- A cozy kitchen countertop with a blender, spilled ingredients, and a freshly poured smoothie in a mason jar.
- An overhead flat-lay composition showing hands reaching for different smoothies, each with unique toppings and straws.
- A tropical beach setting with a coconut smoothie adorned with a tiny paper umbrella, palm leaves, and ocean waves in the background.
- A smoothie being made in action, with fruit slices, ice, and a splash of liquid suspended mid-air above the glass.
- A neon-lit café window at night, with a glowing smoothie glass and reflections of city lights on the glass surface.
- A "build your own smoothie" station, featuring bowls of vibrant fruits, nut butters, seeds, and colorful smoothie jars on display.
- A close-up of a dessert-style smoothie topped with whipped cream, chocolate drizzle, and a sprinkle of nuts, set on a rustic wooden table.