How to Draw a Beach Scene
Learn how to draw a beach scene with this step-by-step tutorial. Create a relaxing and beautiful artwork capturing the essence of the beach.
Materials You'll Need
- Pencil
- Paper
- Eraser
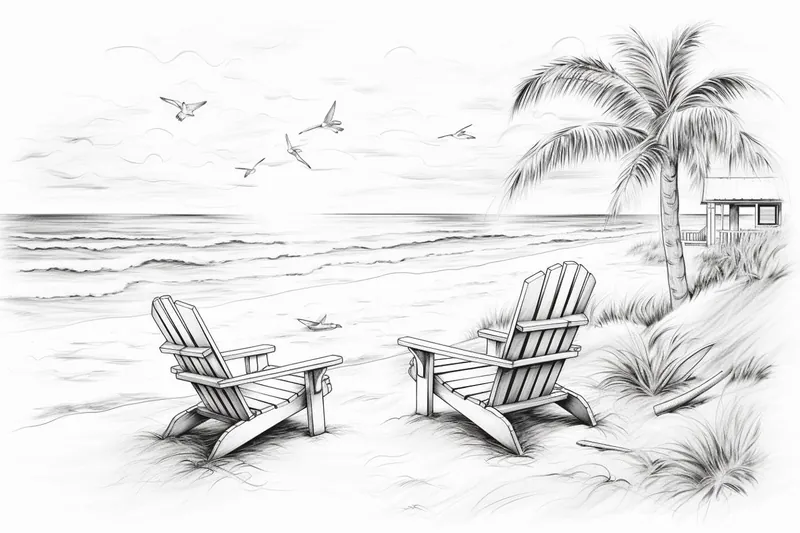
![]() If you've ever dreamed of capturing the essence of a tranquil beach day through art, you're in for a treat! Learning how to draw a beach scene can transport you to a world of sun, sand, and surf—right from the comfort of your own home. Whether it's the gentle waves lapping at the shore or the warm glow of the sun dipping below the horizon, a beach scene can evoke feelings of peace and relaxation.
If you've ever dreamed of capturing the essence of a tranquil beach day through art, you're in for a treat! Learning how to draw a beach scene can transport you to a world of sun, sand, and surf—right from the comfort of your own home. Whether it's the gentle waves lapping at the shore or the warm glow of the sun dipping below the horizon, a beach scene can evoke feelings of peace and relaxation.
In this step-by-step guide, I will be your companion on this artistic journey, providing you with clear instructions to bring your beach scene to life. As we go through each element—from the horizon line to the inviting shoreline—don't hesitate to let your creativity flow and personalize your artwork.
Before we dive into the drawing process, gather your materials and set up your workspace. A cozy and inspiring environment can enhance your experience and help your creativity shine. So, grab your pencils, paper, and let's embark on this beach-inspired drawing adventure together!
Materials Required
Before we begin, make sure you have the following materials handy:
- Drawing paper: Use a sketchbook or any type of paper that works best for your chosen medium.
- Pencils: A range of graphite pencils, including HB, 2B, and 4B, will be useful for shading and creating different tones.
- Eraser: A kneadable eraser or a soft rubber eraser will help you correct mistakes and add highlights.
- Drawing pens: If you prefer using pens for your artwork, have a selection of different sizes available for outlining and adding details.
- Colored pencils or watercolor paints: Optional, but if you want to add color to your beach scene, have colored pencils or watercolor paints ready.
Step 1: Sketch the Horizon Line
Start by lightly drawing a horizontal line across your paper, about one-third of the way up from the bottom. This line represents the horizon where the sky meets the ocean.
Step 2: Add the Sky
Now, imagine a beautiful sunny day at the beach and use your pencils to sketch in the sky. Use a light blue shade and gently shade in the area above the horizon line. Gradually darken the color as you move upwards to create a smooth transition from light to dark.
Step 3: Draw the Sun
At the point where the sky meets the horizon, draw a small circle to represent the sun. You can make it larger or add rays if you'd like a more dramatic effect. Use a combination of yellow and orange colors to fill in the sun, blending them together for a soft glow.
Step 4: Outline and Shade the Beach
Below the horizon line, draw a slightly curved line that represents the shoreline. Then, use a light brown or tan color to shade in the sandy beach area. Add texture by lightly sketching in small lines or dots. Darken the color as you move closer to the shoreline to create depth and dimension.
Step 5: Add the Ocean
Next, draw gentle waves rolling onto the beach. Starting from the shoreline, use curved lines to create the waves, making them larger as they reach the foreground. Use various shades of blue to depict the depths of the ocean and add some lines to represent the movement of the water.
Step 6: Sketch a Palm Tree
To add a tropical touch to your beach scene, draw a palm tree on one side. Start by sketching a rough outline of the trunk using light pencil strokes. Then, add the palm fronds by drawing a series of curved lines extending from the top of the trunk. Add details such as coconuts or foliage if desired.
Step 7: Add Beach Accessories
Tip: As you work through each step of your beach scene drawing, consider taking short breaks to step back and assess your progress; this can provide you with a fresh perspective on your artwork and help you identify areas that might need more detail or adjustment. Additionally, don't hesitate to experiment with different shading techniques or colors to enhance the vibrancy of your scene!
[To make your beach scene more lively, consider adding some beach accessories. Draw a beach umbrella or a lounge chair](https://yonderoo.com/how-to-draw-a-beach-chair/) with an umbrella on the sand. Use simple shapes and lines to represent these objects, and remember to add shading and detail to make them stand out.
Step 8: Finalize the Details
Now that you have the main elements of your beach scene in place, it's time to add the finishing touches. Add details like seashells on the sand, birds in the sky, or sailboats on the horizon. You can also use colored pencils or watercolor paints to add vibrant colors to your artwork.
Conclusion
Congratulations! You've successfully learned how to draw a stunning beach scene. By following these step-by-step instructions and using your creativity, you can create a beautiful piece of art that captures the tranquility and beauty of the beach. Remember to have fun with the process and experiment with different techniques to make your artwork unique.
So grab your drawing materials and start creating your very own beach scene masterpiece today!