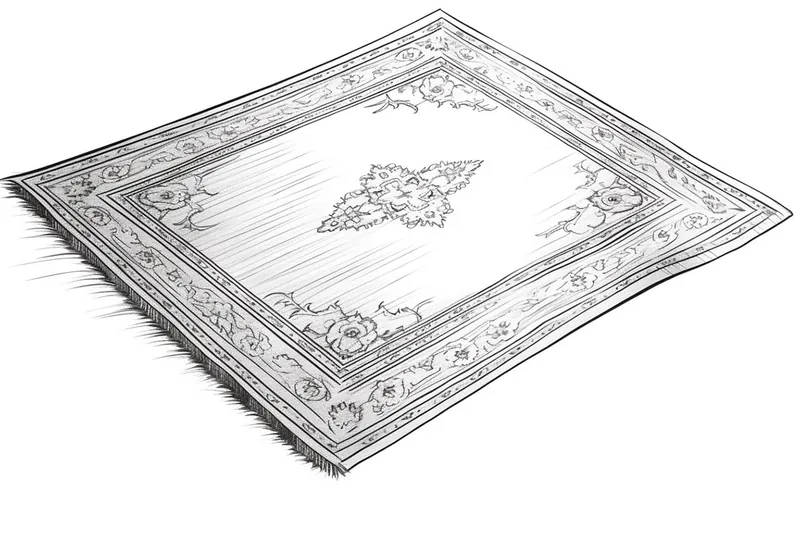
How to Draw a Rug
Learn how to draw a rug step by step with this helpful guide. Find out the materials you'll need and discover tips for adding patterns and textures.
Materials You'll Need
- Pencil
- Paper
- Eraser
Rugs have adorned homes and spaces for centuries, serving both as functional pieces and as works of art that showcase intricate designs, vibrant colors, and cultural stories. When you set out to learn how to draw a rug, you're not only capturing a household object, but also exploring a subject rich with patterns, textures, and historical significance. Rugs can range from simple woven mats to elaborate Persian or oriental masterpieces, making them a fascinating subject for artists who love working with detail and repetition.
Many artists are drawn to rugs because they offer a unique opportunity to practice essential drawing skills such as symmetry, perspective, and rendering texture. Whether you are a beginner looking to experiment with basic geometric shapes or a more experienced artist eager to refine your pattern-making abilities, drawing a rug can help strengthen your observation and design skills. Learning how to draw a rug will encourage you to pay attention to the balance of shapes, the flow of lines, and the subtleties of shading that bring a flat object to life. Plus, rug drawings can make wonderful additions to home decor illustrations or serve as a foundation for creating your own textile designs.
Don't worry if you've never tackled a subject like this before—this tutorial will break down the process into manageable steps suitable for artists of all levels. By the end, you'll be able to create a beautiful and detailed rug illustration you can be proud of, and you might even find yourself inspired to invent your own patterns. Grab your drawing tools, bring your creativity, and let's embark on this artistic journey together!
Materials Required
Before we dive into the drawing process, let's gather the materials you'll need:
- Sketchpad or drawing paper: Choose a size that suits your preference.
- Pencil: Opt for a mechanical pencil or a set of drawing pencils with different lead grades.
- Eraser: Have a soft eraser handy for easy corrections.
- Ruler: A straightedge ruler will help you maintain clean and precise lines.
- Colored pencils or markers: If you'd like to add color to your rug drawing, gather your favorite colored pencils or markers.
Now that we have our materials ready, let's proceed with the step-by-step process of drawing a rug.
Step 1: Sketch the Basic Shape
Begin by lightly sketching the basic shape of your rug using a pencil. This can be a rectangle, oval, or any other shape you prefer. Use your ruler to ensure the edges are straight and the proportions are balanced. Don't worry about adding details at this stage; focus on getting the shape right.
Step 2: Add Intricate Patterns
Once you have the basic shape, it's time to add intricate patterns to your rug. This is where you can let your creativity shine. You can draw geometric shapes, floral patterns, or even create your own unique designs. Use your ruler for straight lines and experiment with different shapes and textures.
Step 3: Refine the Details
Now that you have the main patterns in place, it's time to refine the details. Use a sharper pencil or a thinner lead grade to add smaller intricate details to your rug. Pay attention to the folds and creases in the fabric, and add shading to create depth and realism.
Step 4: Erase Guide Lines
Once you're satisfied with the details, use your eraser to gently remove any guide lines or unwanted pencil marks. Take your time and be careful not to erase any important details you've added.
Step 5: Add Color (Optional)
If you'd like to add color to your rug drawing, now is the time to do so. Use your colored pencils or markers to carefully fill in the patterns and design elements of your rug. Consider using complementary colors or experimenting with different color schemes to make your rug stand out.
Step 6: Final Touches
To add the finishing touches to your rug drawing, step back and assess the overall composition. Look for any areas that may need additional shading or refining. Make any necessary adjustments to ensure your rug looks balanced and visually appealing.
Tip: To effectively capture the intricate designs of a rug, start by breaking down the patterns into simpler geometric shapes. Use a light pencil to sketch the basic outlines of these shapes, allowing yourself to adjust as needed without committing to dark lines too early. Consider employing a ruler for symmetry, especially in designs that feature repetitive motifs, and use different grades of pencils to differentiate between the sketch and final details. To render texture, practice cross-hatching or stippling techniques, layering your pencil strokes to create depth and dimension. Finally, pay close attention to the light source in your drawing; shading along the edges of your shapes can enhance the three-dimensional quality of your rug, making it visually pop off the page.
Conclusion
Drawing a rug can be a delightful and creative endeavor. Through this step-by-step guide, you've learned how to sketch the basic shape, add intricate patterns, refine the details, erase guide lines, add color (if desired), and apply the final touches. By following these steps and using your imagination, you can create a stunning rug drawing that showcases your artistic abilities.
Remember, practice makes perfect, so don't be discouraged if your first attempt doesn't turn out exactly as you envisioned. The more you draw, the more you'll improve and develop your own unique style. So grab your sketchpad and start drawing a rug today!
Fun Facts About Rug
- The oldest known rug, the Pazyryk Carpet, dates back to the 5th century BCE and was discovered in Siberia.
- Persian rugs are renowned worldwide for their intricate designs and craftsmanship.
- Traditional Oriental rugs are often hand-knotted, a process that can take months or even years.
- The famous "magic carpet" from folklore has roots in Middle Eastern and Asian legends.
- Rugs can be made from a variety of materials, including wool, silk, cotton, and synthetic fibers.
- Some antique rugs are considered valuable works of art and have sold for millions at auction.
- The patterns and motifs in rugs often tell stories or symbolize cultural beliefs, as explored by the Victoria and Albert Museum.
- Rug weaving is an important cultural tradition in countries like Iran, Turkey, and India.
- Modern innovations in rug design blend traditional techniques with minimalist or abstract styles.
Suggestions for Scenes and Settings for Rug Drawings
- [Draw a grand Persian rug as the centerpiece of a cozy living room, complete with couches, bookshelves, and a fireplace](https://yonderoo.com/how-to-draw-a-fireplace/).
- Illustrate a colorful woven mat on a sandy beach, with seashells and waves lapping at its edges.
- Create a detailed close-up of a rug's intricate border, focusing on the repeating patterns and textures.
- Sketch a playful children's rug in a nursery, featuring whimsical animal or alphabet motifs and scattered toys.
- Draw a traditional rug being woven on a loom, with the artist's hands at work and skeins of colored thread nearby.
- Design a magical flying carpet soaring over a cityscape or desert, with wind-blown tassels adding movement.
- Depict a picnic scene outdoors, with a patterned blanket-style rug spread under a tree and snacks arranged on top.
- Illustrate an entryway or hallway with a long runner rug, capturing the play of light and shadow across its surface.
- Create a scene of a cat or dog curled up on a soft, fluffy rug in a sunlit corner of a home, perhaps resting on a pillow.
- Imagine a rug as a tapestry hanging on a wall, surrounded by other decorative objects or plants.